
A full tray from a Samsung Bespoke refrigerator typically takes between 4 and 6 hours to freeze, though the exact time required for the samsung bespoke to make ice depends on your current freezer temperature settings. If you set your freezer to -2°F (-19°C), the process stays at the faster end of that range.
Several factors change this timeline. The water pressure in your home, the ambient temperature of your kitchen, and how often you open the refrigerator door all impact the final speed.
Why you should care about Samsung Bespoke ice production
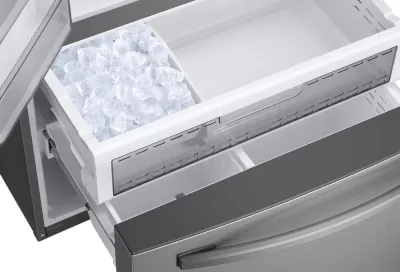
This guide serves owners of Samsung Bespoke refrigerators who have questions about their built-in ice makers. Whether you have the AutoFill Water Pitcher model or the dual-ice maker version, you need to know if your machine is working within its normal performance range. You likely have a new installation or have noticed a recent change in how quickly your bin fills up.
This information is for users who want to troubleshoot slow production without calling a repair service immediately. If you have a standard residential setup, these timelines will help you set expectations for your daily ice needs. If you’re using a non-standard water filter or have your unit in a garage where temperatures fluctuate significantly, you should expect different results. This article assumes you’re operating the unit within a climate-controlled home environment. If you’re looking for professional repair instructions for damaged internal parts or complex electrical failures, please consult the official service manual or contact a certified technician.
Factors Influencing Ice Production
The most critical factor is your freezer’s temperature setting. If you keep the freezer at the recommended 0°F (-18°C), the ice maker operates at its standard speed. If you raise the temperature to save energy, the ice will take longer to solidify. You can check your current temperature on the front control panel or the internal display.
Water pressure is the second factor. Most Samsung units require a pressure between 20 psi and 125 psi to function correctly. If your water pressure is too low, the fill valve will take longer to cycle, which slows down the entire process. You can verify your pressure with a simple gauge at the connection point.
How often you open the door also matters. Every time you open the freezer, cold air escapes and warm air enters. This forces the compressor to work harder to bring the temperature back down. If you open the door frequently during a hot day, production will drop significantly.
Finally, the state of your water filter affects the flow rate. A clogged or old filter restricts the water supply to the ice maker. Samsung recommends replacing the filter based on usage, so consult your owner’s manual to maintain optimal flow and ice quality.
Steps to Maximize Ice Output
- Check your freezer temperature on the display panel; ensure it’s set to at least 0°F (-18°C) for consistent freezing.
- Verify the water line connection behind the unit to ensure the valve is fully open and there are no kinks in the tubing.
- Test your water pressure; if it’s below 20 psi, contact a plumber to install a booster pump or check your home’s main supply.
- Replace your water filter if it has been in use for more than 6 months, as a blockage will slow down the fill cycle.
- Minimize how often you open the freezer door during high-demand periods to keep the internal temperature stable.
- Check that the ice bin is seated correctly; if the sensor is blocked or the bin is misaligned, the unit will stop making ice.
- Activate the “Power Freeze” mode on your control panel if you need a large amount of ice for a special event.
The judgement call that separates a job done properly from one that looks finished is the sound of the machine. A healthy unit makes a quiet, rhythmic sound during the harvest cycle. If you hear loud grinding or clicking, stop immediately and check for jammed cubes or a misaligned auger.
Performance Variations by Situation
| Situation | What to do | What it takes | What to watch for |
|---|---|---|---|
| First installation | Allow 24 hours | 1 day | Discard first 3 bins |
| Low ice supply | Use Power Freeze | 3 hours | Check filter health |
| Hot weather | Keep doors closed | More effort | Avoid frequent openings |
| Low water pressure | Clear line kinks | 30 minutes | Check valve status |
| Old water filter | Replace filter | 5 minutes | Slow water flow |
New units often fail to produce ice immediately because the internal thermostat requires a full cycle to calibrate. If you rush this phase, you risk clogging the ejector mechanism with slush. Always discard the first three bins of ice; these batches contain manufacturing residue and plastic shavings from the supply line.
If the ambient temperature exceeds 90°F, limit door openings to under five seconds. Frequent access triggers a defrost cycle that halts ice production for up to two hours. If the ice remains soft, verify that the condenser coils are free of dust buildup.
Water pressure issues usually stem from a crimped supply line behind the unit. If the flow rate drops below 0.5 gallons per minute, the ice maker will produce hollow, brittle cubes that shatter in the bin. If you hear a humming noise but see no water, the inlet valve is likely stuck. In this case, shut off the main supply and inspect the valve for mineral deposits before calling a technician.
Finally, ignore the “replace filter” light if you notice a sudden drop in flow before the scheduled time. High sediment levels in your local water supply can choke a filter quickly. Replacing it early prevents internal pump strain, which is inexpensive compared to the cost of a major repair if ignored.
Signs of Proper Performance
Monitoring the Harvest Cycle
Experienced owners know that the harvest cycle is automatic and requires no manual input. You should see the ice maker dump a fresh load of cubes into the bin periodically. If you see the bin is empty and the ice maker remains empty for an extended period, the issue is likely the water supply line. Beginners often mistake the sound of the water filling the mold for a malfunction, but this is a standard part of the process.
Managing the Bin Capacity
The ice maker stops once the bin is full, using a metal feeler arm or an infrared sensor to detect the level. If you remove the bin for cleaning, ensure you slide it back until it clicks into place. If the bin isn’t fully inserted, the sensor will think the bin is full and prevent the machine from making more ice.
Troubleshooting Common Issues
| What you notice | What it usually means | What to do first | How to stop it happening |
|---|---|---|---|
| No ice produced | Water line blocked | Check shut-off valve | Replace water filter |
| Small, thin cubes | Low water pressure | Inspect supply line | Check house pressure |
| Ice is clumped | Door left open | Break up cubes | Keep door sealed |
| Loud clicking | Jammed cubes | Clear the tray | Don’t overfill |
| Slow production | Warm freezer temp | Lower the setting | Limit door openings |
If your ice maker stops entirely, check the water line behind the unit for kinks. A bend of more than 90 degrees often restricts flow. If the line is clear, verify the saddle valve is fully open. Most homeowners make the mistake of only partially opening these valves, which allows sediment to clog the narrow aperture over time.
When cubes emerge thin or hollow, your home’s water pressure is likely below the required 20 psi. You can test this by filling a gallon jug from your kitchen sink; if it takes longer than 45 seconds, your supply pressure is too low for the ice maker to function correctly.
Clumped ice usually signals a failing door gasket. If you see frost buildup near the seal, the door isn’t closing airtight. Replace the gasket immediately, as a leaking seal forces the compressor to run more frequently, increasing your energy consumption.
If you hear a persistent clicking sound, the ejector arm is likely blocked by a misaligned cube. Clear the tray manually, then verify the bin is seated flush against the ice maker housing. If the bin sits crooked, the sensor will fail to trigger the next harvest cycle, effectively halting production until the jam is cleared.
Rules for Safe Operation
Samsung specifies that their refrigerators are designed for indoor use within a temperature range of 50°F to 110°F. Operating the unit outside of this range, such as in an unheated garage, will cause the ice maker to fail. You can find the specific operating temperature requirements for your model in the user manual provided by Samsung.
Always use a water filter approved by the manufacturer. Using generic or unverified filters can damage the internal valve system, which is a costly repair. If the water flow slows to a trickle, replace the filter immediately rather than forcing the system to compensate.
If you suspect an electrical fault, such as a burning smell or sparks near the control panel, unplug the unit and contact a professional. Never attempt to bypass the ice maker’s safety sensors, as this can lead to flooding or damage to the motor.
The decision rule is simple: if the unit makes a clicking sound but produces no ice, check the water line pressure before assuming the motor is dead. Many users mistake a frozen water line for a mechanical failure. If the line is clear, only then should you call for service. Ignoring these warnings often leads to a complete compressor failure, which typically costs more to fix than the remaining value of the appliance.
Understanding the Costs
The cost of running your ice maker is primarily tied to your home’s electricity rate and the water filter replacement schedule. Replacing the filter is inexpensive relative to the alternative, depending on the specific model. This is an unavoidable cost to ensure your ice is clean and the machine runs at peak efficiency.
Neglecting this schedule creates a hidden cost: scale buildup. Hard water deposits can force the internal pump to work harder, shortening its lifespan. If your local water hardness is high, you should proactively replace the filter based on usage as directed by your owner’s manual to prevent premature motor failure.
The energy cost is harder to isolate because the freezer compressor handles both the ice maker and the food storage. However, using the “Power Freeze” setting for long periods will increase your energy consumption. If you notice your energy bills rising, check if the “Power Freeze” mode has been left on accidentally.
Comparing your current energy usage to your utility provider’s historical data for your home is the best way to see the impact of your appliance settings. If your bill jumps by more than 10% after installing the unit, check the door seal first. A faulty gasket forces the compressor to run constantly to compensate for air leaks. If the seal is tight but the unit remains warm, the condenser coils are likely clogged with dust. Cleaning these coils as needed, per your owner’s manual, can improve the overall energy efficiency of your refrigerator.
Maintenance and Long-Term Care
To keep your ice maker running, inspect the ice bin periodically. If you notice frost building up on the walls of the freezer, it means the door seal is likely leaking. You can check the seal by closing the door on a piece of paper; if the paper pulls out easily, the seal is loose and needs to be cleaned or replaced based on the guidance in your owner’s manual.
If you’re going on vacation, turn off the ice maker using the control panel. This prevents the machine from trying to cycle when you aren’t there to use the ice. When you return, throw away the first batch of ice that the machine makes, as it may have absorbed odors while the unit was idle. If you ever need to manually reset the unit, look for the small “Test” or “Reset” button located on the side or bottom of the ice maker assembly. Pressing this for 3 seconds will force the machine to start a harvest cycle.
When to Seek Professional Help
This guide is for general troubleshooting. If you find that the ice maker’s motor is making a loud buzzing sound but no ice is being produced, there’s likely an internal mechanical failure.
Similarly, if there’s visible water leaking from the bottom of the refrigerator, you should stop using the unit and turn off the water supply valve immediately. These situations indicate a broken water inlet valve or a cracked line, which requires a professional technician to fix.
Don’t attempt to open the sealed motor assembly. Doing so will void your warranty and could cause permanent damage to the refrigerator’s cooling system.
You should also call for help if you notice a persistent frost buildup on the back wall of the freezer. This usually points to a failing defrost heater or a faulty control board. If you see frost, check the door seal first. If the seal is tight but the ice remains, the issue is electrical.
Use this decision rule: if the repair involves electrical wiring or pressurized water lines, hire a pro. If the issue is simply a clogged filter or a misaligned ice bin, you can safely handle the fix yourself. Attempting complex electrical repairs often leads to blown fuses or short circuits that cost significantly more to repair than the initial service call.
Frequently Asked Questions
How long does it take for the ice bin to fill up?
A full bin typically takes 24 to 48 hours to accumulate after a complete emptying, depending on how often you dispense ice. The speed is determined by your freezer’s set temperature, with 0°F (-18°C) being the standard setting for optimal production.
Can I speed up the ice making process?
Yes, you can speed up production by selecting the “Power Freeze” option on your refrigerator’s control panel. This setting forces the compressor to run continuously for several hours, which helps the ice maker reach its maximum capacity more quickly than during standard operation.
Why is my ice maker making small or hollow cubes?
Small or hollow cubes usually happen because of low water pressure or a clogged water filter. Check that your water line isn’t pinched and ensure your filter isn’t older than 6 months, as these are the most common causes for restricted water flow.
Is it safe to leave the ice maker on all the time?
Yes, it’s safe to keep your ice maker running continuously as long as the freezer door remains properly sealed. The unit is designed to detect when the bin is full and will stop production automatically, preventing any overflow or mechanical strain.
What happens if I move the refrigerator?
Moving the refrigerator can cause the water line to kink or disconnect, which will stop ice production. After moving the unit, always verify that the water supply line is securely connected and that there are no leaks before you turn the ice maker back on.
Does the ice maker need to be cleaned?
You should wash the ice bin with mild soap and water once every few months to remove any old ice buildup. Ensure the bin is completely dry before you replace it, as moisture can lead to cubes sticking together or forming a large, solid block.
Conclusion
Start by checking your freezer’s temperature setting on the display to ensure it’s at 0°F (-18°C). Once you have confirmed the temperature, look for the “Power Freeze” button to boost production if your bin is empty. If you don’t see an increase in ice production within 24 hours, contact a professional refrigerator repair service to inspect the internal water inlet valve.

Hello, This is Annie Walker, a 38-year-old blogger, founder, and editor of Cookware Guider from NY, USA. I am a cookware fanatic and passionate cooker. I love to cook with different types of cooking appliances (example: all types of cookware, rice cookers, slow cookers, etc) almost every day in my kitchen. I love to share my experience with my readers in my blog. Also, I enjoy helping people to solve their problems through my website. You can follow me on Twitter & Pinterest. To know details about my blog please check the about us page.