
A basic butter icing needs 1 cup (2 sticks) of softened unsalted butter beaten with 4 cups of powdered sugar, 2 tablespoons of whole milk, and 1 teaspoon of pure vanilla extract. Making butter icing at home yields about 3 cups of spreadable frosting, which covers 24 standard cupcakes or fills and frosts a two-layer 8-inch cake.
Kitchen temperature and butter softness change your results. A warm room above 74°F creates a greasy mixture, while cold butter leaves hard lumps that block piping tips.
Choosing the Right Butter Icing Method
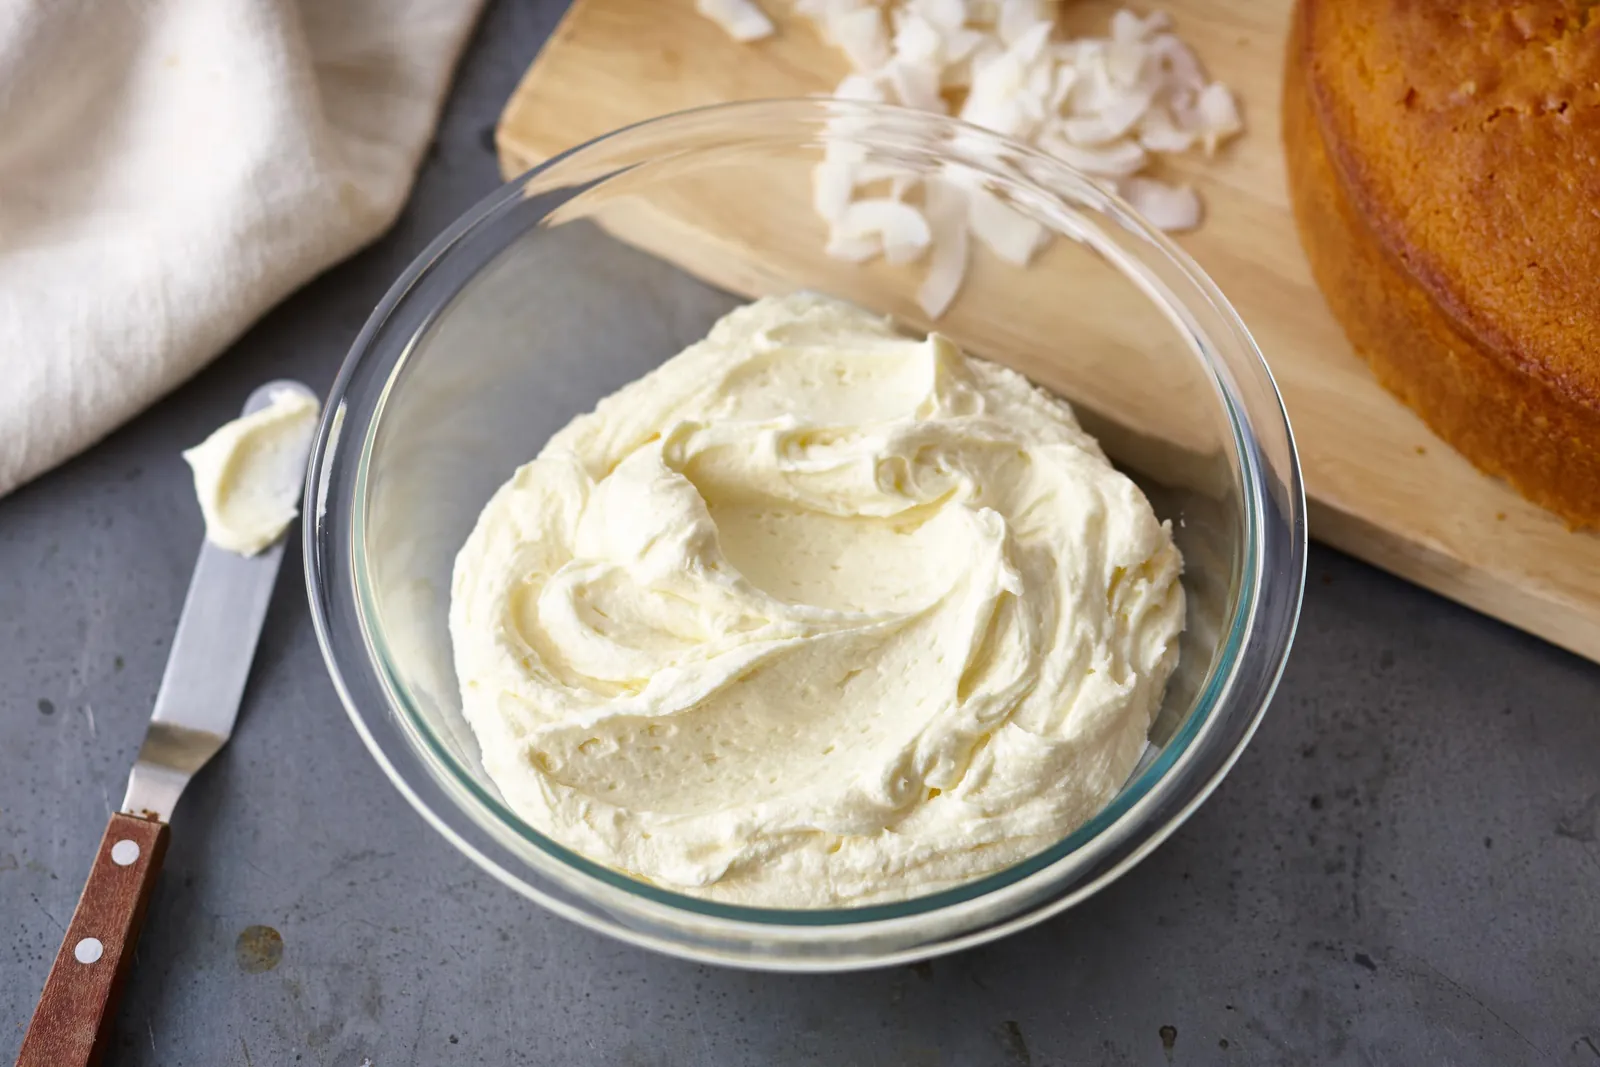
This guide serves home bakers who have a standard hand mixer or stand mixer and want a stable, classic American frosting. You already know basic baking steps, but you need exact ratios and temperature targets so your icing spreads smoothly without sliding off the sponge.
This page isn’t for bakers who want a low-sugar finish or an advanced egg-white base. If you need a silky European style with minimal sweetness, you should make a Swiss meringue or Italian meringue buttercream instead. This guide assumes you want a fast, traditional crusting recipe using confectioners’ sugar and dairy fat.
A third group of readers wants sharp, wedding-style edges on tiered cakes. This recipe covers basic crumb coating and piping, but extreme outdoor summer events need vegetable shortening substitutions to avoid melting. Here, we stick to real dairy butter for superior flavor and clean mouthfeel.
To decide, check your kitchen temperature. If your room exceeds 74°F, the butter will lose its structure during the final whip. In this case, replace 20% of the butter with high-ratio shortening to maintain stability. If you ignore this, the icing will weep or slide off the cake sides within an hour of assembly.
Factors That Change Your Icing
Butter temperature controls the entire structure of your frosting. The sweet spot is 65°F to 68°F. If you push your finger into the block, it should leave an indent without sliding into greasy oil. Butter straight from the fridge won’t beat into a smooth base, leaving tiny yellow chunks. Butter that melted in a microwave separates, leaving a runny soup that never whips. Check your butter with an instant-read probe thermometer or press it lightly with your thumb.
Sugar particle size moves the texture from gritty to satin. Always buy powdered sugar labeled 10x, which means the manufacturer ground it fine enough to dissolve into the fat. Cheap store brands ground to 6x stay sandy on the tongue no matter how long you mix them.
The liquid ratio decides whether your frosting holds a sharp piping edge or spreads easily across soft cake layers. Adding just 1 extra teaspoon of milk can soften a batch past the point of piping upright rosettes. If X requires firm borders, use only 1 tablespoon of milk; if Y requires a smooth crumb coat, use 2 to 3 tablespoons.
Your choice of mixing paddle changes air incorporation. A stand mixer fitted with a paddle creates dense, bubble-free icing. A balloon whisk whips air pockets into the sugar, which looks fluffy in the bowl but tears open into rough holes when you drag an offset spatula across a cake.
Step-by-Step Icing Instructions
- Measure 1 cup (227 grams) of unsalted butter that sits between 65°F and 68°F, and cut it into 1-inch cubes. The butter should give slightly under light thumb pressure without showing shine.
- Place the butter into a large mixing bowl and beat it on medium speed for 3 minutes using a hand mixer or a stand mixer with a paddle. Stop when the butter turns pale ivory and spreads flat against the sides.
- Sift 4 cups (480 grams) of 10x powdered sugar through a fine-mesh wire sieve onto a sheet of parchment paper. Sifting removes hard, compressed balls of sugar that a mixer can’t break apart.
- Add half of the sifted powdered sugar (about 2 cups) to the whipped butter. Run the mixer on the lowest speed for 1 minute until the sugar disappears into the fat, preventing a dust cloud.
- Pour in 1 teaspoon of pure vanilla extract, 1/4 teaspoon of fine table salt, and 1 tablespoon of cold whole milk. Beat on low speed for 30 seconds until the liquid blends into the butter base.
- Add the remaining 2 cups of powdered sugar. Mix on low speed for 1 minute until all dry white pockets vanish into the paste.
- Pour in a second tablespoon of whole milk, then raise the mixer speed to medium. Beat for 2 minutes straight. The icing should look pale, smooth, and hold its shape on a lifted spoon.
- Scrape down the bowl edges with a silicone spatula. Fold the icing by hand for 1 full minute, pressing the mixture against the bottom to push out trapped air pockets.
The single judgement call sits in the scrape test: drag the back of a metal spoon through the bowl. If the wake shows jagged, torn edges, the icing lacks liquid; add milk in 1/2-teaspoon doses until the line stays clean and smooth.
Icing Adjustments for Different Jobs
The base recipe can be altered depending on your project, current room climate, and decorating goals:
| Situation | Recipe Adjustment | Mixer Time | Watch-Out Point |
|---|---|---|---|
| Crumb coating | Add 1 extra tablespoon milk | Beat 2 minutes medium | Too runny weakens structure |
| Piping flowers | Drop milk to 1 tablespoon total | Beat 3 minutes medium | Stiff mix tires hands |
| Hot summer room | Replace 1/2 cup butter with shortening | Beat 4 minutes medium | Shortening leaves waxy mouthfeel |
| Chocolate flavor | Add 1/2 cup unsweetened cocoa powder | Beat 2 minutes medium | Cocoa dries out mixture |
| Pure white color | Add tiny drop violet gel dye | Fold 1 minute low | Excess dye turns icing gray |
| Writing messages | Add 1 teaspoon light corn syrup | Stir 1 minute hand | Makes icing stretchier |
If you’re working in a kitchen above 75 degrees Fahrenheit, prioritize the shortening swap immediately. Butter melts at 90 degrees, meaning your structure will collapse under the weight of piped decorations if you rely solely on dairy fats.
When adding cocoa powder, you must compensate for its high starch content. If the mixture feels like damp sand, add one teaspoon of heavy cream at a time until it reaches a spreadable consistency. Don’t exceed two tablespoons of extra liquid, or the icing will lose its ability to hold sharp edges.
For professional piping, use the “bowl test” to verify your progress. If you pull a spatula through the icing and the peak remains upright without curling over, it’s ready for intricate work. If the peak flops, add more powdered sugar in quarter-cup increments until the texture stabilizes.
Beating Speed and Temperature Control
Managing Fat Consistency
Cold butter forms beads that refuse to absorb liquid, while warm butter loses its emulsion and weeps yellow oil. Work in an environment between 68°F and 72°F. If your kitchen sits at 78°F in summer, chill your mixing bowl for 10 minutes before starting. When butter melts past 82°F, the fat crystals collapse completely; putting melted butter in the fridge only yields a grainy, separated mess. Real success relies on starting with solid fat that yields to finger pressure without leaving oil behind on your skin.
Beating Air Out of the Mix
Air creates spongy cake layers, but it ruins flat icing. Beginners often run mixers on high speed for 5 minutes thinking it makes the frosting lighter. High speeds drive thousands of tiny air bubbles into the sugar matrix. When spread over a crumb coat, these bubbles pop, leaving an uneven, pitted surface that looks unpolished. Mix on medium speed to combine, then switch to a silicone spatula to smear the icing against the glass bowl for 60 seconds. This manual pressing forces excess air out, giving you a smooth, glossy finish.
Fixing Common Butter Icing Problems
When your icing texture fails, identify the physical sign to apply the correct repair:
| What you notice | What it usually means | What to do first | How to stop it happening again |
|---|---|---|---|
| Yellow, greasy pooling | Butter got too warm | Chill bowl 15 minutes | Check room temp before mixing |
| Hard white chunks | Butter was too cold | Microwave 1 tbsp mix, stir back | Soften butter on counter naturally |
| Pitted, torn surface | Trapped mixer air bubbles | Beat by hand with spatula | Keep mixer on low speed |
| Grainy mouthfeel | Undissolved sugar or low-grade grind | Let sit 20 minutes, rewhip | Buy only 10x powdered sugar |
| Frosting slides off cake | Sponge still warm from oven | Chill the cake completely | Wait until cake center is 70°F |
| Edges slump and blur | Too much liquid added | Add 1/4 cup powdered sugar | Measure milk with spoons, not pours |
Kitchen Safety and Food Rules
However, if your recipe introduces fresh fruit purees, cream cheese, or eggs, the rules change immediately.
For any frosting containing cream cheese or unpasteurized dairy substitutes, the Food and Drug Administration (FDA) Food Code mandates keeping the food at or below 41°F to prevent pathogen growth like Staphylococcus aureus. If you sell baked goods from home, check your state’s specific Cottage Food Laws; some states allow traditional butter icing at room temperature, while others ban all dairy glazes from unrefrigerated sales.
If you’re cooking for a person with severe dairy allergies, don’t guess with alternative fats. Commercial plant butters contain different water-to-fat percentages that cause breaking. Consult verified manufacturer ingredient labels for allergen warnings.
Ingredient Costs and Equipment Needs
Making this recipe costs roughly $4.50 to $6.00 for a 3-cup batch at current grocery store prices. Unsalted grade AA butter makes up about 65% of that cost, running between $3.50 and $4.50 per pound. High-grade pure vanilla extract accounts for another $0.80 per teaspoon; you can drop this cost by using artificial vanillin, but you trade away floral complexity for a simple, flat sugar flavor.
A box of store-brand powdered sugar is inexpensive for a 16-ounce bag, which provides just enough for this single batch. If you need to ice a large three-tier event cake, scale the recipe by four, which remains an affordable option compared to professional alternatives.
A standard hand mixer is an inexpensive tool that works well for this recipe. You don’t need an expensive stand mixer unless you produce large volumes every week. The one mandatory tool you can’t skip is an offset spatula, which is quite affordable and keeps your knuckles out of the icing while smoothing cake sides.
Storing and Refreshing Leftovers
Store freshly made butter icing in an airtight plastic container or a glass jar. You can leave it at a cool room temperature (below 70°F) for up to 48 hours. If you plan to use it later, place it in the refrigerator, where it will keep safely for up to 1 week. The surface will form a stiff crust if exposed to open air, so press a layer of plastic wrap directly onto the icing before snapping the lid on.
Freezing works well for long storage. Seal the frosting inside a freezer-safe zip bag, press out all air, and store flat for up to 3 months. When ready to use, thaw the bag in the refrigerator for 12 hours. Never thaw it in a microwave, which turns parts of the butter into yellow liquid oil and ruins the emulsion.
Chilled icing is too hard to spread. Let refrigerated icing sit on your kitchen counter for 1 to 2 hours until it reaches 65°F. Rewhip it with a hand mixer on low speed for 60 seconds to restore its spreadable texture before loading it into piping bags.
When Butter Icing Fails Your Project
American butter icing is the wrong choice for hot, outdoor events. If your cake must sit outside in conditions over 75°F, real butter melts rapidly. The entire exterior will slide off the cake base onto the table. In high-heat situations, use an all-vegetable shortening crusting buttercream or cover the cake with rolled fondant over a thin ganache layer.
Most bakers make the mistake of using high-water-content butter. This costs them structural integrity. If your kitchen temperature exceeds 72°F, switch to a high-ratio shortening. This ingredient contains emulsifiers that hold shape under pressure.
This method also fails if you want delicate, glass-like sugar work or extremely light, European-style textures. A basic butter and sugar mix carries a very sweet profile that overpowers light chiffon sponges or angel food cakes. For those light bases, make a French buttercream made with egg yolks or use a stabilized whipped cream instead.
If you need hard-drying decorations like small figurines or crisp flowers, choose royal icing. Royal icing dries bone-dry like candy, whereas butter icing stays soft inside and crushes under light pressure. Use the “press test” to decide: if the icing indents under a gentle thumb touch, it’s too soft for structural piping.
Frequently Asked Questions
Can you make butter icing with salted butter?
Yes, you can use salted butter without ruining the icing. Omit the extra 1/4 teaspoon of salt listed in the recipe. The icing will have a slightly sharper finish that cuts through the sugar, though different brands use varying amounts of salt, which makes controlling the final taste harder.
Why is my butter icing gritty?
Your icing is gritty because the sugar particles didn’t dissolve into the butter fat. This occurs when you use coarse powdered sugar or skip beating the butter long enough. Let the frosting sit covered at room temperature for 30 minutes so the sugar absorbs ambient liquid, then rewhip for 1 minute.
How long does butter icing take to set?
Butter icing develops a dry outer crust within 15 to 30 minutes at 68°F. The inner layer stays soft and creamy for days. You can touch the dry crust lightly without frosting sticking to your finger, which makes it simple to smooth with clean parchment paper.
Can you color butter icing with grocery store liquid food dye?
Yes, but liquid dye adds extra water that quickly thins the recipe. Use concentrated gel food colors instead. A single toothpick tip of gel gives bright color without changing the thickness of your icing or causing the fats to separate.
What happens if I use melted butter?
Melted butter destroys the recipe completely. Liquid butter can’t trap air or hold powdered sugar in suspension, resulting in a runny, greasy glaze instead of fluffy frosting. If melted, you must throw it out or use it as a simple pourable doughnut glaze.
Does butter icing need to be refrigerated?
Butter icing doesn’t need refrigeration for the first 48 hours if kept under 70°F. The high ratio of sugar acts as a preservative by binding free moisture. If your kitchen runs warm, store it chilled in an airtight container to keep it firm.
How much icing do I need for a 9-inch cake?
You need 4 cups of icing to fill and coat an 8-inch or 9-inch two-layer cake. This recipe makes 3 cups, so multiply all ingredient amounts by 1.33 to ensure you don’t run short while smoothing the final sides.
Starting Your First Batch
Check your butter with a finger press right now; if it yields easily without leaving greasy oil on your skin, you’re ready to start. Your icing should come together into a soft, pale spread that forms smooth peaks when you pull the beaters straight up.
If the mix separates into runny liquid and curds, the room or the fat is too hot. This mistake often happens when butter is microwaved rather than softened at room temperature. It costs you the emulsion, leaving a grainy texture that no amount of extra beating can fix.
You must chill the bowl for 15 minutes before attempting to beat it again. If the mixture remains liquid after cooling, you’re in the “melted” category; discard it and start over with fresh, room-temperature ingredients. Always prioritize a cool kitchen environment to ensure consistent results.

Hello, This is Annie Walker, a 38-year-old blogger, founder, and editor of Cookware Guider from NY, USA. I am a cookware fanatic and passionate cooker. I love to cook with different types of cooking appliances (example: all types of cookware, rice cookers, slow cookers, etc) almost every day in my kitchen. I love to share my experience with my readers in my blog. Also, I enjoy helping people to solve their problems through my website. You can follow me on Twitter & Pinterest. To know details about my blog please check the about us page.