
You can maintain a clean countertop ice maker by running a mixture of equal parts white vinegar and water through the machine every 3 to 6 months. This process removes mineral deposits and prevents mold growth, which ensures your ice tastes fresh and the internal components remain in good working order.
The frequency of this maintenance varies depending on your local water hardness and how often you use the unit. If your water is high in minerals, you should perform this cleaning cycle monthly to prevent scale buildup.
Who needs to clean their ice maker
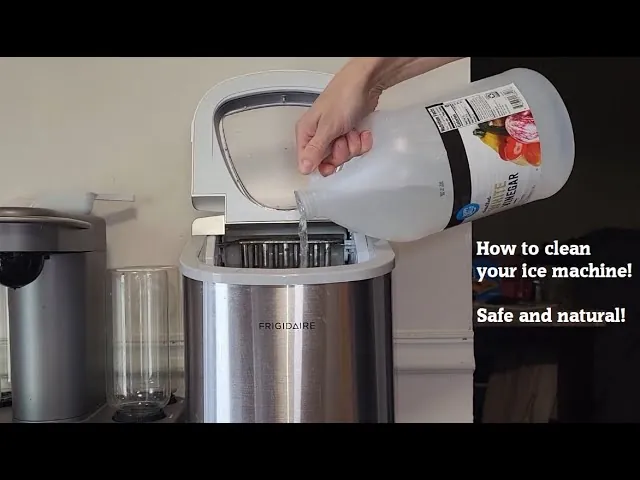
This guide is for owners of portable, self-contained ice makers who notice a bad taste in their ice or see white flakes in their water reservoir. These machines pull water from a reservoir and freeze it on metal prongs, which makes them prone to mineral buildup from hard water. If you’re using a built-in refrigerator ice maker or a commercial-grade unit, this guide isn’t for you, as those systems require different disassembly procedures and sanitization protocols.
The steps below assume you’re using a standard residential countertop model with a removable water tray. If your machine is more than 5 years old, you should check the manufacturer’s manual for specific instructions on how to handle the internal pump, as older models may have fragile seals that can be damaged by acidic cleaning solutions. We assume you have access to standard distilled white vinegar and clean tap water. If your machine shows error codes or stops making ice entirely, the following instructions can’t fix mechanical pump failures. In those cases, you should contact the manufacturer’s authorized service center to avoid voiding your warranty.
Factors affecting cleaning intervals
Several conditions determine how often you need to sanitize your machine to keep it running efficiently. The most significant factor is the mineral content of your tap water, often called water hardness. If your home uses a water softener, you can likely wait longer between cleanings. If you use hard well water, you must clean the unit based on usage and your owner’s manual to prevent permanent scale damage.
Another factor is the usage frequency of the appliance. A machine that runs 24 hours a day collects dust and airborne particles faster than one used only on weekends. If your machine sits in a high-traffic area like a kitchen with heavy cooking, it will accumulate grease on the air intake vents, which forces the internal cooling system to work harder.
Most people make the mistake of using bleach to sanitize their machine. This is a severe error because bleach is corrosive to the nickel plating on the freezing prongs. It can strip the finish, causing the metal to corrode and potentially leaching chemicals into your ice. Always stick to the mild acid of white vinegar or a manufacturer-approved descaling solution.
Finally, the ambient temperature of the room plays a role. Machines located in hot garages or near heat sources like ovens run longer cycles to compensate for the heat, which accelerates mineral deposit formation. You can check your specific model’s recommended maintenance interval in the “Care and Cleaning” section of your user manual.
Steps to sanitize your machine
- Turn off the power and unplug the unit from the electrical outlet to ensure safety.
- Remove all ice from the storage basket and drain the remaining water through the plug at the bottom of the unit.
- Mix 10 ounces of white vinegar with 10 ounces of warm water in a clean container.
- Pour this solution into the water reservoir until it reaches the “Fill” line.
- Plug the unit back in and select the “Clean” or “Self-Clean” mode if your model has one; if not, run a normal cycle without the ice basket in place for 30 minutes.
- Drain the vinegar solution completely and discard it.
- Fill the reservoir with 20 ounces of fresh, plain water and run a cycle again to rinse out any lingering vinegar taste.
- Repeat the rinse cycle two more times, or until you can no longer smell vinegar in the water.
- Wipe the interior of the reservoir and the ice prongs with a clean, damp microfiber cloth.
- Allow the machine to air dry for 1 hour with the lid open before replacing the basket.
The key judgment call is the rinse phase. If you don’t rinse the machine enough, your first few batches of ice will taste like vinegar. If you can smell even a faint trace of acid, perform one final cycle with plain water before putting the machine back into service.
Cleaning requirements by situation
| Situation | Solution to use | Time required | What to watch for |
|---|---|---|---|
| Monthly maintenance | Vinegar and water | 45 minutes | Mineral scale buildup |
| Bad water taste | Vinegar and water | 60 minutes | Mold in reservoir |
| Heavy hard water | Descaling liquid | 90 minutes | White crust on prongs |
| First time use | Mild dish soap | 20 minutes | Factory dust residue |
| After storage | Vinegar and water | 60 minutes | Musty odors |
Most users fail by rinsing with cold water, which fails to dissolve stubborn mineral deposits. Always use warm water to help dissolve mineral deposits more effectively. If you live in an area with hard water, perform a deep descale every three weeks instead of monthly. This prevents internal heating elements from burning out prematurely.
If your machine produces a metallic aftertaste, the reservoir likely harbors biofilm. You must scrub the interior walls with a soft brush before running the vinegar cycle. If the smell persists after a full hour of soaking, perform a second cycle using only distilled water to flush out residual vinegar.
Distinguish between routine maintenance and deep cleaning by checking the prongs. If you see white, chalky crusting, vinegar is insufficient. Switch to a commercial descaling liquid immediately.
Always check your manufacturer’s manual before using descaling chemicals. Some high-end units contain sensitive internal sensors that harsh acids can permanently damage. If your machine features a “clean” indicator light, follow its specific cycle duration precisely. Ignoring this prompt typically leads to internal pump failure within eighteen months.
Best practices for maintenance
Interior care and hygiene
Experienced users always prioritize the cleanliness of the water reservoir. Beginners often forget to wipe the sensors, which can lead to the machine failing to detect when the ice basket is full. Use a soft cloth to gently wipe the water level sensors every time you clean the unit. Never use abrasive scrubbers on the freezing fingers, as scratches on the metal surface make it harder for ice to release, which eventually puts unnecessary strain on the harvest motor.
Managing airflow and external dust
The cooling performance depends entirely on the air intake vents. Many people place the machine too close to walls or curtains, which traps heat and slows down the freezing process. Check your vents weekly for dust buildup. If you see a grey layer of lint, use a soft vacuum brush attachment to clear it away. Keeping the machine at least 6 inches away from any wall ensures the compressor doesn’t overheat, which is the most common cause of premature motor failure in these appliances.
Troubleshooting common issues
| What you notice | What it usually means | What to do first | How to stop it |
|---|---|---|---|
| Slow ice production | Airflow is blocked | Move unit away from walls | Clean intake vents monthly |
| White flakes in ice | Hard water scale | Run vinegar cycle | Use filtered water |
| Ice tastes bad | Old water | Drain and clean unit | Empty reservoir weekly |
| Machine won’t start | Sensor is dirty | Wipe water sensors | Clean reservoir monthly |
| Loud grinding noise | Low water level | Check water supply | Add water promptly |
If your machine produces ice slowly, check the clearance behind the unit. Most models require at least six inches of space to vent heat effectively. If the unit is flush against a wall, the internal compressor overheats and cycles down to protect itself.
White flakes appearing in your ice indicate mineral buildup from hard water. If you live in an area with high calcium content, perform a vinegar flush as recommended by your owner’s manual based on your specific usage. Neglecting this leads to permanent scale damage on the evaporator fingers, which eventually prevents ice from releasing properly.
Bad-tasting ice is almost always caused by stagnant water. If the reservoir sits for more than 48 hours, it absorbs ambient odors from your kitchen. Empty the tank completely if you plan to be away for more than two days.
When the machine fails to start, check the water sensors for a thin film of slime. This biofilm buildup tricks the sensor into thinking the reservoir is empty. Use a soft cloth and a mild soap solution to clear the surface.
Finally, loud grinding sounds almost always signal that the pump is cavitating. If the water level drops below the intake line, the pump draws air. Stop the machine immediately to prevent motor burnout. If the noise persists after refilling, check the intake screen for debris.
Rules for safe operation
According to the Consumer Product Safety Commission, you should always keep electrical appliances away from water splashes and ensure the cord isn’t pinched or damaged. Never submerge the entire ice maker in water, as this will destroy the electrical components and pose a shock hazard. If the power cord shows signs of fraying, don’t attempt to repair it yourself; contact a certified electrician or the manufacturer for a replacement part.
Additionally, always operate the unit on a flat, level surface. If the machine is tilted, the water won’t distribute evenly across the freezing prongs, which can cause the internal pump to run dry and burn out. If you notice the machine leaking, stop using it immediately and check the drain plug at the bottom to ensure it’s tightened properly.
Understanding your costs
The cost of cleaning your machine is very low, primarily involving the price of white vinegar and clean water. Using filtered or distilled water instead of tap water can reduce the frequency of deep cleaning sessions by 50%. While distilled water costs more per gallon than tap water, it significantly extends the lifespan of the pump and the nickel plating on the freezing prongs.
You should compare the cost of a jug of distilled water at your local grocery store against the cost of frequent descaling solutions to see which is more economical for your specific water quality. If your local tap water has a hardness level exceeding 120 parts per million, the mineral buildup will likely force a deep clean every two weeks. In those areas, distilled water is almost always the cheaper long-term choice.
Time is your biggest investment, as you must be present to monitor the rinse cycles. Many users make the mistake of leaving the machine unattended during the final flush. This oversight often leads to a lingering vinegar taste in the first batch of ice, forcing you to discard the entire bin.
If you notice a cloudy appearance in your ice cubes, it’s likely due to high mineral content or trapped air in the water. In this case, stop using tap water immediately and perform a double-rinse cycle. This simple decision rule saves you from the premature failure of the internal water pump, which typically costs more than three years’ worth of distilled water to replace.
Maintaining your ice maker long-term
Once you have cleaned the unit, keep the lid slightly open when the machine isn’t in use to allow moisture to evaporate. This prevents the growth of mildew and bacteria in the dark, damp environment of the reservoir.
If you don’t plan to use the machine for more than a week, drain it completely and wipe the interior dry. Neglecting this step often leads to mineral buildup from stagnant water, which can permanently clog the delicate internal pump. If the water in your area is “hard,” you should perform a full vinegar flush according to your owner’s manual and your frequency of use to prevent scale from hardening on the heating coils.
If you notice a persistent musty smell that doesn’t go away after cleaning, it may indicate mold growth in the internal tubing. In this case, stop using the unit and consult the manufacturer’s support page for professional cleaning recommendations.
You can distinguish between simple surface residue and deep-seated mold by checking the ice cubes themselves. If the cubes appear cloudy or have a bitter aftertaste, the issue is likely mineral scale. If the cubes have visible black or green flecks, you’re dealing with a biological infestation. If you see flecks, don’t attempt a DIY cleaning; contact the manufacturer for professional sanitization guidance. These cleaners can damage the internal seals, potentially causing a leak that ruins the machine’s electrical components.
When this is the wrong approach
If your ice maker produces no ice at all and the cooling fan isn’t running, the troubleshooting steps provided here won’t help you. These symptoms point to a failed compressor or a broken control board, which are non-serviceable parts for the average user.
Don’t attempt to open the outer casing of the machine to repair internal electronics. This is dangerous and will void your warranty. If you suspect an electrical fault, take the unit to a professional appliance repair shop or check if it’s still covered by the manufacturer’s warranty for a replacement.
You can distinguish a mechanical jam from an electrical failure by the sound of the machine. If you hear a faint clicking or humming sound but no ice drops, the issue is likely a mechanical blockage or a sensor error. In this case, our troubleshooting steps will work.
However, if the machine is completely silent when plugged in, the power supply or main board is likely dead. A common mistake is assuming a silent machine just needs a cleaning. This costs you time and risks further damage to the wiring.
If the unit is under two years old, check your receipt before paying for repairs. Many manufacturers offer a limited replacement policy for internal electrical components. If the unit is older, the cost of a professional board replacement often exceeds 60% of the machine’s original value. In that specific scenario, buying a new unit is the more economical decision.
Frequently asked questions
Can I use lemon juice instead of vinegar?
You shouldn’t use lemon juice, as it contains sugars that can leave a sticky residue inside the pump. Vinegar is the standard choice because it’s acidic enough to dissolve mineral scale without leaving behind organic material that encourages mold growth.
How long does it take to clean the unit?
A standard cleaning cycle takes about 45 to 60 minutes from start to finish. This includes the time needed for the vinegar solution to circulate and the time required for at least two fresh water rinse cycles to ensure all vinegar is removed.
Is it safe to leave water in the reservoir?
You shouldn’t leave water in the reservoir for more than 24 hours if the machine isn’t in use. Stagnant water quickly becomes a breeding ground for bacteria, which will affect the taste of your ice and require more frequent deep cleaning.
Why does my ice taste like plastic?
A plastic taste is common in new units and usually disappears after 3 to 5 full cycles. If the taste persists, perform a deep cleaning with a vinegar solution to remove any manufacturing residues left behind during the assembly process at the factory.
Does it matter if I use tap water?
It matters significantly, as the mineral content in your tap water determines how quickly scale builds up on the freezing fingers. Using filtered or distilled water is the best way to keep your machine clean and reduce the need for harsh chemical descaling.
What happens if I don’t clean it?
If you don’t clean your machine, mineral deposits will eventually coat the sensors and the freezing prongs. This leads to smaller ice cubes, longer freezing times, and eventually the machine will stop producing ice entirely when the sensors become too coated to function.
Conclusion
Start by unplugging your unit and draining all old water from the reservoir. Once you have run the vinegar cycle and completed the necessary rinses, your machine should produce clear, fresh-tasting ice again. If you notice the machine making a loud rattling sound or it fails to produce ice after the cleaning, stop immediately and contact the manufacturer’s support line for professional assistance.
Related guides
- 6 Best Soft Ice Cream Maker Picks for Your Kitchen
- 10 Best Pebble Ice Maker Models for Soft Chewable Ice
- 10 Best Under Counter Ice Maker Picks for Your Kitchen

Hello, This is Annie Walker, a 38-year-old blogger, founder, and editor of Cookware Guider from NY, USA. I am a cookware fanatic and passionate cooker. I love to cook with different types of cooking appliances (example: all types of cookware, rice cookers, slow cookers, etc) almost every day in my kitchen. I love to share my experience with my readers in my blog. Also, I enjoy helping people to solve their problems through my website. You can follow me on Twitter & Pinterest. To know details about my blog please check the about us page.