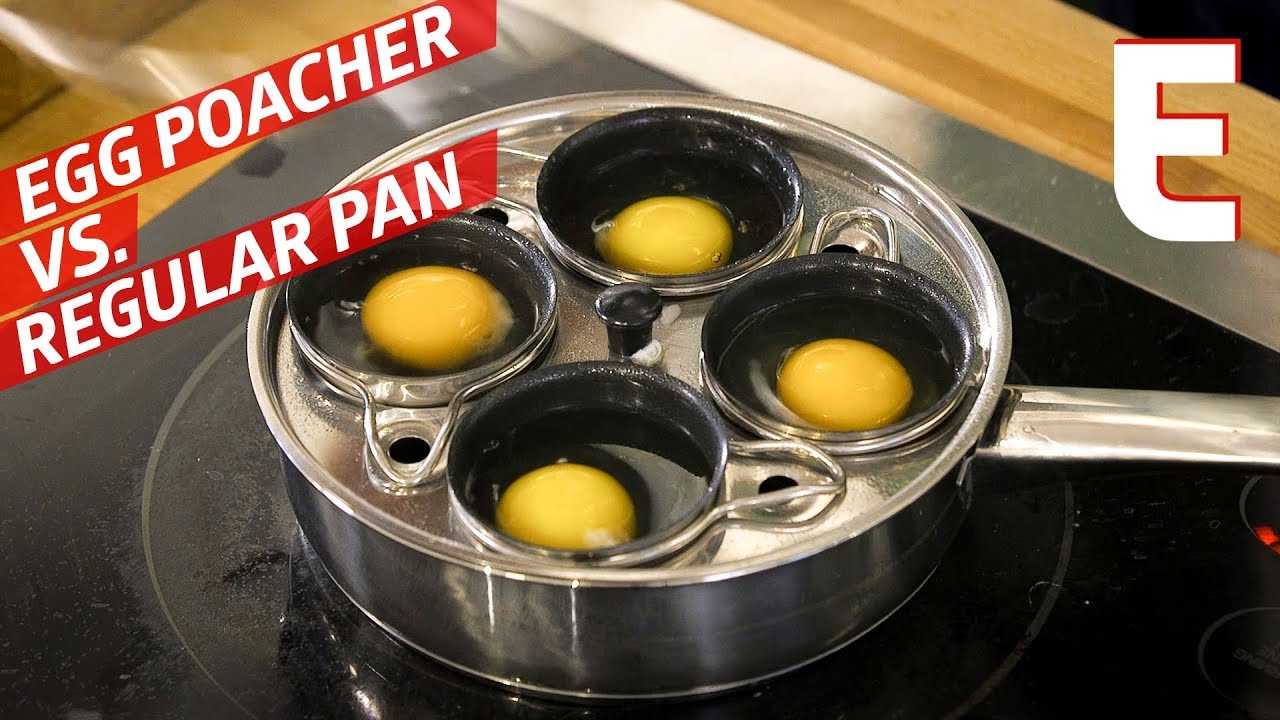
If you’ve ever wanted to enjoy perfectly poached eggs without the hassle, an egg poacher saucepan is your best friend. Using one might seem tricky at first, but once you know the simple steps, you’ll be making restaurant-quality eggs at home every time.
In this guide, you’ll discover how to use an egg poacher saucepan easily and quickly. Keep reading, and you’ll unlock the secret to breakfast that’s both delicious and impressive—without any stress.
Choosing The Right Egg Poacher Saucepan
Choosing the right egg poacher saucepan makes cooking eggs easy and enjoyable. The right pan helps eggs cook evenly and keeps their shape intact. It also saves time and reduces mess. Picking a good egg poacher saucepan means thinking about the material, size, and special features. These factors affect how well the pan works and how long it lasts. Understanding these details helps you find a pan that fits your kitchen and cooking style.
Materials And Sizes
The material of an egg poacher saucepan affects heat distribution and durability. Common materials include stainless steel, non-stick coated aluminum, and silicone. Each has pros and cons.
- Stainless Steel: Durable and heats evenly. Easy to clean but may need oil or butter to prevent sticking.
- Non-stick Aluminum: Lightweight with a smooth surface. Eggs release easily, but the coating can wear off over time.
- Silicone: Flexible and heat-resistant. Usually used for removable poaching cups inside the pan.
Choosing the right size depends on how many eggs you want to poach at once. Egg poacher saucepans come in different sizes, usually holding 2 to 6 eggs. Smaller pans save space and heat faster. Larger pans suit families or groups.
| Size | Number of Eggs | Best For |
|---|---|---|
| Small (6-8 inches) | 2-3 eggs | Single servings, small kitchens |
| Medium (8-10 inches) | 4-6 eggs | Small families, regular use |
| Large (10+ inches) | 6+ eggs | Groups, meal prep |
Think about your kitchen space and how many eggs you cook regularly. This helps pick the best size and material for your needs.
Features To Look For
Good egg poacher saucepans have features that make cooking easy and safe. Look for pans with a tight-fitting lid. This traps steam and cooks eggs evenly. A clear glass lid helps watch eggs without lifting it.
- Non-stick surface: Prevents eggs from sticking and makes cleaning easier.
- Poaching cups or inserts: Hold eggs in shape and stop them from spreading in the water.
- Heat-resistant handles: Keep hands safe from burns.
- Even heat distribution: Helps eggs cook uniformly without hot spots.
- Easy cleaning: Dishwasher safe or simple to wash by hand.
Some pans come with extra features like a water level marker or stackable design. These add convenience but are not must-haves.
| Feature | Benefit |
|---|---|
| Tight-fitting lid | Traps steam for even cooking |
| Poaching cups | Keeps eggs neat and shaped |
| Non-stick coating | Easy release and cleaning |
| Heat-resistant handles | Safe handling during cooking |
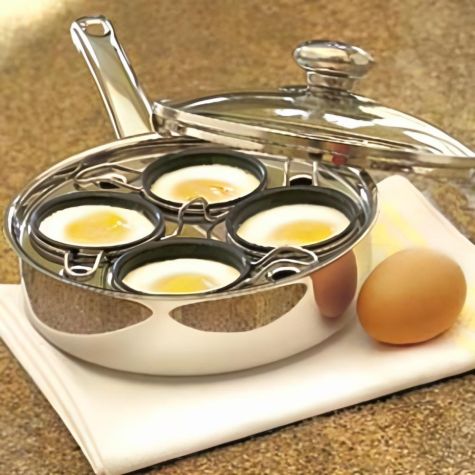
Choose a pan with features that suit your cooking habits. This makes egg poaching simple and less messy.

Credit: www.amazon.com
Preparing The Saucepan
Preparing the saucepan is the first step to making perfect poached eggs. The right preparation ensures the eggs cook evenly and do not stick. Setting up the saucepan correctly saves time and avoids mess. This section covers how to add the right water level and use non-stick inserts for best results.
Adding Water Levels
Adding the correct water level is crucial for steaming the eggs properly. Too much water will touch the egg cups and make the eggs watery. Too little water will evaporate quickly, causing uneven cooking.
Follow these simple steps for the right water level:
- Fill the saucepan with water just below the egg poacher inserts.
- Usually, 1 to 2 inches (2.5 to 5 cm) of water works well.
- Make sure the water does not touch the bottom of the egg cups.
- Water should be enough to create steam but not cover the eggs.
Use this table as a quick guide for water levels based on saucepan size:
| Saucepan Diameter | Water Level (inches) | Water Level (cm) |
|---|---|---|
| 6 inches (15 cm) | 1 inch | 2.5 cm |
| 8 inches (20 cm) | 1.5 inches | 3.8 cm |
| 10 inches (25 cm) | 2 inches | 5 cm |
Check water level during cooking. Add more hot water if it evaporates. Avoid cold water, which cools the pan and slows cooking.
Using Non-stick Inserts
Non-stick inserts make egg poaching easier and cleanup quick. They stop eggs from sticking and keep their shape. Using these inserts properly improves your cooking experience.
Tips for using non-stick inserts:
- Place the inserts firmly inside the saucepan before adding water.
- Lightly grease each cup with oil or butter to help eggs release.
- Make sure inserts fit well and sit above the water level.
- Use a soft brush or paper towel to spread the oil evenly.
- Clean inserts gently with a sponge to protect the coating.
Non-stick inserts come in different styles. Some have handles or lids for easier handling. Choose inserts that fit your saucepan size and match your cooking needs.
Using non-stick inserts helps you get smooth, round poached eggs without fuss. It also keeps the eggs from breaking when removing them. This simple step makes your poaching process smooth and mess-free.
Cracking And Placing Eggs
Using an egg poacher saucepan makes cooking eggs simple and neat. The key step is cracking and placing eggs correctly. This ensures eggs cook evenly and look perfect. Proper technique prevents shells from falling into the water and keeps eggs intact. Follow clear steps to get the best results every time.
Techniques For Cracking
Cracking eggs carefully is important for a clean poaching process. A good crack prevents shell pieces from mixing with the eggs. Use fresh eggs for better shape and taste. Here are easy ways to crack eggs without mess:
- Tap gently on a flat surface: Avoid using the edge of a bowl. Tap the egg on a flat surface to create a clean crack.
- Use thumbs to open: Hold the egg over a small bowl. Use your thumbs to pull the shell apart slowly.
- Check for shell pieces: Remove any small shell parts with a spoon or your fingers before placing eggs in the poacher.
Try cracking eggs into a separate small bowl first. This helps catch any shell and lets you check the egg quality. Only pour the egg into the poacher after checking it is clean.
| Step | Tip | Why It Helps |
|---|---|---|
| Tap on flat surface | Use countertop or plate | Creates a smooth crack, less shell breakage |
| Open slowly with thumbs | Pull shell apart gently | Prevents egg from breaking inside shell |
| Crack into bowl first | Check egg quality | Stops bad eggs and shells from entering poacher |
Arranging Eggs In The Poacher
Placing eggs correctly in the poacher ensures they cook evenly and keep their shape. Each egg should sit in its own compartment or cup inside the saucepan. This avoids eggs mixing or sticking together during cooking.
Follow these tips for the best egg arrangement:
- Use the right size poacher cups: Each cup should fit one egg comfortably.
- Place eggs gently: Pour eggs slowly from the bowl into each cup to avoid breaking yolks.
- Leave some space: Don’t overcrowd the cups. Eggs need room to expand slightly while cooking.
Remember, the water level in the saucepan should be low enough to avoid touching the eggs directly. Steam cooks the eggs gently and keeps them tender.
| Tip | Reason |
|---|---|
| Use separate cups | Prevents eggs from mixing |
| Pour eggs gently | Keeps yolks whole and intact |
| Leave space in cups | Allows eggs to cook evenly |
| Keep water level low | Steam cooks eggs softly without water contact |
Credit: www.youtube.com
Cooking Time And Heat Settings
Cooking eggs in an egg poacher saucepan requires attention to both cooking time and heat settings. These two factors control the texture and taste of your eggs. Understanding how to adjust heat and timing helps make perfect poached eggs every time. This section explains the difference between simmering and boiling, plus timing tips for different egg doneness levels.
Simmering Vs Boiling
Simmering and boiling are two heat settings often used in cooking eggs. They differ in water temperature and the way water moves. Simmering means heating water just below boiling point, about 185°F to 205°F (85°C to 96°C). Boiling means water reaches 212°F (100°C) and bubbles rise rapidly.
Why simmer instead of boiling?
- Simmering keeps water gentle, preventing eggs from breaking.
- It cooks eggs evenly and softly.
- Boiling water’s strong bubbles can damage delicate eggs.
- Simmering reduces splashing and mess.
Heat settings for an egg poacher saucepan:
| Heat Setting | Water Temperature | Effect on Eggs |
|---|---|---|
| Simmer | 185°F – 205°F (85°C – 96°C) | Gentle cooking, smooth whites, runny yolks |
| Boil | 212°F (100°C) | Harsh cooking, risk of broken eggs |
Always start with simmering heat for best results in an egg poacher saucepan. Use a medium to low flame. Adjust heat as needed to keep water just bubbling softly.
Timing For Different Doneness
Egg doneness depends on cooking time. Shorter cooking yields soft, runny yolks. Longer cooking makes firm yolks and whites. The egg poacher saucepan helps control timing for each preference.
Recommended cooking times:
| Doneness Level | Cooking Time | Description |
|---|---|---|
| Soft Poached | 3-4 minutes | Runny yolk, tender whites |
| Medium Poached | 4-5 minutes | Partially set yolk, firm whites |
| Hard Poached | 6-7 minutes | Fully set yolk and whites |
Steps to time eggs correctly:
- Bring water to simmer in the egg poacher saucepan.
- Place eggs in the poacher cups.
- Start timer immediately after closing the lid.
- Lift eggs out carefully at the desired time.
Use a kitchen timer or phone to track cooking time precisely. Check eggs at the lower end of the time range first. Adjust next batch time depending on your taste.
Removing And Serving Poached Eggs
Removing and serving poached eggs from an egg poacher saucepan is an important step to enjoy perfectly cooked eggs. Handling them carefully keeps the eggs whole and prevents breaking the delicate whites. This part of the process requires gentle tools and quick action to move the eggs from the water to your plate without losing their shape or warmth.
Using A Slotted Spoon
A slotted spoon is the best tool for taking poached eggs out of the saucepan. Its holes let water drain away quickly, so the eggs don’t get soggy. Use a spoon with a wide, shallow bowl to support the egg fully.
Follow these steps for safe and easy removal:
- Hold the spoon under the egg gently from the side or underneath.
- Lift slowly to avoid breaking the yolk or tearing the white.
- Let the water drain through the slots while holding the spoon above the saucepan.
- Place the egg on a plate or paper towel to absorb extra moisture.
Here is a simple guide to help you understand the right way to use the slotted spoon:
| Step | Action | Tip |
|---|---|---|
| 1 | Slide spoon under egg | Be gentle to keep egg shape |
| 2 | Lift slowly | Prevent yolk from breaking |
| 3 | Drain water | Hold spoon over pot or sink |
| 4 | Place on plate or towel | Keep eggs warm and dry |
Using the slotted spoon carefully gives you neat, attractive poached eggs ready to serve.
Serving Suggestions
Poached eggs taste great on many dishes. Their soft texture and mild flavor add richness to simple or fancy meals.
Try these easy serving ideas:
- On toasted bread with butter or avocado spread
- With sautéed spinach and mushrooms for a healthy meal
- Over crispy bacon or smoked salmon for extra flavor
- On a salad with fresh greens and vinaigrette
- With hollandaise sauce on English muffins (classic eggs Benedict)
For a quick breakfast, place the poached egg on toast and sprinkle with salt and pepper. Add chili flakes for a little heat.
Here is a simple table showing common pairings:
| Dish | Best Accompaniments |
|---|---|
| Toast | Butter, avocado, or tomato slices |
| Salad | Mixed greens, vinaigrette, nuts |
| Eggs Benedict | English muffin, ham, hollandaise sauce |
| Healthy Bowl | Spinach, mushrooms, quinoa |
Serving poached eggs hot keeps their creamy yolk soft and delicious. Add fresh herbs like parsley or chives for color and flavor.
Credit: www.williams-sonoma.com
Cleaning And Maintenance Tips
Keeping your egg poacher saucepan clean and well-maintained ensures it lasts longer and works efficiently. Regular cleaning removes food bits and prevents buildup. Proper care protects the saucepan’s surface and keeps eggs tasting fresh every time. Follow simple steps to clean and store your egg poacher saucepan correctly. This keeps it safe from damage and ready for your next breakfast.
Cleaning Non-stick Surfaces
Non-stick surfaces need gentle care to avoid scratches and damage. Avoid using metal scrubbers or harsh chemicals. Use soft sponges or cloths instead. Here are key tips for cleaning:
- Cool the saucepan before washing to prevent warping.
- Use warm, soapy water for cleaning non-stick surfaces.
- Gently scrub with a soft sponge or nylon brush.
- Rinse well to remove all soap residue.
- Dry completely with a soft towel to stop rust or water spots.
Avoid dishwasher use unless the manufacturer says it’s safe. Dishwashers can wear down the non-stick coating over time. For stuck-on food, soak the saucepan in warm water for 10-15 minutes before washing. This softens residue without heavy scrubbing.
| Do | Don’t |
|---|---|
| Use soft sponges | Use metal scrubbers |
| Wash with mild soap | Use harsh chemicals |
| Dry thoroughly | Leave wet to air dry |
| Soak stuck food | Scrape hard with knives |
Following these steps keeps your egg poacher saucepan’s non-stick surface smooth and ready to cook perfectly poached eggs every time.
Storing Your Saucepan
Proper storage protects your egg poacher saucepan from damage and saves space. Store it in a dry, cool place away from heavy pots or sharp objects. Here are tips to store it safely:
- Clean and dry the saucepan fully before storing.
- Stack carefully if placing with other cookware to avoid scratches.
- Use a protective cloth or paper towel between pans.
- Keep lids separate or store upside down to save space.
- Hang the saucepan by its handle if possible to prevent damage.
Use a dedicated kitchen rack or cabinet shelf for your egg poacher saucepan. Avoid placing heavy items on top. This keeps the pan’s shape intact and its coating unharmed.
| Storage Tip | Benefit |
|---|---|
| Dry completely before storing | Prevents rust and mold |
| Use protective cloth or paper | Stops scratches and dents |
| Hang by handle | Saves space and prevents damage |
| Store in cool, dry place | Maintains pan quality |
Careful storage ensures your egg poacher saucepan stays clean, safe, and ready to use for many breakfasts to come.
Troubleshooting Common Issues
Using an egg poacher saucepan can make cooking eggs simple and quick. Sometimes, small problems happen during cooking. These issues can stop you from getting perfect eggs. Knowing how to fix common problems helps keep your cooking smooth. Below are solutions for frequent troubles with egg poachers.
Eggs Sticking To The Poacher
Eggs sticking to the poacher is a common problem. It makes cleaning hard and can break the eggs. The main reason is usually a lack of oil or butter in the cups. Always add a small amount of oil or butter before cracking eggs into the poacher. This creates a non-stick surface.
Other tips to avoid sticking:
- Use fresh eggs, as older eggs tend to stick more.
- Make sure the poacher cups are clean and dry before use.
- Cook eggs on medium heat. High heat can cause sticking and burning.
- Cover the saucepan with a lid to cook evenly and prevent sticking.
Table below shows common causes and quick fixes:
| Cause | Fix |
|---|---|
| No oil or butter in poacher cups | Lightly grease each cup before adding eggs |
| Old eggs | Use fresh eggs for better results |
| High heat | Cook on medium heat to avoid sticking |
| Dirty poacher cups | Clean and dry cups before each use |
Water Evaporation Problems
Water evaporation is normal but too much can cause problems. The water in the saucepan heats the egg cups and keeps eggs cooking gently. If water evaporates too fast, eggs may cook unevenly or burn. Keep an eye on the water level during cooking.
Ways to control water evaporation:
- Fill the saucepan with water up to the recommended level before cooking.
- Use a lid to cover the saucepan. This slows down evaporation.
- Check the water level after cooking each batch of eggs.
- Add hot water if the level is low to avoid cooling the cooking process.
Table below shows causes and solutions for water evaporation:
| Cause | Solution |
|---|---|
| Not using a lid | Always cover saucepan during cooking |
| Too little water at start | Fill saucepan to correct water level |
| Long cooking time | Check and add hot water if needed |
| High heat | Cook on medium heat to reduce evaporation |
Frequently Asked Questions
How Do I Prepare An Egg Poacher Saucepan?
Fill the saucepan with water below the poacher cups. Heat until simmering, then place eggs in cups. Cover and cook for 4-6 minutes until eggs are set.
Can I Use Any Eggs In An Egg Poacher Saucepan?
Yes, fresh eggs work best for poaching. Older eggs may spread more in the water and not hold shape well in the poacher.
How Long Should Eggs Cook In A Poacher Saucepan?
Cook eggs for 4-6 minutes for runny yolks. Increase time to 7-8 minutes for firmer yolks. Adjust based on personal preference.
Is Cleaning An Egg Poacher Saucepan Difficult?
No, most poacher pans are easy to clean. Wash cups with warm soapy water and wipe the saucepan after use.
Conclusion
Using an egg poacher saucepan makes cooking eggs simple and quick. You get soft, tasty eggs every time. Just add water, place the eggs, and wait a few minutes. Cleaning the pan is easy too. Perfect eggs can brighten your breakfast or lunch.
Try different cooking times to find your favorite texture. Small steps lead to great results in the kitchen. Enjoy the process and the delicious eggs you make!

Hello, This is Annie Walker, a 38-year-old blogger, founder, and editor of Cookware Guider from NY, USA. I am a cookware fanatic and passionate cooker. I love to cook with different types of cooking appliances (example: all types of cookware, rice cookers, slow cookers, etc) almost every day in my kitchen. I love to share my experience with my readers in my blog. Also, I enjoy helping people to solve their problems through my website. You can follow me on Twitter & Pinterest. To know details about my blog please check the about us page.