
A cast iron frying pan is more than just a kitchen tool—it’s an investment that can last for generations. But for it to deliver those famous crispy edges and deep flavors, you need to prepare it correctly before cooking. Many people feel intimidated by cast iron, worrying about rust, sticking food, or “ruining” the pan.
The good news is, anyone can learn to prepare a cast iron frying pan. With the right steps, you’ll unlock its full potential and enjoy delicious results every time.
This guide will walk you through everything you need to know: from seasoning a new or used pan, to cleaning, drying, and maintaining it. You’ll discover practical tips, common mistakes, and even a few expert secrets. Whether you’re new to cast iron or looking to improve your technique, you’ll find clear instructions here.
Why Cast Iron Needs Preparation
Cast iron isn’t like nonstick pans. Its surface is rough and porous when new, which means food can stick and flavors can be affected. Preparing—or seasoning—a pan creates a natural, nonstick layer. This layer also protects the pan from rust and improves with use. Skipping preparation means your food will likely stick, and your pan could rust or wear out faster.
There are two main reasons for preparing a cast iron frying pan:
- Nonstick cooking: Proper seasoning builds a slick surface, so eggs, pancakes, and meats release easily.
- Rust prevention: Cast iron is vulnerable to moisture. Preparation helps shield the metal.
Many new pans come “pre-seasoned,” but this coating is thin and often uneven. Even if your pan is labeled as ready-to-use, it’s smart to season it yourself for best results.
Tools And Materials You’ll Need
Before starting, gather these essential items:
- Cast iron frying pan (new or used)
- Vegetable oil or another high smoke point oil (see comparison below)
- Paper towels or a lint-free cloth
- Mild dish soap
- Sponge or stiff brush
- Oven (for oven seasoning)
- Aluminum foil (to catch drips)
- Tongs or heat-resistant gloves
Best Oils For Seasoning
The type of oil you use matters. Some oils bond better with cast iron, creating a more durable coating.
| Oil Type | Smoke Point (°F) | Flavor Impact | Cost | Recommended? |
|---|---|---|---|---|
| Flaxseed oil | 225 | Neutral | High | Yes (for hard coating) |
| Grapeseed oil | 420 | Neutral | Medium | Yes |
| Canola oil | 400 | Neutral | Low | Yes |
| Vegetable oil | 400-450 | Neutral | Low | Yes |
| Olive oil | 375 | Noticeable | Medium | No |
| Butter/Lard | 350 | Rich | Medium | No (short-term only) |
Non-obvious insight: Flaxseed oil creates a hard, smooth layer but can flake if applied too thick. Vegetable and canola oil are reliable, affordable choices.
Step-by-step: How To Prepare A Cast Iron Frying Pan
1. Wash The Pan
Even if your pan is new, give it a thorough wash. Use mild dish soap and a sponge or stiff brush to remove any factory residue or dust. Don’t soak the pan; a quick scrub is enough.
- For rusty or used pans, use steel wool or a chainmail scrubber to remove rust and old food. Rinse well.
Key tip: After washing, immediately dry the pan with a towel to prevent flash rust.
2. Dry The Pan Completely
Moisture is the enemy of cast iron. After towel drying, place the pan on a stovetop burner over low heat for a few minutes. This evaporates hidden water in the pores.
- The pan should feel warm and fully dry before moving to the next step.
3. Apply A Thin Layer Of Oil
Pour a small amount (about a teaspoon) of seasoning oil into the pan. Use a paper towel or lint-free cloth to spread it evenly over all surfaces, including the handle and outside. Wipe away excess oil—the pan should look shiny, not greasy.
Non-obvious insight: Too much oil causes sticky patches or uneven seasoning. Less is more.
4. Bake The Pan
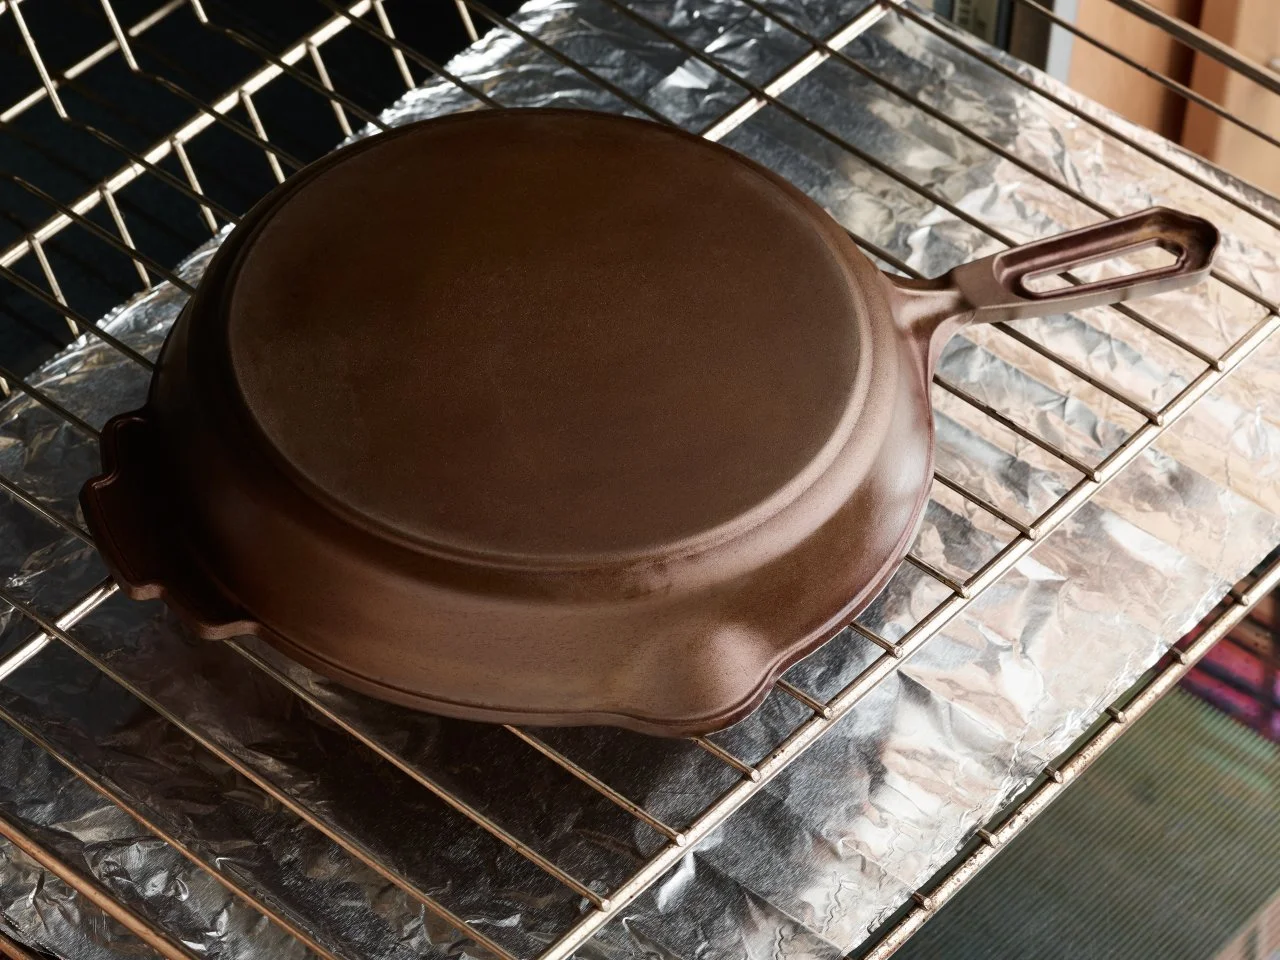
Preheat your oven to 450°F (232°C). Place a sheet of aluminum foil on the bottom rack to catch any drips.
- Place the pan upside down on the top rack. This prevents oil from pooling inside.
- Bake for one hour. This high heat bonds the oil to the iron, creating a hard, black layer.
- After an hour, turn off the oven and let the pan cool inside. This slow cooling helps set the seasoning.
Expert tip: Seasoning works by polymerization—a chemical change that turns oil into a plastic-like layer.
5. Repeat For A Stronger Seasoning
One layer is good; two or three are better. For the best nonstick surface, repeat the oiling and baking steps 2–3 times. Each round builds a tougher, smoother finish.
- Many chefs season a new pan three times before using it for delicate foods like eggs.
6. Final Wipe And Inspection
Once the pan is cool, inspect the surface. It should be dark, smooth, and not sticky. If you feel tacky spots, heat the pan again to set the oil further.
Now, Your Pan Is Ready For Cooking!
How To Maintain Your Cast Iron Pan
Proper preparation is just the start. Regular care keeps your pan performing well for years. Here’s what you need to do after each use.
Cleaning After Cooking
- Wipe out crumbs and oil with a paper towel while the pan is still warm.
- For stuck-on food, pour in a little hot water and scrub with a stiff brush (no soap needed for light cleaning).
- For heavy messes, use a small amount of mild soap and rinse quickly.
- Never soak your pan or put it in the dishwasher.
Drying And Oiling
- Dry the pan on the stovetop over low heat.
- While still warm, wipe on a thin layer of oil. This keeps the seasoning fresh and protects against rust.
Storage
- Store your pan in a dry place.
- Put a paper towel inside to absorb moisture and prevent scratches if stacking pans.
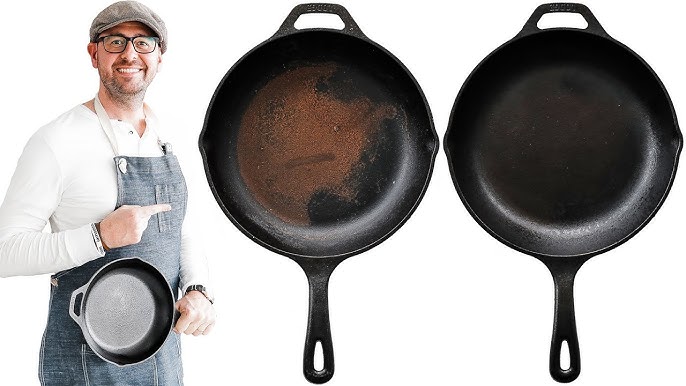
Common mistake: Storing a damp pan leads to rust. Always dry and oil before putting away.
Credit: www.youtube.com
Comparing Cast Iron To Other Frying Pans
To understand why preparation matters, it helps to compare cast iron with other materials.
| Pan Material | Nonstick Quality | Heat Retention | Durability | Maintenance |
|---|---|---|---|---|
| Cast Iron | Excellent (if seasoned) | High | Lifetime+ | High |
| Stainless Steel | Moderate | Medium | Long | Low |
| Nonstick (Teflon) | Excellent (short-term) | Low | Short | Low |
| Carbon Steel | Good (if seasoned) | Medium | Long | Medium |
Takeaway: Cast iron, with proper preparation, offers unmatched durability and heat retention. The trade-off is the need for regular care and seasoning.
Troubleshooting Common Problems
Even experienced cooks sometimes run into issues with cast iron pans. Here’s how to handle them:
Sticky Surface
- Usually caused by too much oil during seasoning.
- Solution: Place the pan in the oven at 450°F for 30 minutes to bake off excess oil.
Rust Spots
- Common if the pan isn’t fully dried or oiled.
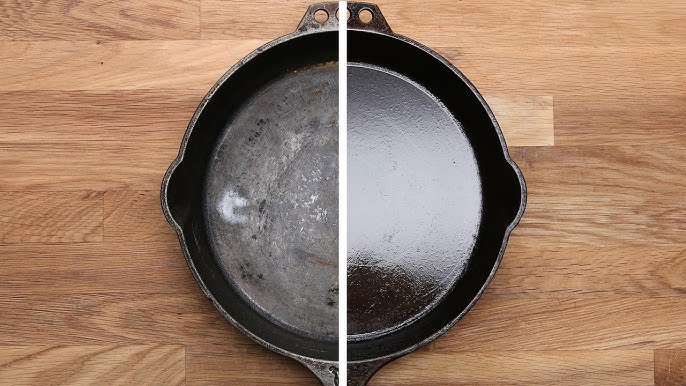
- Scrub with steel wool, rinse, dry, and reseason.
Food Sticking
- New pans are less nonstick; this improves with use.
- Avoid cooking eggs or fish until the seasoning has built up.
- Cook bacon or fry potatoes a few times to boost seasoning.
Flaking Or Peeling Seasoning
- Can happen if the oil layer is too thick or the pan was not heated enough.
- Strip the old seasoning with oven cleaner or vinegar, scrub well, and start seasoning again.
Credit: www.youtube.com
Advanced Tips For Cast Iron Success
- Cook fatty foods first: Bacon, sausage, or fried potatoes help build up the seasoning.
- Avoid acidic foods: Tomatoes and vinegar can strip new seasoning. Wait until your pan is well-seasoned.
- Don’t panic over scratches: Minor scratches will fill in as you continue to season and cook.
- Use enough heat: Cast iron needs time to preheat. Place the pan on medium heat for several minutes before adding food.
- Embrace the patina: The blacker and shinier your pan gets, the better it performs.
For more background on cast iron and its unique chemistry, visit the Wikipedia page on cast iron cookware.
Frequently Asked Questions
How Often Should I Season My Cast Iron Frying Pan?
You should re-season your pan every few months, or whenever food starts to stick or the surface looks dull. Regular light oiling after each use helps keep the seasoning strong.
Can I Use Soap To Clean My Cast Iron Pan?
Yes, but use mild dish soap and rinse quickly. Soap will not ruin a well-seasoned pan, but don’t soak it. Always dry and oil the pan after washing.
What’s The Best Oil For Seasoning?
Vegetable oil or canola oil are great choices for most people. Flaxseed oil creates a hard coating, but it’s more expensive and can flake if applied too thick. Choose an oil with a high smoke point for best results.
My Pan Has Rust—can I Save It?
Absolutely. Scrub away the rust with steel wool or a stiff brush, wash thoroughly, dry, and re-season. Most surface rust is easy to fix.
Why Does My Food Taste Metallic From My Cast Iron Pan?
This usually means the seasoning layer is too thin or has worn off. Reseason your pan and cook fatty foods to rebuild the nonstick layer. Avoid acidic foods until the pan is fully seasoned.
A cast iron frying pan is a powerful tool when prepared and cared for correctly. With time and use, your pan will become better, smoother, and more nonstick. Invest a little effort up front, and you’ll enjoy perfectly cooked meals for decades to come.
Credit: www.foodnetwork.com

Hello, This is Annie Walker, a 38-year-old blogger, founder, and editor of Cookware Guider from NY, USA. I am a cookware fanatic and passionate cooker. I love to cook with different types of cooking appliances (example: all types of cookware, rice cookers, slow cookers, etc) almost every day in my kitchen. I love to share my experience with my readers in my blog. Also, I enjoy helping people to solve their problems through my website. You can follow me on Twitter & Pinterest. To know details about my blog please check the about us page.