Baking cupcakes at home is a fun activity, but it can quickly turn messy and frustrating when batter sticks to pans or cakes don’t release smoothly. If you’ve ever struggled with traditional metal pans, silicone bakeware is a game changer. Silicone cupcake molds promise easy release, consistent results, and less cleanup. But using them correctly takes some know-how. This guide will show you everything you need to bake perfect cupcakes with silicone bakeware, from preparation to cleaning, with real-world tips and expert advice.
What Makes Silicone Bakeware Special?
Silicone bakeware is made from food-grade silicone, a flexible material that resists heat and cold. Unlike metal or glass pans, silicone molds bend without breaking, and their nonstick surface helps baked goods release easily. Here are the main benefits:
- Nonstick properties: Cupcakes pop out without scraping or prying.
- Flexible: The molds fold and twist, so cakes don’t get stuck.
- Heat resistance: Safe from -40°F to 450°F (some up to 500°F).
- Easy cleaning: Silicone doesn’t absorb odors or stains.
- Lightweight: Easier to handle than heavy pans.
A study from the National Sanitation Foundation found that silicone bakeware reduces stuck-on batter by more than 70% compared to metal pans. For busy home bakers, that means less wasted cake and more consistent results.
Choosing The Right Silicone Cupcake Molds
Not all silicone molds are equal. Before baking, pick the right type for your cupcakes:
Size And Shape
Silicone cupcake molds come in standard, mini, and jumbo sizes. Standard molds (2. 5 inches wide) fit most recipes, while mini molds are perfect for bite-sized treats. Jumbo molds create larger cupcakes for special occasions.
Thickness And Quality
Look for molds that are thick and sturdy. Thin, cheap silicone can warp in the oven or tear. Quality molds hold their shape, even when filled with batter.
Color And Design
Color doesn’t affect baking, but brighter molds are easier to spot in the kitchen. Some molds have fun shapes (stars, hearts), which are great for kids’ parties.
Individual Cups Vs. Muffin Trays
Individual silicone cups are versatile—you can space them out or use just a few at a time. Silicone muffin trays (with 6, 12, or 24 cups) are better for batch baking.
Here’s a quick comparison:
| Type | Pros | Cons |
|---|---|---|
| Individual Cups | Flexible use, easy to store, clean only what you use | May tip over, uneven baking if spaced poorly |
| Muffin Tray | Consistent shape, easy transport, batch baking | Bulkier, harder to clean |
:max_bytes(150000):strip_icc()/ms-silicone-pan-getty-f19d374f8c454f71a0a1f2231bee0f94.jpg)
Credit: www.marthastewart.com
Preparing Silicone Bakeware For Cupcakes
Even though silicone is nonstick, proper preparation is important for the best results.
Wash Before First Use
New molds can have a residue from manufacturing. Wash them with warm soapy water, then dry thoroughly.
Light Greasing (optional)
Some bakers skip greasing, but a thin layer of cooking spray or oil makes release easier, especially for sticky batters. Apply a tiny amount and wipe off the excess.
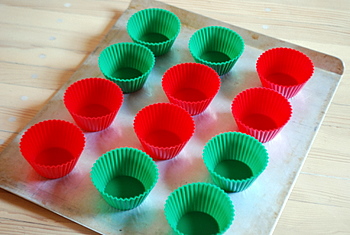
Place Molds On A Baking Sheet
Silicone molds are flexible, so they can bend or spill when filled. Always set them on a metal baking sheet before adding batter. This makes moving them in and out of the oven safer.
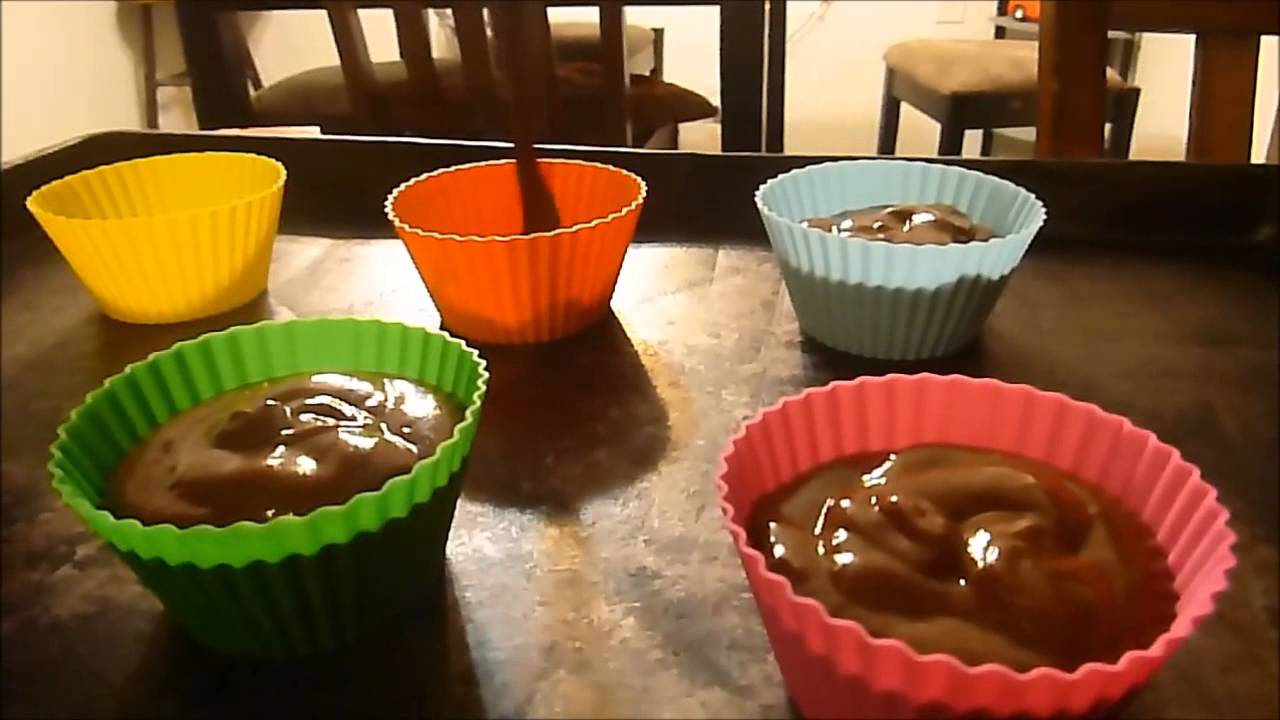
Fill Evenly
Fill each cup two-thirds full for standard cupcakes. Overfilling can lead to overflow or misshapen cakes.
Batter Consistency
Silicone molds work best with thicker batters. Runny batters can leak or spill. If using a liquid batter, be extra careful when transferring to the oven.
Baking Cupcakes In Silicone Molds: Step-by-step
Let’s break down the process for making classic vanilla cupcakes. You can use this method for any cupcake recipe.
Ingredients
- 1 ½ cups all-purpose flour
- 1 cup granulated sugar
- ½ cup unsalted butter (softened)
- 2 large eggs
- ½ cup milk
- 1 tsp vanilla extract
- 1 ½ tsp baking powder
- ¼ tsp salt
Instructions
- Preheat your oven to 350°F (175°C).
- Mix dry ingredients: Combine flour, baking powder, salt in a bowl.
- Cream butter and sugar: Beat until light and fluffy.
- Add eggs and vanilla: Mix until smooth.
- Combine wet and dry: Add flour mixture and milk alternately, mixing gently.
- Prepare silicone molds: Wash, dry, lightly grease, and place on a baking sheet.
- Fill molds: Spoon batter into cups, filling two-thirds full.
- Bake: Place in oven. Standard cupcakes need 18–22 minutes. Minis: 12–15 minutes; jumbos: 25–30 minutes.
- Check doneness: Insert a toothpick—if it comes out clean, cupcakes are ready.
- Cool: Let cupcakes sit in the molds for 5–10 minutes before removing.
Removing Cupcakes
Silicone makes it easy, but patience helps. Gently press the bottom of each mold. The cupcake should pop out. Avoid twisting too hard or using metal tools—this can damage the silicone.
Credit: bakingbites.com
Tips For Perfect Cupcakes Every Time
Baking with silicone is simple, but a few tricks make your cupcakes even better.
- Use room-temperature ingredients: Cold butter or eggs can cause dense cupcakes.
- Avoid overmixing: Stir just until combined to keep cupcakes light.
- Rotate the tray: Halfway through baking, turn the tray for even browning.
- Let cupcakes cool in molds briefly: This prevents tearing or crumbling.
- Don’t use sharp utensils: Silicone can tear. Use plastic or wooden tools.
Many beginners miss the importance of placing silicone molds on a sturdy tray. If you skip this, cups can tip and batter spills—especially with individual molds. Also, always check your oven temperature with a thermometer. Silicone molds can sometimes bake unevenly if your oven runs hot or cold.
Cleaning And Storing Silicone Bakeware
Silicone is low-maintenance, but careful cleaning keeps it working well.
Cleaning
- Hand wash: Use warm, soapy water and a soft sponge. Avoid harsh scrubbers.
- Dishwasher safe: Most silicone molds can go in the dishwasher. Place them on the top rack.
- Remove oily residue: If cupcakes stick, soak molds in hot water with baking soda for 30 minutes, then wash.
Storing
Silicone molds bend and stack easily. Store them in a cool, dry place. Don’t fold or crush them; this can cause permanent creases.
Some bakers notice lingering smells after baking strong flavors (like chocolate or coffee). To remove odors, bake the empty molds at 350°F for 10 minutes. This “resets” the silicone.
Comparing Silicone Bakeware To Metal And Paper
Is silicone really better than traditional pans? Here’s a data-driven look.
| Feature | Silicone | Metal | Paper |
|---|---|---|---|
| Nonstick | Excellent | Good (needs greasing) | Good (single use) |
| Reusable | Yes (100s of times) | Yes | No |
| Heat Distribution | Moderate | Excellent | Poor |
| Cleanup | Easy | Moderate | None |
| Cost | Medium | Low–Medium | Low |
Silicone molds are best for nonstick and easy cleanup. Metal pans heat more evenly, so they’re ideal for crisp edges and browning. Paper cups are convenient for parties but create waste.
Common Mistakes When Using Silicone Bakeware
Even experienced bakers make errors. Here are mistakes to avoid:
- Skipping the baking sheet: Molds can collapse or spill without support.
- Not greasing sticky batters: While silicone is nonstick, dense batters (banana, carrot) can stick.
- Overfilling molds: This causes overflow and misshapen cupcakes.
- Removing cupcakes too soon: Cupcakes can break if removed while hot.
- Using sharp tools: Metal utensils damage silicone.
- Ignoring oven spots: Silicone doesn’t brown as quickly; rotate trays for even color.
A less-known tip: If your silicone molds have a white “film” after washing, it’s probably leftover oil. Wash again with baking soda, and the film disappears.
Decorating Cupcakes From Silicone Molds
Silicone molds produce smooth, round cupcakes, perfect for decorating.
- Frosting: Use buttercream, cream cheese, or whipped cream. Let cupcakes cool completely before frosting.
- Sprinkles and toppings: Add after frosting to avoid melting.
- Fondant: Silicone molds create even surfaces, so fondant sticks well.
If you’re making cupcakes for a party, bake a day ahead. Silicone molds make it easier to pop out cupcakes without tearing, so you can decorate several at once.
Advanced Uses: Beyond Cupcakes
Silicone molds aren’t just for cupcakes. Try these ideas:
- Mini cheesecakes: Silicone is ideal for sticky or creamy desserts.
- Brownie bites: Flexible molds make brownies easy to release.
- Egg muffins: For breakfast, bake eggs with veggies in silicone cups.
- Frozen treats: Silicone withstands cold—use for ice cream or yogurt pops.
Some chefs even use silicone molds for savory dishes, like meatloaf bites or baked polenta.
Credit: www.youtube.com
Safety And Health Concerns
Silicone bakeware is FDA-approved and considered safe. It doesn’t leach chemicals at baking temperatures. However, only buy food-grade silicone—cheap, colored molds sometimes contain fillers.
A 2022 study from the FDA found that high-quality silicone molds had no detectable leaching, even after repeated use. Still, never use molds that are cracked, torn, or discolored.
For more safety info, see this official resource: FDA Silicone Cookware.
Troubleshooting: What If Cupcakes Stick Or Burn?
If cupcakes stick, try these solutions:
- Lightly grease molds before baking.
- Let cupcakes cool longer before removing.
- Wash molds with hot water and baking soda to remove residue.
If cupcakes burn or bake unevenly:
- Check oven temperature—use an oven thermometer.
- Rotate baking sheet halfway.
- Lower oven rack if tops brown too quickly.
Beginners often miss that silicone molds can insulate batter, slowing browning. If you want crisp edges, bake a few minutes longer or use a metal tray under the silicone for extra heat.
Environmental Impact: Is Silicone Eco-friendly?
Silicone molds last for years and reduce single-use waste from paper liners. Unlike plastic, silicone is stable and doesn’t break down into microplastics. However, it’s not biodegradable. The main environmental benefit is reusability—one set of molds can replace hundreds of paper liners.
Frequently Asked Questions
Are Silicone Cupcake Molds Safe For The Oven?
Yes, food-grade silicone cupcake molds are safe up to 450°F (sometimes higher). Always check the packaging for temperature limits.
Should I Grease Silicone Molds Before Baking?
For most cupcake recipes, a light grease is optional. Sticky batters (like chocolate or banana) benefit from a thin layer of oil or spray.
Can I Use Silicone Molds In The Microwave?
Yes, silicone bakeware is microwave-safe. You can use it for mug cakes, reheating, or melting butter.
How Long Do Silicone Cupcake Molds Last?
Quality silicone molds can last for years—often 100 or more uses. Avoid using molds with cracks, tears, or fading colors.
Why Do My Cupcakes Bake Unevenly In Silicone Molds?
Silicone insulates the batter more than metal. If your cupcakes bake unevenly, rotate the tray halfway through, use a baking sheet for support, and check your oven temperature.
Final Thoughts
Silicone bakeware makes cupcake baking easier, cleaner, and more fun. With the right molds, careful preparation, and a few expert tricks, you can bake cupcakes that release perfectly every time. Silicone’s flexibility and nonstick surface are ideal for beginners and pros alike.
If you’re tired of scraping cakes from metal pans or wasting paper liners, silicone is worth trying. Remember to choose quality molds, support them with a baking sheet, and clean them well after use. With practice, you’ll enjoy delicious cupcakes and hassle-free baking for years to come.

Hello, This is Annie Walker, a 38-year-old blogger, founder, and editor of Cookware Guider from NY, USA. I am a cookware fanatic and passionate cooker. I love to cook with different types of cooking appliances (example: all types of cookware, rice cookers, slow cookers, etc) almost every day in my kitchen. I love to share my experience with my readers in my blog. Also, I enjoy helping people to solve their problems through my website. You can follow me on Twitter & Pinterest. To know details about my blog please check the about us page.