
A sharp knife makes cooking safer, easier, and more enjoyable. But many people struggle with dull blades, which can slip and cause accidents or make cutting food frustrating. Learning how to use a knife sharpener is a skill that transforms your kitchen experience. Whether you’re a beginner or someone who wants better results, this guide will help you understand different sharpeners, how to use them correctly, and how to keep your knives sharp for longer.
Knowing how to sharpen your knives is not just about maintaining tools—it’s about improving your food preparation and protecting yourself from injury. Many home cooks make mistakes, such as using the wrong sharpener or not maintaining their knives after sharpening.
In this article, you’ll learn everything you need to start sharpening knives confidently, from choosing the right sharpener to using proper technique and avoiding common errors.
Why Sharp Knives Matter
Sharp knives are essential for safety and efficiency. A dull blade requires more force and can slip, leading to injuries. Sharp knives cut cleanly, which helps preserve the texture and appearance of food. Professional chefs always keep their knives sharp because it saves time and gives better results.
According to a study from the National Safety Council, dull knives cause more kitchen injuries than sharp ones. When a knife is sharp, you have more control over each cut. Food is sliced cleanly, and you use less effort. With dull knives, you might crush or tear ingredients, affecting taste and appearance.
Keeping your knives sharp also extends their lifespan. Dull knives can develop chips or uneven edges, which may require expensive repairs or replacement. Regular sharpening and maintenance are simple ways to protect your investment and make cooking more enjoyable.
Types Of Knife Sharpeners
Not all sharpeners are the same. Choosing the right one depends on your needs, skill level, and the types of knives you own. Here’s a look at the most common types:
| Sharpener Type | How It Works | Skill Level | Best For |
|---|---|---|---|
| Manual Pull-Through | Drag knife through slots with abrasive surfaces | Beginner | Home cooks, quick sharpening |
| Electric | Motorized wheels sharpen blade automatically | Beginner/Intermediate | Busy kitchens, many knives |
| Whetstone | Rub blade over stone at controlled angle | Intermediate/Expert | Professional chefs, precision sharpening |
| Honing Rod | Aligns edge, does not sharpen | All levels | Maintaining sharpness between sharpening |
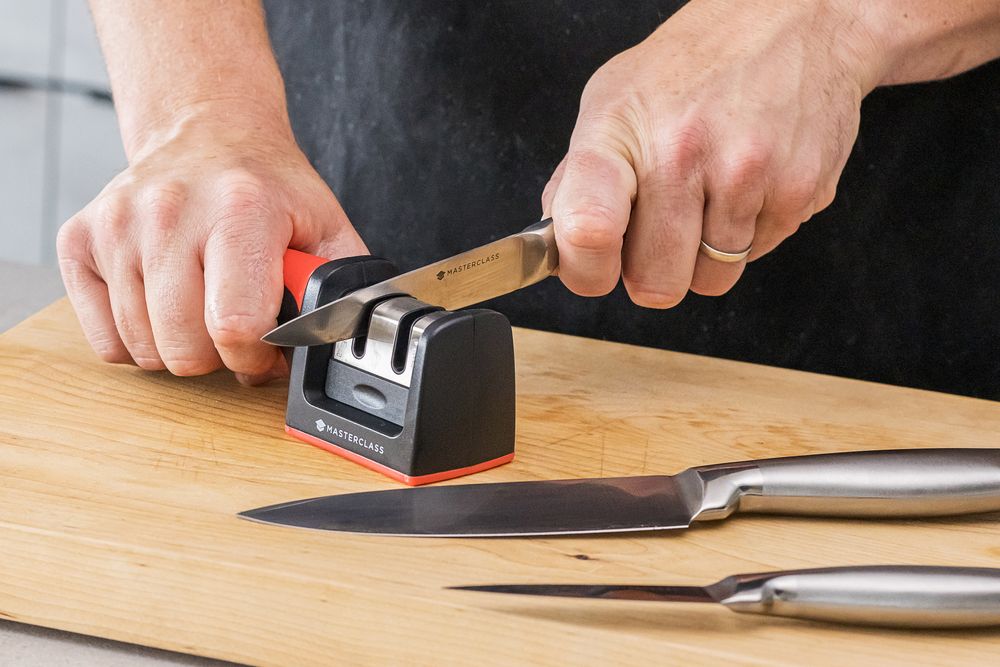
Manual Pull-through Sharpeners
These are the most common in home kitchens. They have slots with abrasive surfaces. You pull the knife through, and the abrasives remove dull metal to form a new edge. Most have two slots—one for coarse sharpening and one for fine polishing.
Advantages:
- Easy to use
- Affordable
- Good for quick sharpening
Disadvantages:
- Less control over edge angle
- Not suitable for specialty knives
Electric Sharpeners
Electric sharpeners use spinning wheels or belts to grind the blade. You insert the knife, and the machine does the work. They are fast and can handle many knives in a short time.
Advantages:
- Very quick
- Consistent results
Disadvantages:
- Can remove too much metal
- Expensive
- Not always suitable for delicate or expensive knives
Whetstones (sharpening Stones)
A whetstone is a rectangular block made from ceramic, diamond, or synthetic materials. You rub the blade over the stone at a set angle. This method gives the most control and is preferred by chefs.
Advantages:
- High precision
- Works for any knife type
Disadvantages:
- Requires practice
- Takes more time
Honing Rods
Honing rods do not sharpen knives. Instead, they realign the edge. Use them regularly to keep knives sharp between sharpening sessions.
Advantages:
- Maintains sharpness longer
- Quick and easy
Disadvantages:
- Cannot fix a dull edge
- Not a substitute for sharpening
Choosing The Right Knife Sharpener
Selecting the best sharpener depends on your kitchen, knives, and skill. Here are some factors to consider:
| Factor | Why It Matters | Common Mistake |
|---|---|---|
| Knife Type | Some sharpeners can’t handle serrated or Japanese knives | Using pull-through on delicate knives |
| Budget | Electric sharpeners are costly | Buying cheap sharpeners that damage knives |
| Skill Level | Whetstones require practice | Trying stones without training |
| Frequency | Busy kitchens need faster tools | Relying on honing instead of sharpening |
Non-obvious insight: Many people overlook the importance of matching the sharpener to their knife steel. Japanese knives are harder and need finer abrasives, while Western knives can handle more aggressive sharpeners.
Practical tip: If you own a mix of knives, consider having both a pull-through sharpener and a whetstone. The pull-through is for quick fixes, and the stone is for precision work.
Preparing To Sharpen Your Knife
Before you begin, gather your tools and prepare your workspace. Here’s what you need:
- Knife sharpener (manual, electric, or whetstone)
- Clean, dry knife
- Towel or mat to protect surfaces
- Water or oil (for some stones)
- Gloves (optional, for safety)
Steps for preparation:
- Clean your knife with soap and water. Dry completely.
- Place sharpener on a stable surface.
- If using a whetstone, soak it for 10-15 minutes (unless it’s a dry stone).
- Set up a towel or mat to catch metal shavings.
Common mistake: Sharpening a dirty or oily knife can clog the sharpener and damage the edge. Always start with a clean blade.
How To Use A Manual Pull-through Knife Sharpener
Manual sharpeners are popular for their simplicity. Here’s how to use them correctly:
Step-by-step Guide
- Identify the slots: Most sharpeners have a coarse and fine slot. Start with the coarse slot if the knife is very dull.
- Hold the sharpener steady: Place it on a flat surface. Hold it firmly with one hand.
- Insert the knife: Place the knife heel (closest to handle) in the slot.
- Pull through: Draw the knife through the slot, from heel to tip, applying gentle pressure.
- Repeat: Do this 3-6 times in the coarse slot, then switch to the fine slot for polishing.
- Clean the knife: Wipe the blade to remove metal shavings.
Example: If your knife is dull from cutting hard vegetables, start with the coarse slot. If it’s only slightly dull, use the fine slot.
Non-obvious insight: Many people press too hard, thinking it will sharpen faster. This removes too much metal and can ruin the edge. Gentle pressure is best.
How To Use An Electric Knife Sharpener
Electric sharpeners are ideal for busy kitchens. Follow these steps:
Step-by-step Guide
- Plug in the sharpener: Make sure it’s on a stable surface.
- Read instructions: Each model is a bit different. Check recommended angles.
- Insert the knife: Place the blade in the slot, starting at the heel.
- Let the machine work: Slowly pull the knife through as the wheels spin.
- Repeat: Usually 2-3 passes per slot are enough.
- Finish: Wipe the blade clean.
Practical tip: Don’t rush. Moving too fast can result in uneven sharpening. Follow the manufacturer’s speed guide.
Common mistake: Using an electric sharpener on expensive Japanese knives can damage them. These knives require a finer touch.
:max_bytes(150000):strip_icc()/200389815-001_HighRes-56a20eaa3df78cf772717b45.jpg)
Credit: www.thespruceeats.com
How To Use A Whetstone
Whetstones give the most precise results. Using them requires patience and practice.
Step-by-step Guide
- Soak the stone: If it’s a water stone, soak for 10-15 minutes.
- Set the angle: Use a guide or estimate 15-20 degrees for most knives.
- Hold the knife: Place blade against stone at desired angle.
- Push and pull: Slide the knife across the stone, from heel to tip, maintaining angle.
- Alternate sides: Sharpen one side, then flip and repeat.
- Polish: Use the finer side of the stone or a separate polishing stone.
- Clean: Rinse the knife and stone, dry both.
Example: Japanese chef knives are usually sharpened at 15 degrees. Western knives are typically 20 degrees.
Non-obvious insight: The angle is more important than speed. Many beginners rush but lose the correct angle, resulting in a dull edge.
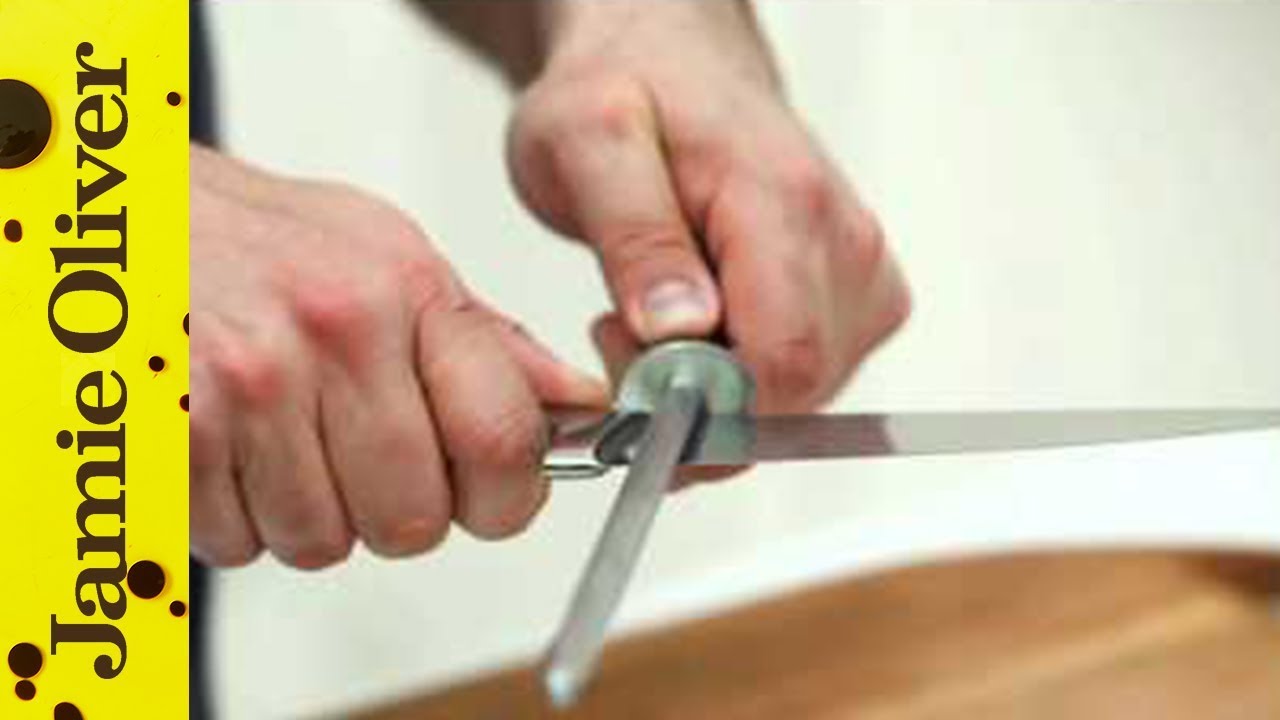
How To Use A Honing Rod
Honing rods are for maintenance, not sharpening. Here’s how to use them:
Step-by-step Guide
- Hold the rod upright: Place the tip on a stable surface.
- Hold the knife at an angle: Usually 15-20 degrees.
- Draw the blade down: Slide the knife from heel to tip along the rod.
- Alternate sides: Repeat for both edges, 4-6 times each.
- Wipe the blade: Clean off any residue.
Practical tip: Hone your knife before every use. This keeps the edge aligned and reduces the need for frequent sharpening.
Common mistake: Many people confuse honing with sharpening. Honing does not restore a dull blade—it only maintains an already sharp edge.
How Often Should You Sharpen Your Knife?
The frequency depends on how much you use your knives and the type of blade. Here’s a general guideline:
| Knife Type | Sharpening Frequency | Honing Frequency |
|---|---|---|
| Chef’s Knife | Every 2-3 months | Every use |
| Paring Knife | Every 4-6 months | Weekly |
| Japanese Knife | Every 4-6 months | Every use |
| Serrated Knife | Rarely (special tools) | N/A |
Non-obvious insight: Over-sharpening can shorten the life of your knife. It’s better to hone regularly and sharpen only when needed.
Common Mistakes When Using Knife Sharpeners
Avoid these errors to keep your knives in top shape:
- Using too much pressure: This damages the blade and sharpener.
- Ignoring the angle: Consistency is key. Changing angle dulls the edge.
- Failing to clean the sharpener: Metal shavings build up and reduce effectiveness.
- Sharpening dirty knives: Dirt can scratch the blade and clog the sharpener.
- Sharpening serrated knives with regular sharpeners: Serrated knives need special tools.
- Skipping honing: Without regular honing, knives become dull faster.
- Using the wrong sharpener for the knife: Match sharpener to knife material and shape.
Knife Maintenance After Sharpening
Proper maintenance extends the life of your sharp edge. Here’s how:
- Clean immediately: Wash and dry the knife after sharpening.
- Store safely: Use a knife block, sheath, or magnetic strip. Avoid tossing knives in drawers.
- Avoid hard surfaces: Cutting on glass or stone dulls the blade fast. Use wood or plastic boards.
- Oil high-carbon knives: If you own carbon steel knives, wipe with a bit of oil to prevent rust.
- Regular honing: Hone before each use to keep the edge aligned.
Practical tip: If you sharpen your knife but notice it dulls quickly, check your cutting board. Hard surfaces are a hidden cause of dull blades.
Sharpening Specialty Knives
Some knives need special attention:
Serrated Knives
Most pull-through and electric sharpeners don’t work for serrated blades. Use a ceramic rod or a special serrated sharpener. Sharpen only the beveled side. Over-sharpening removes the teeth.
Japanese Knives
Japanese knives are made from harder steel. Use a fine-grit whetstone (1000-6000 grit). Sharpen at a lower angle (12-15 degrees). Avoid aggressive sharpeners.
Pocket And Outdoor Knives
For pocket knives, use small portable stones or field sharpeners. Follow the same angle rules.
Non-obvious insight: Specialty knives often have unique edge shapes. Check the manufacturer’s guidelines before sharpening.
Safety Tips When Sharpening Knives
Knife sharpening is safe if you follow basic precautions:
- Work slowly: Rushing increases risk.
- Use gloves: Protects your hands, especially with stones.
- Keep fingers away: Hold blade from spine, not edge.
- Stable surface: Prevents slips.
- Clean up metal filings: Avoids contamination in food.
Example: If you use a whetstone, always keep your hands dry and steady. Wet hands slip easily.
Sharpening Vs. Honing: What’s The Difference?
Many people confuse sharpening and honing. Here’s how they differ:
- Sharpening removes metal to create a new edge.
- Honing realigns the edge, keeping it straight and sharp.
You need both. Sharpen when the knife is dull; hone regularly to maintain sharpness.
Sharpening Angles Explained
The angle you sharpen at affects the blade’s performance.
- 15 degrees: Sharp but delicate, best for Japanese knives.
- 20 degrees: Durable, suited for Western knives.
- 25 degrees: Used for heavy-duty knives like cleavers.
Non-obvious insight: Lower angles make a sharper edge but are more fragile. Higher angles are less sharp but last longer.
How To Test Knife Sharpness
After sharpening, test the blade. Here are three simple methods:
- Paper test: Try slicing a sheet of paper. A sharp knife cuts cleanly without tearing.
- Tomato test: Slice a tomato without squashing it. A sharp blade glides easily.
- Fingernail test: Gently rest the edge on your fingernail. If it bites, it’s sharp.
Practical tip: Avoid testing sharpness with your finger. It’s easy to cut yourself.
Sharpening Tools Comparison
Here’s a quick overview of sharpening tools and their features:
| Tool | Precision | Speed | Price Range | Ease of Use |
|---|---|---|---|---|
| Manual Pull-Through | Low | High | $10–$40 | Easy |
| Electric Sharpener | Medium | Very High | $50–$200 | Very Easy |
| Whetstone | High | Medium | $20–$100 | Requires Practice |
| Honing Rod | N/A | Very High | $10–$50 | Very Easy |
Environmental Impact Of Knife Sharpeners
Not all sharpeners are eco-friendly. Electric sharpeners use energy and often contain plastic. Whetstones last longer and are often made from natural materials. Manual sharpeners have a small footprint but may need replacement.
Practical tip: If you want a sustainable option, choose a high-quality whetstone. It can last decades and reduces waste.
Troubleshooting Knife Sharpening Problems
Sometimes sharpening doesn’t go as planned. Here are solutions for common issues:
- Blade still dull: Try more passes or check the angle.
- Uneven edge: Use consistent strokes and pressure.
- Scratches: Use a finer grit for polishing.
- Blade chips: Avoid aggressive sharpeners; use a stone for repair.
- Sharpener clogged: Clean regularly to remove metal filings.
Non-obvious insight: If your knife is sharp but still struggles to cut, check for burrs (tiny metal fragments). Remove them by lightly honing the edge.
The Role Of Knife Steel In Sharpening
Different steel types need different sharpeners:
- High-carbon steel: Sharpen easily, but rust quickly. Use stones and oil.
- Stainless steel: Harder to sharpen, but resist rust. Use higher grit stones or electric sharpeners.
- Damascus steel: Requires gentle sharpening and fine stones.
Example: Cheap knives made from soft steel can be sharpened quickly with pull-through sharpeners. Premium knives need more care.
Credit: www.youtube.com
Professional Sharpening Services
If you’re unsure about sharpening, or have expensive knives, consider professional services. They use specialized tools and can fix damaged blades. Prices range from $5–$15 per knife.
Practical tip: For delicate Japanese knives, professional sharpening preserves the blade and avoids mistakes.
Knife Sharpening Myths
There are many myths about knife sharpening. Here are a few:
- Myth: Sharpening is dangerous. Reality: It’s safe if you follow instructions.
- Myth: Honing replaces sharpening. Reality: Honing only aligns, not sharpens.
- Myth: Electric sharpeners ruin knives. Reality: They’re safe for most Western knives if used correctly.
Resources For Learning More
Learning to sharpen knives is a lifelong skill. Reliable resources include instructional videos, chef forums, and expert guides. For deeper information, visit Wikipedia for a comprehensive overview.
Frequently Asked Questions
How Do I Know If My Knife Needs Sharpening?
A knife needs sharpening if it struggles to cut tomatoes, paper, or slips on food. If honing doesn’t restore sharpness, it’s time to sharpen.
Can I Sharpen Serrated Knives With A Regular Sharpener?
No. Serrated knives need special tools like ceramic rods. Regular sharpeners damage the teeth.
How Do I Sharpen A Japanese Knife?
Use a fine-grit whetstone and sharpen at a lower angle (12-15 degrees). Avoid aggressive sharpeners.
Is It Safe To Use Electric Sharpeners?
Yes, for most Western knives. Follow instructions and don’t use on delicate or specialty blades.
How Often Should I Sharpen My Kitchen Knives?
For regular use, sharpen every 2-3 months. Hone before each use to maintain sharpness.
Learning how to use a knife sharpener is simple but requires attention to detail. With the right tools and techniques, you can keep your knives sharp, safe, and ready for any kitchen task. Remember, regular maintenance and correct sharpening save money and improve your cooking. Start today, and enjoy the difference a sharp knife makes.
Credit: www.cookserveenjoy.com

Hello, This is Annie Walker, a 38-year-old blogger, founder, and editor of Cookware Guider from NY, USA. I am a cookware fanatic and passionate cooker. I love to cook with different types of cooking appliances (example: all types of cookware, rice cookers, slow cookers, etc) almost every day in my kitchen. I love to share my experience with my readers in my blog. Also, I enjoy helping people to solve their problems through my website. You can follow me on Twitter & Pinterest. To know details about my blog please check the about us page.