
If you cook at home, you know how important a sharp knife is. A dull blade is slow, dangerous, and frustrating. It can ruin your food and even cause injuries if you slip. Luckily, electric knife sharpeners make sharpening easy and fast.
But using them wrong can damage your knives—or leave them still dull. This guide shows you how to use an electric knife sharpener safely, step by step, so you get the best results every time. You’ll learn what matters, common mistakes to avoid, and tips that even many experienced cooks miss.
By the end, you’ll feel confident sharpening any knife at home.
Understanding Electric Knife Sharpeners
Electric knife sharpeners are popular in kitchens because they save time and effort. Unlike manual sharpeners or sharpening stones, they use spinning abrasive wheels powered by electricity. These wheels grind away dull edges, making your knives sharp again in just a few passes.
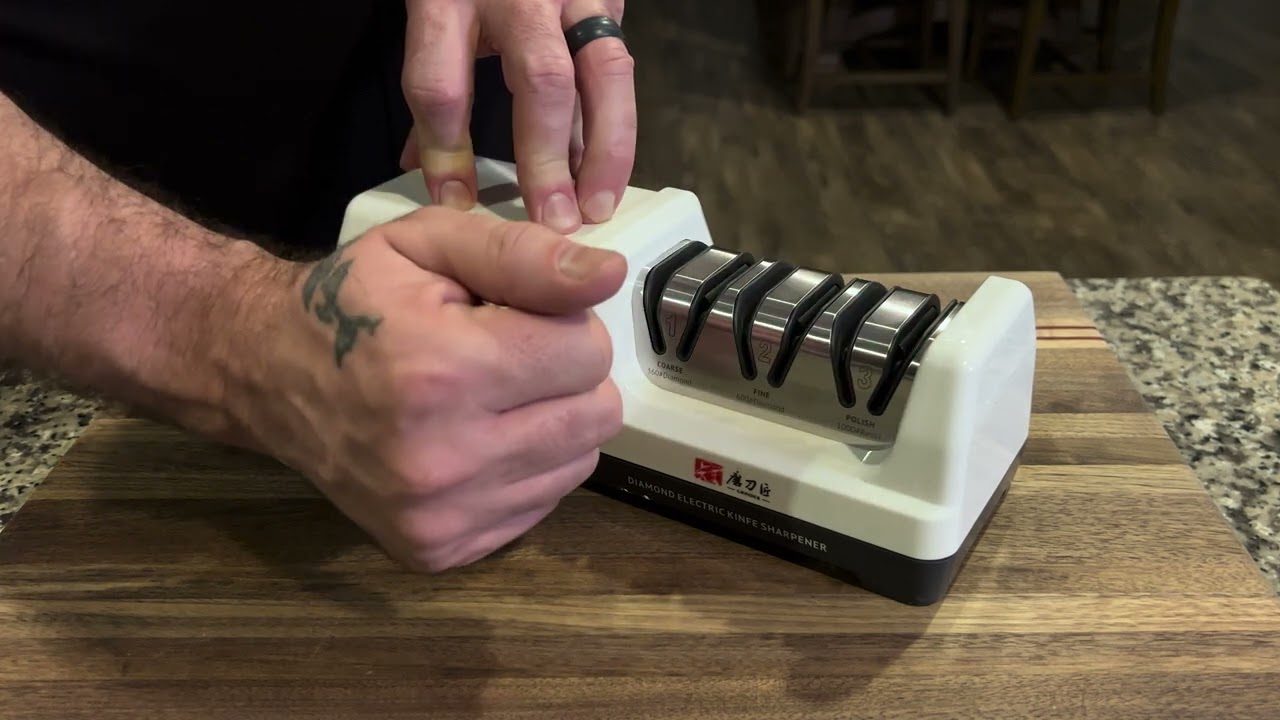
Most modern electric sharpeners have at least two slots—one for coarse sharpening, another for fine honing. Some models add a third slot for polishing or special blades. You simply insert the knife and let the machine do the work.
How Electric Knife Sharpeners Work
Inside, the sharpener uses abrasive disks. When you pull a knife through a slot, these disks spin and remove tiny bits of metal from the blade. The coarse stage fixes dull, damaged edges. The fine stage smooths and sharpens. Some models even include a polishing stage for extra shine.
Types Of Knives You Can Sharpen
Electric sharpeners are best for straight-edged knives—like chef’s knives, paring knives, and utility knives. Some advanced models can handle serrated knives or even Japanese-style blades. Always check your sharpener’s manual first.
Safety Features
Many electric sharpeners have non-slip bases, automatic guides, or overheat protection. These features help you sharpen safely and protect your knives from damage.
Why Choose Electric Over Manual
- Speed: Most knives are sharp in minutes.
- Consistency: Automatic guides keep the angle steady.
- Ease: No skill required. Just follow simple instructions.
Preparing Your Knife And Sharpener
Before you start sharpening, it’s important to prepare both your knife and the sharpener. This ensures you get the best results and avoid mistakes.
Cleaning The Knife
Always clean your knife before sharpening. Food particles, oil, or rust can damage the sharpener’s abrasive wheels or cause uneven sharpening. Wash the blade with warm water and mild soap. Dry it completely with a towel.
Inspecting The Knife
Look for chips, cracks, or deep nicks in the blade. Electric sharpeners can fix minor damage, but big cracks or broken tips need professional repair. If the blade is bent, do not try to sharpen it.
Setting Up The Sharpener
Place the sharpener on a stable, flat surface. Make sure the area is dry and free from clutter. Plug in the sharpener, but do not turn it on yet.
Check the sharpener’s slots and guides. If the model has adjustable angles, set the angle according to your knife type. For most home knives, 20 degrees is standard. Japanese knives may use 15 degrees.
Reading The Manual
Each sharpener is a little different. Take five minutes to read the manual. Look for:
- Slot functions: Which is coarse? Which is fine?
- Blade types: What knives can you sharpen?
- Operating instructions: How to turn on/off, clean, and maintain.
Step-by-step Guide: Using An Electric Knife Sharpener
Now you’re ready to sharpen. Follow these steps for safe and effective sharpening. If your sharpener has three slots, use all; if only two, skip the polishing stage.
1. Plug In And Power On
Check that everything is ready. Plug in the sharpener and switch it on. You should hear the motor running smoothly—no loud rattles or grinding noises.
2. Insert The Knife In The Coarse Slot
Start with the coarse slot. This stage removes dullness and fixes minor damage.
- Hold the knife by the handle.
- Insert the blade tip-first into the slot.
- Keep the blade straight—do not angle or tilt.
3. Pull The Knife Slowly
Pull the knife smoothly through the slot. Go at a steady pace, about 2–3 seconds per pass. Do not rush or force the blade. Let the sharpener’s guides control the angle.
4. Repeat For Each Side
Most sharpeners have slots for both sides of the blade. Repeat the pull for each side, usually 2–3 times per side. If your sharpener uses a single slot for both sides, follow the manual.
5. Move To The Fine Slot
After coarse sharpening, switch to the fine slot. This stage smooths and sharpens the edge.
- Insert the blade as before.
- Pull slowly, matching the pace from earlier.
Repeat 2–3 times per side. For most knives, this is enough. Do not over-sharpen.
6. (optional) Use The Polishing Slot
If your sharpener has a polishing slot, finish with it. This makes the edge shiny and smooth.
- Insert and pull as before.
- Usually, one pass per side is enough.
7. Wipe The Knife
After sharpening, wipe the blade with a damp cloth. This removes metal dust or debris.
8. Test The Edge
Check the sharpness with a simple test:
- Try slicing a sheet of paper. If the knife glides through easily, it’s sharp.
- If not, repeat the fine stage—but only once or twice.
9. Unplug And Clean The Sharpener
Turn off and unplug the sharpener. Clean the slots with a dry brush or cloth to remove metal particles. Some models have removable trays for easy cleaning.
Practical Tips For Best Results
Even if you follow the basic steps, there are extra tips that make a big difference. Many beginners miss these and end up with uneven or damaged blades.
Use Consistent Speed And Pressure
Always pull the knife at the same speed and pressure. If you go too fast, the sharpener can’t work properly. Too much force can damage the edge.
Avoid Over-sharpening
Sharpening too often or for too many passes wears down your blade quickly. Most home cooks only need to sharpen knives once every few months. If you cook daily, sharpen monthly.
Match Knife Type To Sharpener
Not all sharpeners fit all knives. For example, some electric sharpeners cannot handle serrated blades or scissors. Check the manual before trying.
Clean The Sharpener Regularly
Metal dust builds up inside. Clean the slots and trays after each use. If ignored, buildup can clog the wheels and reduce performance.
Keep Your Knife Dry
After sharpening and cleaning, dry the blade fully. Moisture can cause rust, especially on carbon steel knives.
Store Knives Safely
A sharp knife is dangerous if stored carelessly. Use a knife block, magnetic strip, or blade guards. Never toss sharp knives in a drawer.
Common Mistakes And How To Avoid Them
Even with electric sharpeners, mistakes happen. Knowing these will help you avoid problems that ruin blades or reduce sharpness.
1. Using The Wrong Slot
Beginners sometimes use the fine slot first. Always start with coarse unless the knife is already sharp and just needs touch-up.
2. Rushing The Process
Pulling the knife too quickly means the abrasive wheels don’t have time to sharpen properly. Always go slow and steady.
3. Applying Too Much Force
Pressing down hard can damage the blade and the sharpener. Light, even pressure is best.
4. Overusing The Sharpener
If you sharpen every week, you’ll wear down the blade fast. Only sharpen when the knife feels dull.
5. Ignoring The Manual
Each sharpener is different. Skipping the manual leads to mistakes—like using the wrong angle or slot.
6. Not Cleaning The Sharpener
Metal shavings can block the wheels and cause uneven sharpening. Clean after every session.
7. Sharpening Dirty Knives
Food particles scratch the abrasive disks and cause uneven edges. Always clean knives first.
8. Forgetting To Test Sharpness
Testing on paper or food saves you from over-sharpening. Always check before repeating any stage.
Comparing Electric Knife Sharpeners: Key Features
Choosing an electric sharpener is not just about price. It’s about matching features to your needs. Here’s a comparison of common features:
| Feature | Basic Model | Advanced Model |
|---|---|---|
| Number of Slots | 2 (Coarse, Fine) | 3 (Coarse, Fine, Polish) |
| Angle Adjustment | No | Yes |
| Works with Serrated Knives | No | Yes |
| Removable Tray | No | Yes |
| Price Range (USD) | $40–$80 | $100–$250 |
If you only sharpen basic kitchen knives, a simple model is enough. For more variety or professional use, advanced features are worth the investment.
Sharpening Different Knife Types
Electric sharpeners work best with certain knives. But what about specialty blades? Here’s how to handle different types.
Chef’s Knives
These are the most common. Follow the standard steps—coarse, fine, and polish if available.
Paring Knives
Smaller blades need careful handling. Pull slowly and avoid tilting. Use fewer passes.
Serrated Knives
Some advanced sharpeners have special slots for serrated blades. If yours does, follow the manual. If not, do not attempt to sharpen serrated knives—use a professional service.
Japanese Knives
Japanese knives often use a 15-degree angle. Make sure your sharpener supports this. Otherwise, you may damage the blade.
Specialty Knives
Cleavers, boning knives, and fillet knives may require special slots or angles. Check if your sharpener is compatible.
When To Sharpen Vs. Hone
Many people confuse sharpening and honing. Here’s the difference:
- Sharpening: Removes metal to create a new edge.
- Honing: Realigns the edge without removing metal.
Electric sharpeners do both, but some models have a separate honing stage. Use sharpening only when the knife feels dull. Use honing more often to keep the edge aligned.
A simple test: If your knife slides off a tomato skin without cutting, it needs sharpening. If it cuts but feels rough, try honing first.
:max_bytes(150000):strip_icc()/faw-electric-knife-sharpeners-primary-nsimpson-1585-1-323acf8440c647d4995ccb67e4983f89.jpeg)
Credit: www.foodandwine.com
Safety Precautions
Electric sharpeners are safer than manual stones, but you still need to be careful.
Keep Fingers Away From Slots
Never touch the spinning wheels or slots while the sharpener is running.
Use Stable Surfaces
Always place the sharpener on a solid counter. If it wobbles, you could slip and cut yourself.
Unplug After Use
Always unplug the sharpener after finishing. This prevents accidents, especially with children in the home.
Wear Eye Protection
If you’re sharpening many knives, metal dust can fly. Wearing safety glasses protects your eyes.
Clean Up Metal Shavings
Metal dust is sharp and can injure skin or contaminate food. Always clean up after sharpening.
Maintenance And Care For Your Sharpener
A well-maintained sharpener lasts longer and performs better. Here’s how to care for yours.
Regular Cleaning
After each use, wipe down the slots and remove metal debris. Use a soft brush if needed. For models with removable trays, empty and wash them.
Check Abrasive Wheels
Over time, the wheels wear down. If sharpening takes longer or feels uneven, check the wheels. Replace them as directed in the manual.
Store Properly
Store the sharpener in a dry place. Moisture can damage the motor and wheels.
Inspect Power Cord
Look for fraying or damage in the cord. If you see problems, stop using the sharpener until repaired.
Annual Servicing
If you use the sharpener often, consider professional servicing once a year. This keeps the motor and wheels in top shape.
Real-life Example: Sharpening A Chef’s Knife
Let’s walk through a real example. Suppose you have a dull chef’s knife used daily.
- Clean the blade and dry it.
- Set up the sharpener—place it on the counter, plug in, and check settings.
- Start with the coarse slot. Pull the knife through each side, 3 times.
- Move to the fine slot. Repeat for each side, 2 times.
- Finish with the polish slot (if available), once per side.
- Wipe the blade and test on a sheet of paper. The knife slices cleanly.
- Unplug and clean the sharpener.
This process takes about 5 minutes. The knife is sharp enough for any kitchen task. Repeat every 2–3 months for regular home use.
How Electric Sharpeners Compare To Other Methods
Home cooks sometimes ask: Is electric sharpening better than manual? Here’s a quick comparison.
| Method | Ease of Use | Speed | Consistency | Skill Needed |
|---|---|---|---|---|
| Electric Sharpener | Very Easy | Fast | High | Low |
| Manual Stone | Moderate | Slow | Variable | High |
| Pull-Through Manual | Easy | Moderate | Medium | Low |
| Professional Service | Very Easy | Slow (depends) | Very High | None |
Electric sharpeners are the best choice for busy kitchens and beginners. Manual stones are great for experts or traditionalists. Professional services are ideal for expensive knives or deep repairs.

Credit: www.youtube.com
Sharpening Frequency: How Often Is Enough?
How often should you sharpen? It depends on use and knife type.
- Daily cooks: Every 4–6 weeks
- Weekly cooks: Every 3–4 months
- Occasional cooks: Every 6 months
Japanese knives and high-carbon blades may need sharpening more often. Stainless steel knives hold their edge longer.
Honing can be done weekly or even daily, depending on use.
Signs Your Knife Needs Sharpening
Watch for these warning signs:
- The blade slips on food instead of cutting.
- Slicing tomatoes or onions is difficult.
- You need more force to cut.
- Cuts are uneven or ragged.
- The knife feels rough or “gritty.”
If you notice any of these, it’s time to sharpen.
Credit: www.youtube.com
Choosing The Right Electric Sharpener
When buying, consider these factors:
- Knife types: Does it handle straight, serrated, or Japanese knives?
- Slot number: More slots mean more stages.
- Angle adjustment: Essential for Japanese or specialty knives.
- Safety features: Non-slip base, auto guides, overheat protection.
- Ease of cleaning: Removable trays are helpful.
- Price: Balance features and budget.
Avoid buying cheap models without guides or safety. They often damage knives.
If you want more in-depth buying advice, check trusted sources like Consumer Reports.
Advanced Tips: Getting The Perfect Edge
If you want your knives extra sharp, try these advanced tips:
Alternate Passes
For a mirror edge, alternate passes between coarse and fine slots. This smooths out micro-burrs.
Use Light Pressure
Let the machine do the work. Too much force wears down the blade and creates uneven edges.
Finish With A Leather Strop
After sharpening, use a leather strop to polish the edge. This removes leftover burrs and gives a razor finish.
Sharpen One Knife At A Time
Never sharpen multiple knives back-to-back without cleaning the slots. Metal dust from different blades can mix and reduce performance.
Environmental Impact: What You Should Know
Electric sharpeners use power and produce metal dust. To reduce impact:
- Use energy-efficient models.
- Clean up all metal shavings—never wash them down the drain.
- Recycle old abrasive wheels or trays if possible.
Frequently Asked Questions
How Long Does It Take To Sharpen A Knife With An Electric Sharpener?
Usually, it takes 2–5 minutes per knife. Basic sharpening is faster; deep repair can take longer. Most home cooks can sharpen a whole set in 15–30 minutes.
Can I Sharpen Serrated Knives With An Electric Sharpener?
Some advanced models have slots for serrated blades. If yours does, follow the instructions. If not, do not use electric sharpeners for serrated knives; seek professional sharpening.
Is It Safe To Use An Electric Sharpener On Expensive Knives?
Yes, but only if your sharpener has angle adjustment and quality guides. Cheap models can damage expensive blades. Always check compatibility and follow the manual.
How Do I Know If My Knife Is Sharp Enough?
Test by slicing paper or soft food like tomatoes. If the blade cuts cleanly without tearing, it’s sharp. If not, repeat the fine stage once or twice.
How Often Should I Clean My Electric Knife Sharpener?
Clean after every use. Remove metal dust, wipe slots, and empty trays. This keeps the sharpener working well and prevents buildup.
Final Thoughts
A sharp knife makes cooking safer, faster, and more enjoyable. Electric knife sharpeners take the guesswork out of sharpening—they’re easy, fast, and reliable. By preparing your knife, following the right steps, and avoiding common mistakes, you’ll keep your blades sharp for years.
Remember to match your sharpener to your knife types, clean regularly, and test the edge each time. With these tips, your kitchen knives will always be ready for any task.

Hello, This is Annie Walker, a 38-year-old blogger, founder, and editor of Cookware Guider from NY, USA. I am a cookware fanatic and passionate cooker. I love to cook with different types of cooking appliances (example: all types of cookware, rice cookers, slow cookers, etc) almost every day in my kitchen. I love to share my experience with my readers in my blog. Also, I enjoy helping people to solve their problems through my website. You can follow me on Twitter & Pinterest. To know details about my blog please check the about us page.