
Using a Chef’s Choice knife sharpener is a smart way to keep your kitchen knives in top condition. Whether you’re a home cook or a professional chef, sharp knives make food preparation safer, faster, and more enjoyable. Many people struggle with manual sharpening or don’t know how to use electric sharpeners properly.
Chef’s Choice sharpeners solve this problem, but knowing exactly how to use them unlocks their full potential. This guide gives you clear, step-by-step advice, useful tips, and practical examples. By the end, you’ll feel confident sharpening your knives like a pro.
What Makes Chef’s Choice Knife Sharpeners Special?
Chef’s Choice sharpeners are popular for a reason. They use advanced technology, like diamond abrasives, precise guides, and multiple sharpening stages. Unlike basic sharpeners, these devices handle different blade types and angles. You can sharpen straight-edge knives, serrated blades, and even specialty knives. Chef’s Choice models also make sharpening fast and easy, even for beginners.
Features And Benefits
- Multiple Stages: Most models have 2 or 3 stages for sharpening, honing, and polishing.
- Diamond Abrasives: These provide durable, gentle sharpening without damaging blades.
- Angle Guides: The guides ensure you sharpen at the correct angle every time.
- Versatility: You can sharpen European, Asian, and serrated blades.
- Speed: Electric models sharpen quickly, usually in under 2 minutes.
Types Of Chef’s Choice Sharpeners
Chef’s Choice offers a range of sharpeners. Here’s a quick look:
| Model | Type | Stages | Blade Types | Price Range |
|---|---|---|---|---|
| Trizor XV 15 | Electric | 3 | European, Asian, Serrated | $130–$160 |
| Model 130 | Electric | 3 | All knives | $100–$140 |
| Model 120 | Electric | 3 | Chef’s knives, serrated | $100–$120 |
| Hybrid 250 | Hybrid (Electric/Manual) | 3 | Chef’s, Santoku, serrated | $70–$90 |
| Manual 4643 | Manual | 3 | European, Asian | $40–$60 |
Preparing Your Knife And Sharpener
Before you begin sharpening, proper preparation is key. This step is often skipped but makes a big difference.
Cleaning The Knife
Always clean your knife before sharpening. Dirt, grease, or food particles can interfere with the sharpening process. Use warm, soapy water and dry the blade completely.
Inspecting The Blade
Look at the edge for chips, nicks, or rust. Chef’s Choice sharpeners can handle minor damage, but badly damaged blades may need professional repair. If the knife is very blunt, you might need extra sharpening passes.
Setting Up The Sharpener
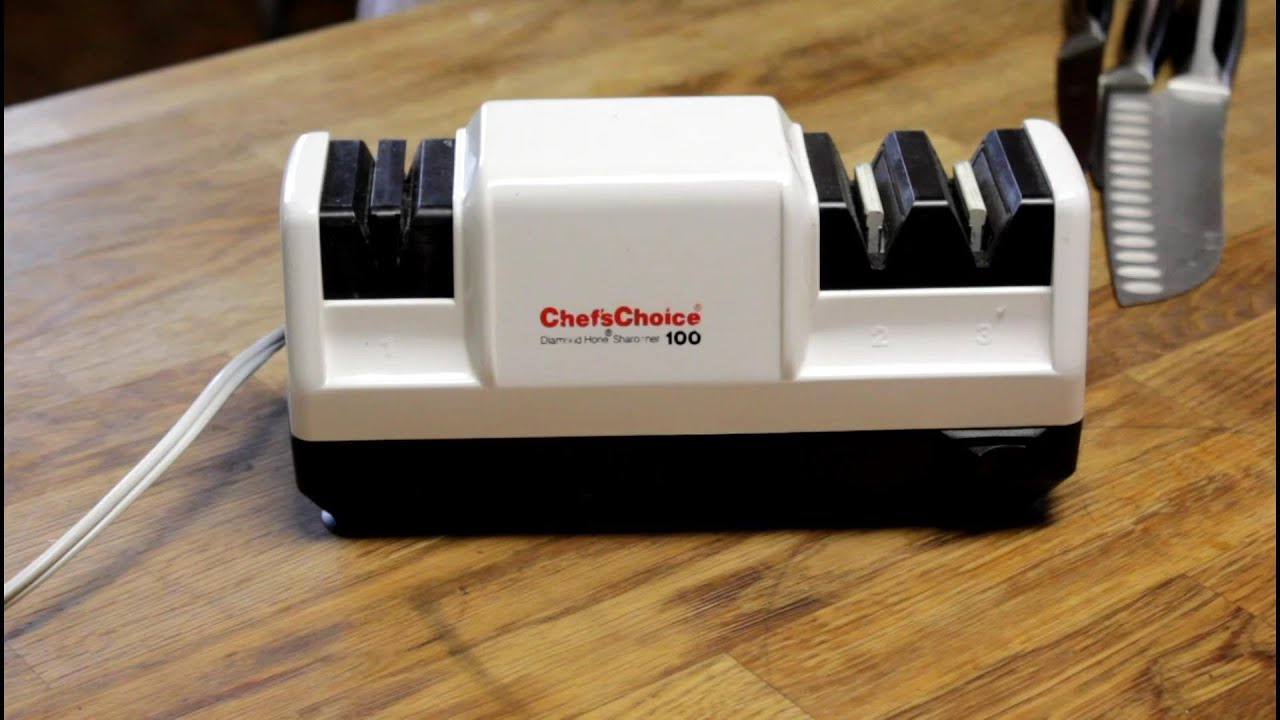
Place the sharpener on a stable, flat surface. If your model is electric, plug it into a safe outlet. For manual models, make sure you have a comfortable grip. Some sharpeners have removable trays for catching metal shavings—empty them before starting.
Credit: www.youtube.com
Understanding Sharpening Stages
Chef’s Choice sharpeners use stages for best results. Knowing what each stage does helps you use the device correctly.
Stage 1: Sharpening
This stage uses diamond abrasives to create a new edge. It removes the most material from the blade. If your knife is very dull, start here.
Stage 2: Honing
Stage 2 refines the edge. It uses finer abrasives and sets the blade angle. This stage is for regular maintenance or after Stage 1.
Stage 3: Polishing
The final stage polishes and smooths the blade. It may use flexible disks or very fine abrasives. For serrated knives, Stage 3 is usually recommended.
Typical Stage Functions By Model
| Stage | Purpose | Material Used | Best For |
|---|---|---|---|
| Stage 1 | Sharpening | Diamond abrasives | Very dull knives |
| Stage 2 | Honing | Fine diamond or ceramic | Regular sharpening |
| Stage 3 | Polishing | Flexible stropping disks | Serrated blades, finishing |
Step-by-step Guide: Using Chef’s Choice Knife Sharpener
Let’s walk through the process. Most electric Chef’s Choice sharpeners work the same way, but always check your specific model’s instructions.
Step 1: Position The Knife
Hold your knife by the handle. Place the heel (the part closest to the handle) into the slot of Stage 1. The sharpener’s guides will help you keep the correct angle.
Step 2: Draw The Blade Through The Slot
Slowly pull the blade through the slot. Move from the heel to the tip in one smooth motion. Do not push down hard; let the machine do the work. Count to 3 as you pull the blade through.
Step 3: Repeat On Both Sides
Chef’s Choice sharpeners have slots for both sides of the blade. Alternate sides—usually left, then right. For most knives, 3–5 passes per side are enough. For very dull knives, you may need 6–10 passes.
Step 4: Move To Stage 2
After Stage 1, place the knife in Stage 2. Repeat the same process: pull the blade slowly through the slot, alternating sides. This stage refines the edge. Use 2–3 passes per side.
Step 5: Finish With Stage 3
Stage 3 polishes the edge. Place the blade in the slot and pull through, 1–2 times per side. For serrated knives, use only Stage 3. The flexible disks sharpen and restore serrations.
Step 6: Wipe And Test The Blade
After sharpening, wipe the blade with a damp cloth to remove metal particles. Test the edge by slicing a piece of paper or a tomato. The knife should cut smoothly, with little pressure.
Step 7: Clean The Sharpener
Chef’s Choice sharpeners collect metal shavings in a tray. Empty and clean this tray regularly. For electric models, unplug before cleaning. Use a dry cloth to wipe the exterior.
Practical Tips For Best Results
Many users overlook small details that improve sharpening. Here are practical tips you won’t find in most manuals.
- Don’t rush: Sharpen slowly and steadily. Fast movements can damage the edge.
- Avoid excessive pressure: Pushing down too hard wears out abrasives and can chip the blade.
- Use the right stage: For regular maintenance, skip Stage 1 and use Stage 2 and 3.
- Sharpen only when needed: Over-sharpening shortens blade life. Sharpen when the knife feels dull.
- Angle awareness: Chef’s Choice guides help, but keep your wrist steady for consistent results.
- Check for burrs: After sharpening, feel for tiny metal burrs. If present, use Stage 3 to remove them.
Non-obvious Insight: Sharpening Asian Vs. European Knives
Asian knives (like Santoku or Nakiri) usually have a 15-degree angle. European knives (like chef’s knives) have a 20-degree angle. Chef’s Choice Trizor XV sharpener converts 20-degree edges to 15-degree, making knives sharper. But keep in mind, thinner edges are sharper but less durable. Choose the angle based on your cooking needs.
Sharpening Different Knife Types
Chef’s Choice sharpeners handle many blade types. Here’s how to use them for various knives.
Straight-edge Knives
These are standard kitchen knives. Use all three stages for sharpening, honing, and polishing.
Serrated Knives
Serrated knives require special care. Only use Stage 3. The flexible disks sharpen the tips and restore the bite. Do not use Stages 1 or 2, as these can damage serrations.
Specialty Knives
Knives like cleavers, boning knives, and Japanese blades may need special attention. For cleavers, use only Stage 1 and 2. For thin Japanese blades, use the model’s Asian slot or angle setting.
Common Mistakes And How To Avoid Them
Many beginners make errors that reduce sharpening quality. Here’s how to avoid them.
- Skipping stages: Using only Stage 1 leaves the blade rough. Always finish with Stage 3.
- Sharpening dirty knives: Dirt scratches the blade and clogs the sharpener.
- Over-sharpening: Frequent sharpening wears out the blade. Sharpen only when dull.
- Wrong angle: Using the wrong angle reduces sharpness and durability. Check your knife type.
- Ignoring maintenance: Not cleaning the sharpener leads to build-up and reduces effectiveness.
Example: Fixing A Dull Chef’s Knife
Suppose your chef’s knife struggles to slice tomatoes. Clean it, inspect the edge, and use Chef’s Choice Trizor XV. Start with Stage 1, 5 passes per side. Move to Stage 2, 3 passes per side. Finish with Stage 3, 2 passes per side.
Test by slicing paper. If the knife cuts smoothly, you’ve restored the edge.
How Often Should You Sharpen Your Knives?
There’s no single answer. Frequency depends on how often you use your knives and what you cut.
General Guidelines
- Home cooks: Sharpen every 2–3 months.
- Professional chefs: Sharpen every 2–4 weeks.
- For heavy use (meat, bone): Sharpen more often.
- For light use (vegetables, fruit): Sharpen less often.
Honing Vs. Sharpening
Honing realigns the blade but does not sharpen. Use a honing steel weekly and the Chef’s Choice sharpener when the knife is dull.
Comparing Chef’s Choice To Other Sharpeners
How does Chef’s Choice stack up against other brands? Let’s compare.
| Brand | Type | Sharpening Stages | Blade Compatibility | Ease of Use | Price Range |
|---|---|---|---|---|---|
| Chef’s Choice | Electric/Manual | 2–3 | European, Asian, Serrated | Easy | $40–$160 |
| Work Sharp | Electric/Manual | 2–3 | All knives, tools | Moderate | $50–$200 |
| Wüsthof | Manual | 2 | European, Asian | Easy | $30–$60 |
| Lansky | Manual | 3–5 | Specialty blades | Harder | $30–$80 |
| Edge Pro | Manual | Multi-stage | All knives | Advanced | $170–$400 |
Chef’s Choice stands out for ease of use, versatility, and speed. Beginners often find Chef’s Choice easier to master compared to brands like Edge Pro or Lansky.
Safety Tips For Using Knife Sharpeners
Sharpeners are safe if used correctly, but mistakes can cause injury. Here are important safety tips.
- Keep fingers clear: Never put your fingers near the sharpening slots.
- Stable surface: Always use the sharpener on a flat, stable table.
- Unplug when cleaning: For electric models, unplug before maintenance.
- Dry hands: Wet hands can slip, causing accidents.
- Supervise children: Keep sharpeners out of reach of kids.
Non-obvious Insight: Sharpening Can Leave Micro-burrs
After sharpening, tiny burrs may remain on the blade edge. These burrs can cut your fingers unexpectedly. Always wipe the blade carefully and test with paper, not your skin.
Maintaining Your Chef’s Choice Knife Sharpener
Proper maintenance keeps your sharpener working for years.
Cleaning
- Remove the metal shavings tray and empty it after each use.
- Wipe the exterior with a dry cloth.
- Do not use water or cleaning sprays on the abrasives.
Storing
- Store the sharpener in a dry place.
- Avoid humid environments, which can cause rust on knife blades.
- For manual models, keep away from dust.
Replacing Parts
Some models allow you to replace abrasive disks. Check the manual for instructions. If you notice reduced sharpening quality, it may be time to replace abrasives.
Troubleshooting Common Problems
Even the best sharpeners can have issues. Here’s how to fix common problems.
Knife Edge Not Getting Sharp
- Check if you’re using the correct stage.
- Make more passes in Stage 1.
- Ensure you’re drawing the blade at a steady speed.
Sharpener Not Working
- For electric models, check the plug and outlet.
- For manual models, check for debris blocking the slots.
Uneven Edge
- Make sure you’re alternating sides equally.
- Keep wrist steady and use the guides.
Real-world Examples
Let’s look at how Chef’s Choice sharpeners improve kitchen performance.
Example 1: Home Cook Restoring Old Knives
A home cook inherited old knives. They were dull and rusty. She cleaned them, then used Chef’s Choice Model 120. After 10 passes in Stage 1, 5 in Stage 2, and 2 in Stage 3, the knives sliced onions effortlessly.
Example 2: Professional Chef Sharpening Daily
A chef uses his knives daily. He sharpens them every week using Trizor XV. He skips Stage 1, using only Stage 2 and 3. This keeps the knives razor sharp with little wear.
Example 3: Fixing A Serrated Bread Knife
A baker noticed her bread knife tearing bread. Using only Stage 3 on Chef’s Choice, she restored the serrations. The knife cut cleanly again.
Upgrading To Chef’s Choice Trizor Xv
The Trizor XV model is famous for converting traditional 20-degree edges to ultra-sharp 15-degree edges. Here’s what that means:
- Sharper edge: Slices more easily.
- Less effort: Cuts tomatoes, onions, and meat with less force.
- Edge durability: Thinner edges are sharper but require more care.
If you want your knives to perform better, upgrading to Trizor XV is a smart choice. But remember, thinner edges are more fragile.
How Chef’s Choice Improves Kitchen Safety
Sharp knives are safer than dull ones. Dull knives slip, causing accidents. Chef’s Choice sharpeners restore the edge, making cutting predictable and reducing risk.
Data: Kitchen Accidents
According to the CDC, over 350,000 knife injuries occur yearly in US kitchens. Most are caused by dull blades slipping. Sharpening reduces this risk by making cuts more controlled.
Chef’s Choice Sharpeners: Value For Money
Chef’s Choice sharpeners are not the cheapest, but their quality saves money over time.
- Less blade wear: Advanced abrasives protect knives.
- Time-saving: Sharpening takes only 2–3 minutes.
- Long-lasting: Chef’s Choice devices last years with proper care.
Example: Cost Comparison
A typical Chef’s Choice electric sharpener costs $120. Sending knives for professional sharpening costs $5–$10 per knife, per time. If you sharpen 5 knives monthly, Chef’s Choice pays for itself in 2–3 years.

Credit: www.youtube.com
Environmental Impact
Chef’s Choice sharpeners help reduce waste. Proper sharpening extends knife life, so you buy fewer knives and throw away less metal. Electric models use little energy. Manual models use none.
Advanced Tips For Experienced Users
If you’re comfortable with sharpening basics, try these advanced tips.
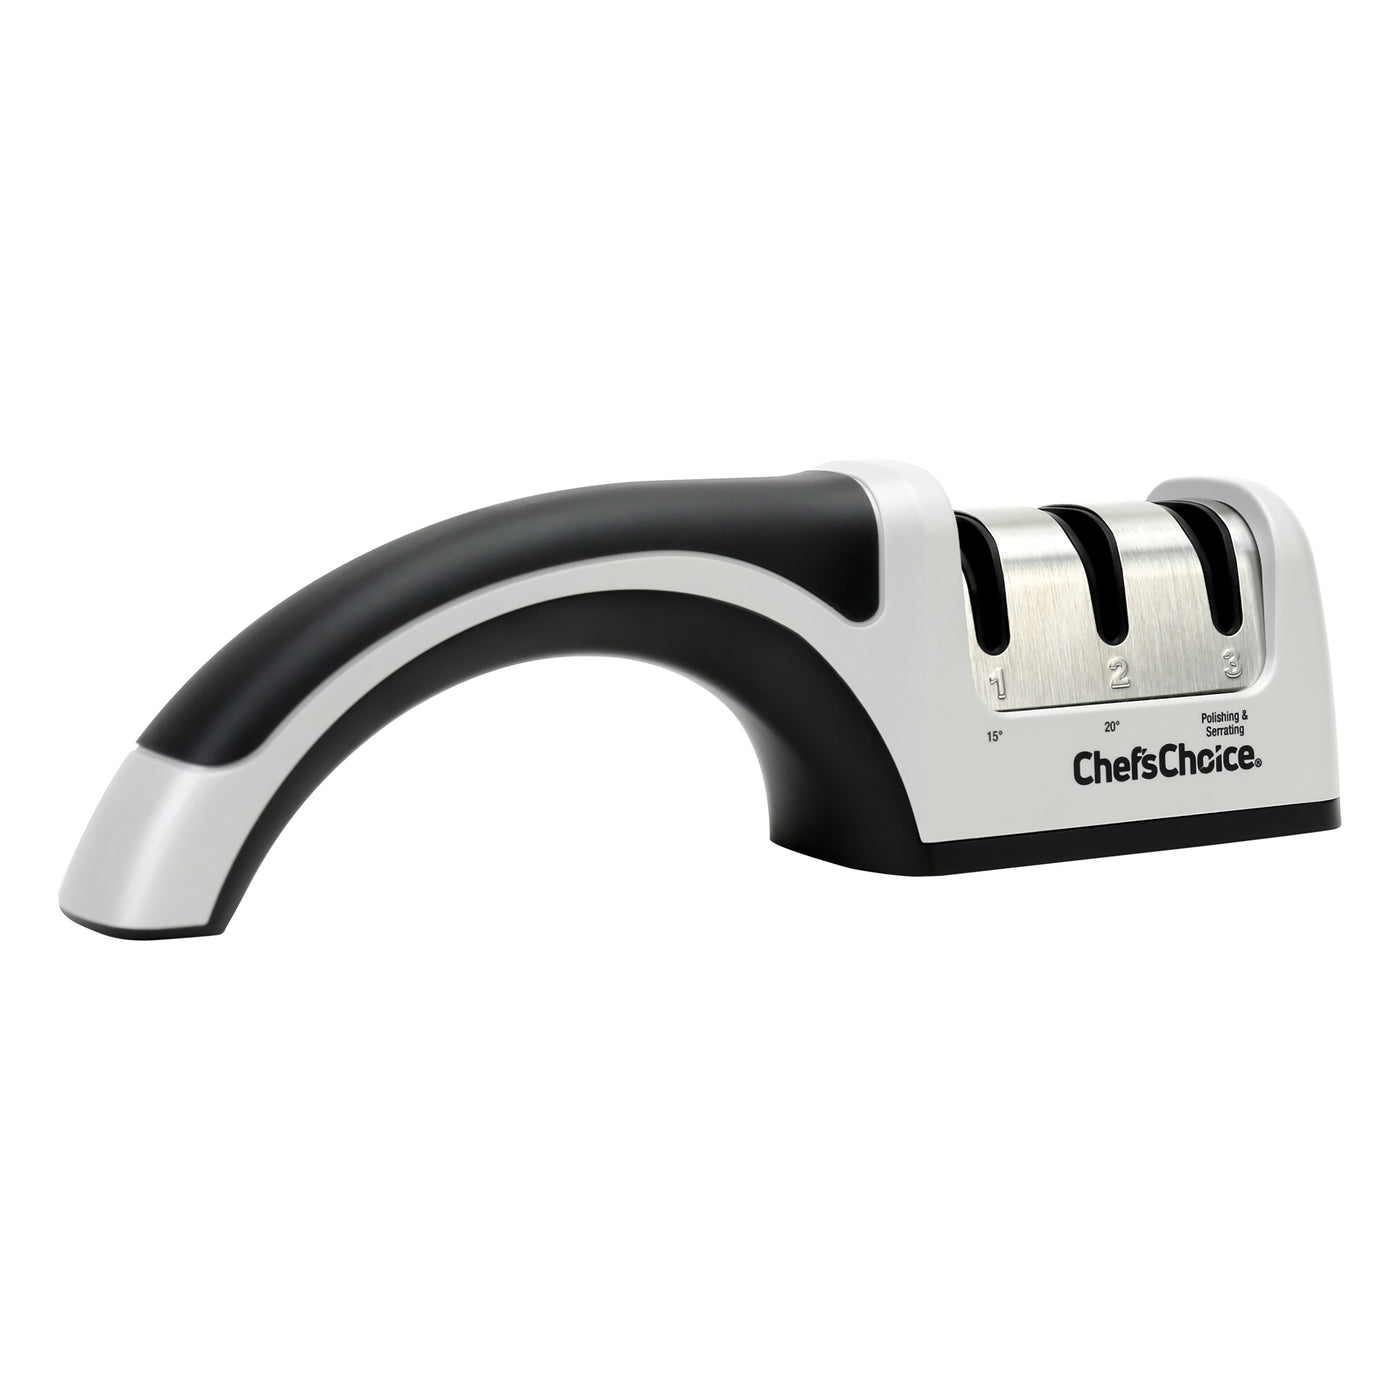
- Custom angles: Some Chef’s Choice models let you adjust sharpening angles. Use this for specialty blades.
- Sharpening frequency: Track how often you sharpen. Over-sharpening reduces blade life.
- Polishing for show knives: Use Stage 3 for a mirror finish. Show knives look impressive with a polished edge.
Credit: chefschoice.com
Getting The Most From Your Chef’s Choice Sharpener
To maximize results:
- Always read the manual for your model.
- Use the sharpener for intended blade types.
- Clean and store the device properly.
- Sharpen only clean, dry knives.
- Use slow, steady motions.
If you want more information on knife sharpening techniques, visit the official Chef’s Choice site: Chef’s Choice.
Frequently Asked Questions
How Do I Know When My Knife Needs Sharpening?
If your knife struggles to cut tomatoes, paper, or slips on food, it’s dull. You can also check by slicing paper—if the blade tears instead of slices, it needs sharpening.
Can Chef’s Choice Sharpeners Damage My Knives?
No, if you follow instructions. Avoid excessive pressure and do not over-sharpen. Chef’s Choice guides keep the angle correct, preventing blade damage.
Can I Use Chef’s Choice Sharpener For Scissors Or Other Tools?
Most Chef’s Choice models are designed for kitchen knives. Some models have slots for scissors or specialty tools. Check your manual for compatibility.
How Long Does Sharpening Take With Chef’s Choice?
Sharpening usually takes 2–3 minutes per knife. Very dull knives may take longer. Regular maintenance is faster—less than 2 minutes.
What Is The Difference Between Honing And Sharpening?
Sharpening removes metal to create a new edge. Honing realigns the edge without removing metal. Use honing steel for weekly maintenance and Chef’s Choice sharpener for true sharpening.
Using a Chef’s Choice knife sharpener transforms your kitchen experience. Sharp knives make cooking safer and easier. With the right technique, you can keep your blades in perfect condition for years. Chef’s Choice sharpeners combine advanced technology with user-friendly features.
Whether you have European, Asian, or serrated knives, you’ll get professional results at home. Remember, preparation and proper use are key. Follow these steps, and your knives will always be ready for any culinary challenge.

Hello, This is Annie Walker, a 38-year-old blogger, founder, and editor of Cookware Guider from NY, USA. I am a cookware fanatic and passionate cooker. I love to cook with different types of cooking appliances (example: all types of cookware, rice cookers, slow cookers, etc) almost every day in my kitchen. I love to share my experience with my readers in my blog. Also, I enjoy helping people to solve their problems through my website. You can follow me on Twitter & Pinterest. To know details about my blog please check the about us page.