
If you have ever tried to cut tomatoes with a dull knife, you know how frustrating it can be. A sharp knife is not only safer, but it also makes cooking faster and easier. That’s why many home cooks and professionals use the Work Sharp knife sharpener. This tool helps you keep your blades in top condition. But using it correctly requires some care and practice. In this guide, you will learn step-by-step how to use a Work Sharp knife sharpener, discover helpful tips, and avoid common mistakes. Whether you’re new to sharpening or just want better results, this article will show you everything you need to know.
What Is The Work Sharp Knife Sharpener?
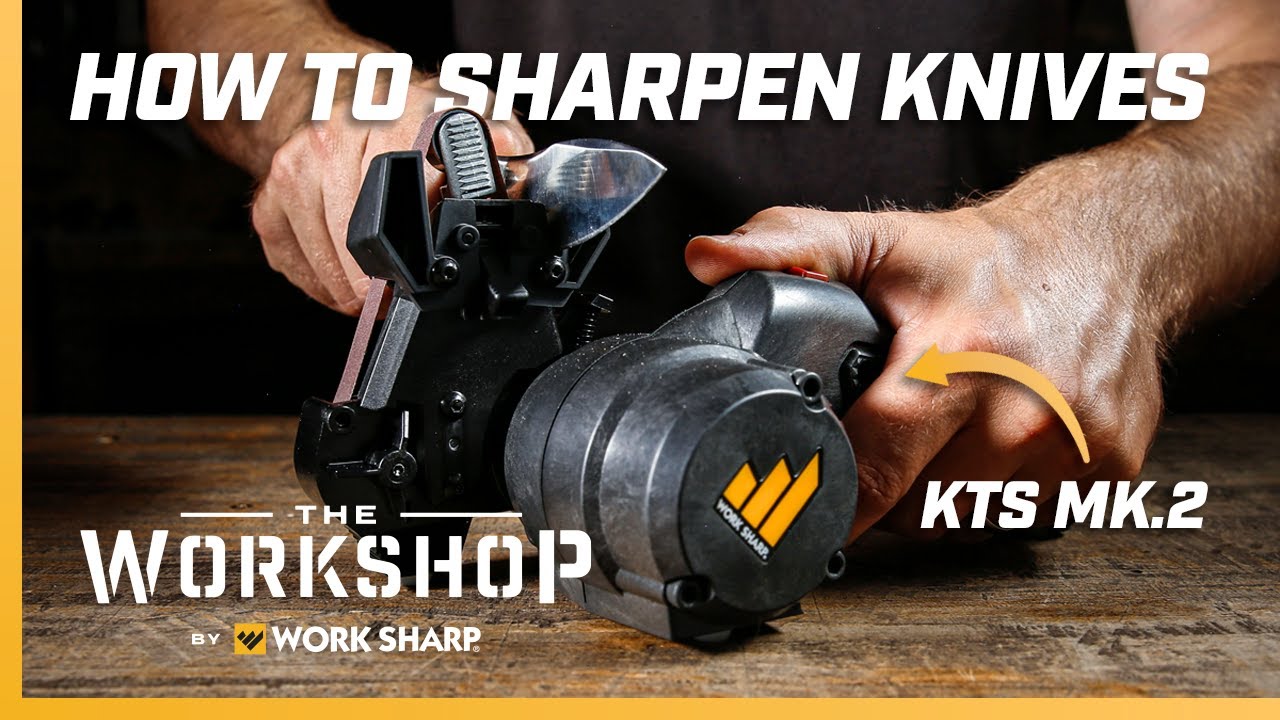
The Work Sharp knife sharpener is a popular sharpening system made in the USA. It uses motorized belts to sharpen knives quickly and accurately. Unlike traditional sharpening stones, Work Sharp makes the process easier and more consistent. There are several models, but the most common are the Work Sharp Knife & Tool Sharpener (Ken Onion Edition) and the Work Sharp Combo Knife Sharpener.
The sharpener comes with different abrasive belts, guides for setting angles, and a motor that spins the belts. You pull your knife across the belt, and it sharpens the blade. Many people prefer Work Sharp because it works for almost any knife, from kitchen blades to hunting knives and even scissors.
Key Features
- Motorized belt system
- Adjustable sharpening angle guides
- Multiple abrasive belts (coarse, medium, fine)
- Compact size
- Suitable for knives, scissors, and tools
Why Choose Work Sharp?
Work Sharp’s main advantage is speed and consistency. You can sharpen most blades in just a few minutes. The angle guides help you avoid mistakes, and the belts are easy to change. Many users report that their knives become sharper than factory-new after using Work Sharp. Also, it’s safer because you’re less likely to slip compared to hand sharpening.
Getting Started: Setting Up Your Work Sharp Knife Sharpener
Before you start sharpening, you need to set up your Work Sharp. Let’s walk through the basics to ensure you get the best results.
Unboxing And Assembly
When you open the box, you’ll find the sharpener, belts, angle guides, and instructions. Assembly is simple:
- Attach the angle guides to the sharpener.
- Insert the abrasive belt (choose the right grit for your blade).
- Plug the sharpener into a power outlet.
- Make sure the belt spins smoothly and is correctly tensioned.
Choosing The Right Belt
Work Sharp includes belts with different abrasives:
- Coarse belt (usually 80 grit): For damaged or very dull knives.
- Medium belt (220 grit): For regular sharpening.
- Fine belt (6000 grit): For finishing and polishing.
For most kitchen knives, start with the medium belt unless the blade is very dull or chipped.
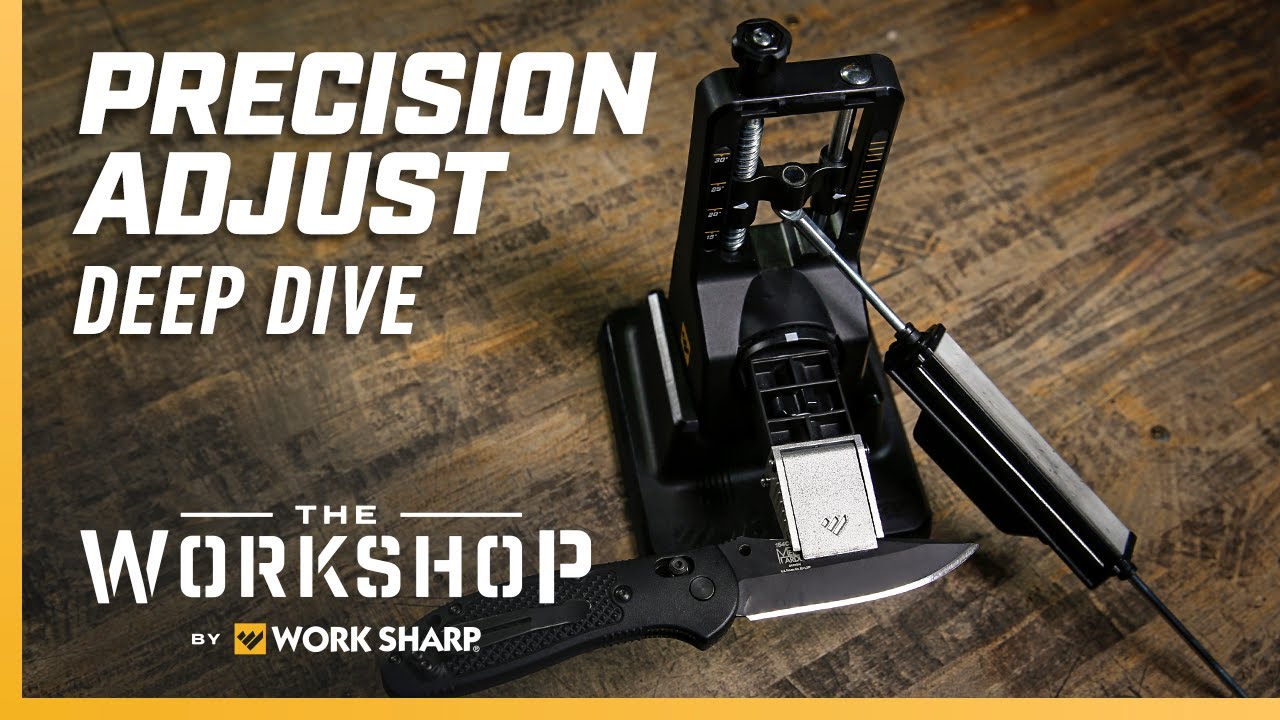
Setting The Sharpening Angle
The angle guide is a key feature. Different knives require different angles:
- Kitchen knives: 15°–20°
- Hunting knives: 20°–25°
- Pocket knives: 18°–22°
Work Sharp models allow you to adjust the angle, usually between 15° and 30°. Set the guide to match your knife type. Using the correct angle is critical for getting a sharp edge and preventing damage.

Credit: worksharptools.com
Step-by-step: How To Use Work Sharp Knife Sharpener
Now you’re ready to sharpen. Follow these steps for the best results:
Step 1: Inspect Your Knife
Check your knife’s condition. Look for chips, dents, or extreme dullness. If the blade is damaged, start with the coarse belt. For regular maintenance, use the medium or fine belt.
Step 2: Install The Correct Belt
Slide the belt onto the sharpener’s rollers. Make sure it sits flat and tight. The belt should not wobble or slip.
Step 3: Set The Angle Guide
Adjust the angle guide to match your knife’s edge. For most kitchen knives, 17°–20° is ideal.
Step 4: Turn On The Sharpener
Plug in the sharpener and switch it on. The belt will start spinning. Hold the sharpener on a stable surface.
Step 5: Sharpen The First Side
Place the knife in the angle guide. Start at the heel (closest to the handle) and slowly pull the blade through the guide, following the shape of the blade. Apply light, steady pressure. The belt will remove metal and sharpen the edge.
- For most knives, 3–5 passes per side are enough.
- If the blade is very dull, make 6–8 passes.
Step 6: Sharpen The Other Side
Flip the knife over and repeat the process on the other side. Try to match the number of passes and pressure for both sides.
Step 7: Check For Burrs
A burr is a tiny lip of metal that forms on the edge after sharpening. You can feel it by running your finger (carefully!) Along the blade. If you feel a burr, it means you’ve sharpened enough.
Step 8: Switch To Finer Belt
Replace the belt with a finer grit for polishing. Repeat the sharpening passes as before. This step gives your knife a smooth, razor-sharp edge.
Step 9: Final Pass And Testing
After sharpening both sides with the fine belt, wipe the blade clean. Test the sharpness by slicing paper or cutting a tomato. If the knife glides easily, you’re done.
Comparison: Work Sharp Vs. Traditional Sharpeners
Understanding how Work Sharp stacks up against other sharpening tools can help you make the best choice. Here’s a side-by-side look:
| Feature | Work Sharp | Sharpening Stones | Manual Pull-Through Sharpeners |
|---|---|---|---|
| Speed | Fast (2–5 minutes) | Slow (10–20 minutes) | Medium (5–10 minutes) |
| Consistency | Very consistent | Depends on skill | Moderate |
| Ease of Use | Simple, guided | Harder, requires technique | Easy |
| Blade Types | All types | All types | Limited |
| Maintenance | Change belts | Flatten stones | Replace rods |
| Safety | High | Medium | High |
Work Sharp is ideal for people who want fast, reliable sharpening without a steep learning curve. Stones give you more control, but require skill. Pull-through sharpeners are quick, but can damage blades over time.
Practical Tips For Sharpening Success
Sharpening looks easy, but many beginners miss important steps. Here are some practical tips to get the best results:
Don’t Press Too Hard
Many people think pressing harder makes the knife sharper. Actually, too much pressure can damage the belt and blade. Use gentle, steady pressure.
Match The Passes
Always make the same number of passes on each side. Uneven sharpening creates a lopsided edge.
Clean The Blade Often
Metal shavings build up on the blade. Wipe the knife after each sharpening stage. This prevents scratching and helps you see the edge clearly.
Change Belts Regularly
Belts wear out after repeated use. A dull belt won’t sharpen well. Replace belts when they look worn or lose their abrasive texture.
Use The Right Angle
If you’re not sure of your knife’s factory angle, check the manufacturer’s website or use 17°–20° as a safe default for most kitchen knives.
Sharpening Different Types Of Knives
Work Sharp is versatile, but not every knife needs the same process. Here’s how to sharpen common types:
Kitchen Knives
Set the angle guide to 17°–20°. Use the medium belt for regular maintenance and the fine belt for polishing. Most kitchen knives need only light pressure.
Hunting And Outdoor Knives
These blades are thicker and require a steeper angle (20°–25°). Start with the coarse belt if the blade is very dull or has nicks.
Serrated Knives
Work Sharp can sharpen serrated blades, but only the flat part. Use the fine belt and angle guide. Serrated edges need less sharpening.
Scissors And Tools
Some Work Sharp models come with guides for scissors and garden tools. Follow the instructions for each tool, usually using the coarse belt first.
Common Mistakes And How To Avoid Them
Even with a guided sharpener, mistakes happen. Here are common problems and how to fix them:
- Over-sharpening: Too many passes can thin the blade or change its shape. Stop when you feel a burr or the edge cuts cleanly.
- Wrong angle: Sharpening at the wrong angle makes the blade dull faster. Always use the angle guide.
- Using a worn belt: Old belts don’t sharpen well. Check and replace as needed.
- Skipping fine grit: Not finishing with a fine belt leaves the edge rough. Always polish for a smooth, sharp blade.
- Pulling too fast: Rushing causes uneven sharpening. Move slowly and steadily.
Maintaining Your Work Sharp Knife Sharpener
Keeping your sharpener in good condition ensures it works well for years. Here’s how to care for it:
Cleaning
After each use, wipe down the sharpener and belts. Remove any metal dust or debris. Use a soft cloth—never water.
Storing Belts
Store belts in a dry place. Keep them flat and away from heat. Moisture can damage the abrasives.
Motor Care
Don’t overload the motor. If the sharpener gets hot, let it cool down. Avoid running it for more than 10 minutes at a time.
Replacing Parts
Belts, guides, and rollers wear out over time. Check for signs of wear and order replacements from the manufacturer.
Safety Tips For Sharpening
Sharpening is safe if you follow basic guidelines:
- Always keep fingers away from the moving belt.
- Wear safety glasses if sharpening large blades or tools.
- Use a stable surface—don’t sharpen on an uneven table.
- Unplug the sharpener when changing belts or cleaning.
These steps help you avoid injury and keep your sharpener working smoothly.
How Often Should You Sharpen Knives?
The frequency depends on how often you use your knives and what you cut. Most home cooks should sharpen kitchen knives every 2–3 months. If you cook daily or use knives for tough tasks, sharpen more often.
Professional chefs may sharpen every week. Outdoor knives and tools should be sharpened before and after big tasks, like camping or hunting.
Troubleshooting: Problems And Solutions
Sometimes things go wrong. Here’s how to fix common sharpening issues:
Knife Won’t Get Sharp
- Check if the belt is worn.
- Try a lower angle.
- Make sure you are using the correct number of passes.
Uneven Edge
- Match the passes and pressure on both sides.
- Slow down and use the angle guide.
Blade Gets Hot
- Use lighter pressure and fewer passes.
- Let the sharpener rest between sessions.
Belt Slips Off
- Make sure the belt is installed correctly.
- Check for worn rollers and replace if needed.
Sharpening Stats And Facts
Here are some data points that show how effective Work Sharp can be:
- Sharpening time: Most knives can be sharpened in under 5 minutes.
- Edge sharpness: Tests show Work Sharp can achieve a cutting edge as sharp as 120–200 grams on a sharpness tester (factory-new knives often score 250–400 grams).
- Belt life: Each belt can sharpen about 30–50 knives before needing replacement, depending on blade type and condition.
- Angle accuracy: Work Sharp’s guides hold angles within ±1°, making it one of the most consistent consumer sharpeners.
These numbers come from independent tests and user reviews. For more technical data, you can check the Work Sharp official website.
Comparing Work Sharp Models
Work Sharp offers several models. Here’s a quick comparison to help you choose:
| Model | Sharpening Angles | Belt Types | Suitable For | Price Range |
|---|---|---|---|---|
| Ken Onion Edition | 15°–30° adjustable | Coarse, Medium, Fine | Knives, tools, scissors | $130–$170 |
| Combo Knife Sharpener | Fixed 20° | Medium, Fine | Kitchen knives, pocket knives | $50–$70 |
| Knife & Tool Sharpener | Fixed 20°, 25° guides | Coarse, Medium, Fine | Knives, tools | $80–$120 |
If you want flexibility for many blade types, the Ken Onion Edition is best. For simple kitchen sharpening, the Combo Knife Sharpener is easier and more affordable.
Real-world Examples: How Work Sharp Makes A Difference
Let’s look at some practical cases:
- Home cook: Sarah, who cooks daily, found her knives were dull after six months. Using Work Sharp, she restored her chef’s knife in four minutes. She noticed her prep time dropped by 30%, and slicing tomatoes was effortless.
- Outdoor enthusiast: Mike takes hunting trips. He used Work Sharp to sharpen his survival knife before and after a trip. The blade stayed sharp even after heavy use, saving him from buying a new knife.
- Professional chef: Chef Luis uses Work Sharp weekly for his restaurant knives. He says the sharpener keeps his blades “better than new,” and he spends less time sharpening compared to stones.
These examples show that Work Sharp is not just for hobbyists—it’s used by people who rely on sharp knives daily.
Advanced Sharpening: Getting A Mirror Edge
Some users want more than just a sharp blade—they want a mirror edge. This is an ultra-smooth, shiny finish. Work Sharp can achieve this if you use the fine belt and finish with a stropping belt.
Steps For A Mirror Edge
- Sharpen with medium belt as usual.
- Switch to fine belt and make 4–5 slow passes per side.
- Use a leather or stropping belt (if available) for final polishing.
- Wipe blade and check reflection. The edge should shine like a mirror.
A mirror edge is more than cosmetic—it reduces friction and improves cutting performance. However, it’s not necessary for most kitchen tasks.
Non-obvious Insights For Beginners
Many beginners overlook these points:
- Sharpening is not just about the edge. The spine and handle matter, too. Clean and maintain these parts for comfort and safety.
- Factory edges are often inconsistent. Sharpening with Work Sharp can give you a better edge than new knives.
- Don’t forget maintenance sharpening. Even a sharp knife benefits from quick touch-ups every few weeks, not just when it’s dull.
Environmental Impact: Using And Disposing Belts
Work Sharp belts are made from synthetic abrasives. They last longer than most, but eventually wear out. Most belts are not recyclable, so dispose of them as regular trash. The sharpener itself is energy-efficient—using less than 50 watts per session.
If you’re concerned about waste, use belts until they are truly worn out. Some users repurpose old belts for rough sharpening or tool maintenance.
Accessories And Upgrades
Work Sharp offers accessories to improve your sharpening experience:
- Extra belt kits: For finer or specialty sharpening.
- Stropping belts: For mirror finish.
- Angle guides: For different blade types.
- Storage cases: Protect your sharpener and belts.
Upgrades can help if you sharpen many knives or want professional results.
Credit: www.youtube.com
Frequently Asked Questions
How Long Does It Take To Sharpen A Knife With Work Sharp?
Most knives can be sharpened in 2 to 5 minutes. Very dull or damaged blades may take longer, especially if you start with the coarse belt.
Can Work Sharp Sharpen Serrated Knives?
Yes, but only the flat parts of the serrated blade. It won’t sharpen the teeth themselves. For full restoration, you need a specialty sharpener.
How Often Should I Replace The Abrasive Belts?
Replace belts after 30–50 sharpenings, or when you notice they look smooth or lose their grit. Sharp belts ensure good results.
Is Work Sharp Safe For Expensive Knives?
Absolutely. The angle guides and gentle motor action protect blades. Many professionals use Work Sharp for high-end knives.
What’s The Difference Between Work Sharp Models?
Models differ in angle adjustment, belt types, and price. The Ken Onion Edition offers adjustable angles and more belt options; Combo Knife Sharpener is simpler and cheaper.
Final Thoughts
A sharp knife changes everything in the kitchen, workshop, or outdoors. The Work Sharp knife sharpener gives you a fast, easy way to keep blades razor-sharp. By following the steps in this guide—setting the right angle, choosing the correct belt, and using steady passes—you can achieve professional results at home. Remember to maintain your sharpener, avoid common mistakes, and sharpen regularly. Whether you are a beginner or expert, Work Sharp makes knife sharpening simple and reliable. Take care of your knives, and they will take care of you.
Credit: www.youtube.com

Hello, This is Annie Walker, a 38-year-old blogger, founder, and editor of Cookware Guider from NY, USA. I am a cookware fanatic and passionate cooker. I love to cook with different types of cooking appliances (example: all types of cookware, rice cookers, slow cookers, etc) almost every day in my kitchen. I love to share my experience with my readers in my blog. Also, I enjoy helping people to solve their problems through my website. You can follow me on Twitter & Pinterest. To know details about my blog please check the about us page.