
You can create a simple, sweet treat by whisking one gallon of clean, fresh snow with one cup of milk, half a cup of sugar, and one teaspoon of vanilla extract until it reaches a thick, creamy consistency. How to make snow ice cream is a process that relies on gathering snow from an area that hasn’t been contaminated by dirt, salt, or animal activity. This recipe assumes the use of light, fluffy powder; if the snow is icy or heavy, you’ll need to adjust the liquid ratios.
Who should make snow ice cream
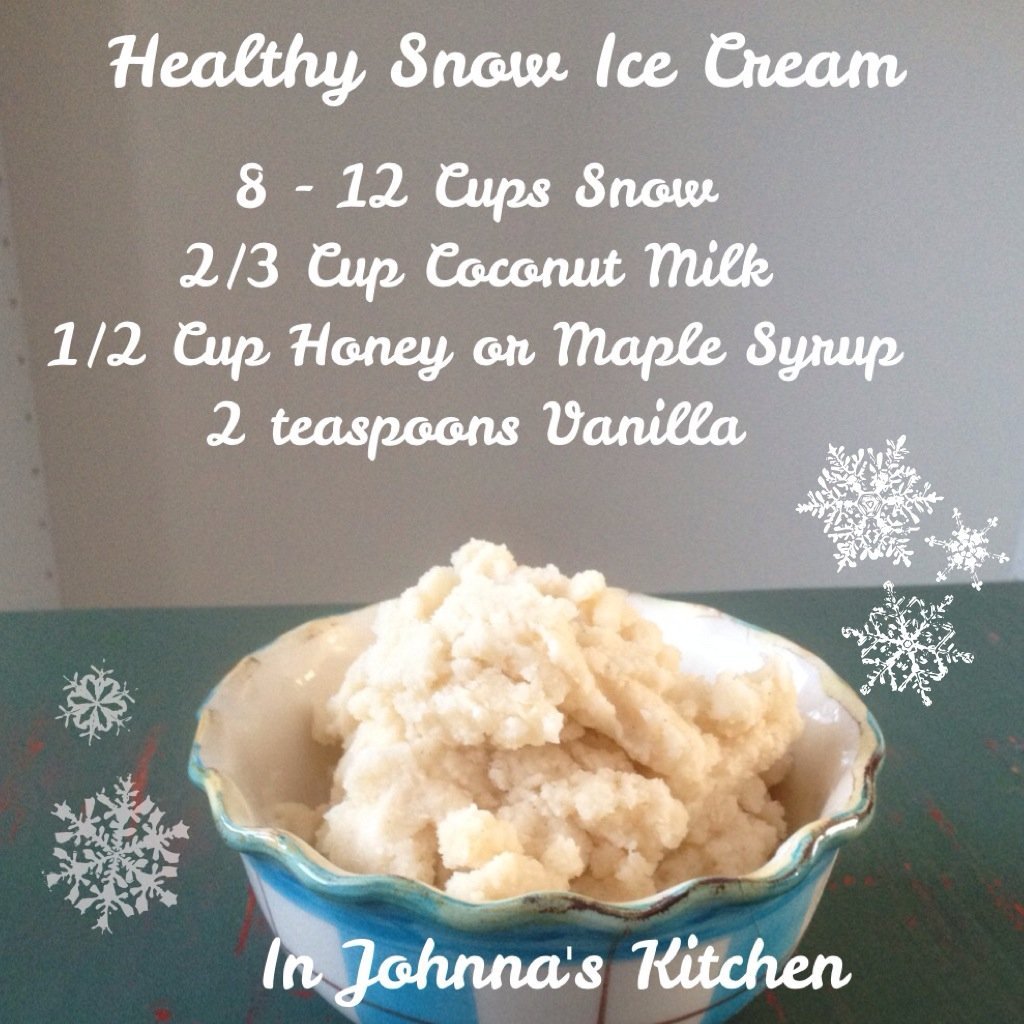
This guide serves home cooks who live in regions with frequent winter snowfall and want a quick, classic activity to share with their families. It’s built for people who already have basic pantry staples like sugar, milk, and vanilla, and who are comfortable identifying clean, undisturbed snow in their own yard. If you’re looking for a complex culinary project or a formal dessert, this simple mixture might not meet your expectations.
The page assumes you have access to a clean outdoor space where you can collect fresh snow that hasn’t touched a roof or a driveway. It assumes you understand that snow acts as a porous material that can absorb particles from the air or ground. If you’re uncertain about the air quality in your area or if there has been recent traffic, pollution, or chemical treatment of the ground in your vicinity, you should avoid consuming the snow. This content is for those who prioritize safety and simplicity over complex techniques. If you’re searching for a high-end gourmet recipe that requires specialized dairy equipment or industrial thickening agents, you’re better off looking for a professional-grade ice cream guide.
Factors that change the outcome
The most important factor is the density of the snow, which determines how much liquid you need to add. Light, dry, powder-like snow absorbs liquid quickly, while heavy, wet snow contains more water and can make the mixture runny. You can test your snow by packing a small amount; if it feels like ice, use less milk.
Temperature is the second factor, as it dictates how fast the product melts. If your kitchen is warmer than 70°F, the ice cream will turn into a sweet milk drink within minutes. Always prepare this in a chilled bowl that has been kept in the freezer for at least one hour beforehand.
The quality of your dairy base also changes the final texture significantly. Using whole milk or heavy cream creates a richer, more scoopable result than skim milk, which can result in a thinner, icy consistency. Most people make the mistake of adding all the milk at once; this often leads to a liquid soup that won’t set. Always start with half the amount of milk and add more only if the mixture remains too dry to stir.
How To Make Snow Ice Cream: Steps for Preparation
- Place a large stainless steel or glass mixing bowl in your freezer for at least 60 minutes before you begin.
- Go to an area with fresh, undisturbed snow and collect one gallon of the top layer, avoiding any snow that touches the ground or has visible debris.
- In a separate small pitcher, combine one cup of whole milk, half a cup of granulated sugar, and one teaspoon of vanilla extract, stirring until the sugar is fully dissolved.
- Remove your chilled bowl from the freezer and immediately add the collected snow.
- Slowly pour half of your milk mixture over the snow while folding it in with a large wooden spoon or silicone spatula.
- Continue to fold the mixture gently; you’re looking for a thick, scoopable texture similar to soft-serve ice cream.
- If the mixture is still too powdery, add the remaining milk one tablespoon at a time until the desired consistency is reached.
- Serve the mixture immediately in chilled bowls, as the structure will break down rapidly at room temperature.
Work as fast as possible to achieve a good result. If you take too long, the ambient heat of the room will turn your treat into a sweet, watery slush.
Variations at a glance
| Situation | Action | Effort | Watch for |
|---|---|---|---|
| Using cream | Use heavy cream | Moderate | High fat content |
| Dairy-free | Use almond milk | Low | Thin consistency |
| Extra flavor | Add cocoa powder | Low | Clumping issues |
| Quick set | Chill bowl longer | High | Frostbite risk |
| Firm texture | Add more snow | Low | Icy texture |
When using heavy cream, aim for at least 36% milkfat. Anything lower will fail to hold a stiff peak, leaving your dessert soupy regardless of how long you whip it. If the mixture remains liquid after five minutes of agitation, stop immediately. You have likely reached the butter stage, and further effort will only separate the solids from the whey.
Almond milk is the standard dairy-free substitute, but it lacks the protein structure of cow’s milk. Because it’s mostly water, it won’t trap air bubbles effectively. To compensate, add a half-teaspoon of xanthan gum to your base before chilling. This provides the necessary viscosity to prevent a watery mouthfeel.
Cocoa powder is hydrophobic, meaning it resists blending. Don’t dump it directly into the cold base, or you’ll face stubborn, dry clumps. Instead, whisk the powder into a tablespoon of warm water or melted fat first to create a smooth slurry. Incorporate this paste slowly to ensure a uniform, silky distribution.
This creates large, jagged ice crystals that ruin the texture.
Finally, adding more snow is a quick fix for firmness, but it dilutes flavor. If you find your texture is too soft, add snow in quarter-cup increments. If you exceed one cup of snow per pint of base, the result will be icy rather than creamy. Always taste after each addition to ensure you haven’t muted your base ingredients.
Ensuring a quality result
Preparation and cleanliness
Experienced makers always prioritize the source of their snow. They avoid areas near roads, walkways, or structures where runoff can collect. They also prefer snow that has fallen within the last few hours rather than snow that has been sitting on the ground for days, as older snow tends to collect more dust and pollutants from the air.
Mixing technique
The order of operations is vital for a smooth texture. By dissolving the sugar into the milk before it touches the snow, you ensure the grit of the sugar doesn’t ruin the mouthfeel. Never use a high-speed electric mixer, as the friction will melt the snow instantly and ruin the structure of your dessert.
Troubleshooting common issues
| What you notice | What it usually means | What to do first | How to stop it |
|---|---|---|---|
| Mixture is runny | Too much milk | Add more snow | Measure milk slowly |
| Gritty texture | Sugar not dissolved | Stir milk longer | Dissolve sugar fully |
| Melts instantly | Room is too hot | Move to garage | Pre-chill bowls |
| Tastes off | Old snow used | Discard batch | Use fresh fall |
| Too airy | Over-mixed | Let it rest | Fold, don’t whip |
If your mixture remains runny after adding extra snow, check the temperature of your milk. If the milk is above 40°F, it will liquify the base faster than you can stir it. Always use milk pulled directly from the back of the refrigerator.
Gritty texture often stems from using granulated sugar instead of superfine or powdered varieties. If you must use granulated, dissolve it in the milk separately before adding the snow. If you see crystals at the bottom of the bowl, you haven’t stirred long enough.
Melting issues are rarely about the snow itself. If your bowls are room temperature, they act as heat sinks. Place your serving bowls in the freezer for at least 20 minutes before assembly. This creates a thermal buffer that buys you an extra five minutes of eating time.
A metallic or stale taste indicates the snow has absorbed odors from the freezer or ground contaminants. Only harvest snow from an open area away from driveways or overhanging trees. If the snow has a yellow tint, discard it immediately.
Over-mixing forces air into the structure, turning your treat into a foam. If the consistency looks like stiff meringue, stop immediately. Use a silicone spatula to gently fold the ingredients. If you use a mechanical whisk, you’ll lose the delicate crystalline structure required for the perfect mouthfeel.
Safety and standards
When consuming snow, you must consider the environmental factors in your specific location. The Environmental Protection Agency provides data on air quality that can help you determine if your local precipitation is safe to consume. If you live near industrial sites or heavy traffic corridors, the snow may contain particulate matter that isn’t suitable for eating.
If you’re unsure about the safety of your snow, don’t use it. There’s no standard that classifies snow as a food-grade ingredient, so you’re responsible for your own safety. If you have any concerns regarding your health or the safety of your local water source, consult with your local health department’s guidelines for private water collection. Never attempt to use snow that has been treated with de-icing agents or salt, as these chemicals aren’t safe to ingest. If you notice any discoloration in the snow, such as yellow or grey tints, discard it immediately.
Understanding the costs
The monetary cost of this recipe is very low, as it primarily uses basic pantry staples. The real cost is your time and the effort required to collect, clean, and prepare the snow in a cold environment. If you calculate the price of one cup of milk and half a cup of sugar, the cost is typically a negligible amount per batch. However, you must factor in the cost of electricity if you’re running your freezer at a lower setting to keep the bowls extra cold. The most significant variable is the time spent finding an area of clean snow, which can take anywhere from five to fifteen minutes depending on your property size and the depth of the snowfall.
Storage and maintenance
You can’t store this treat in the freezer for later use. Once the snow melts and is mixed with the milk, the structure changes, and refreezing it will result in a hard block of ice that lacks the creamy texture of the original dessert. If you have leftovers, they must be discarded.
The primary mistake beginners make is attempting to salvage the mixture by adding more milk or sugar after it begins to thaw. This doesn’t restore the aeration; it only creates a slushy, unpalatable mess.
To maintain the quality for your next batch, keep your mixing bowls in the freezer at all times so they’re ready for the next snowfall. A pre-chilled bowl acts as a thermal buffer, preventing the snow from melting upon contact.
When you notice that your snow collection area has been disturbed by wind or animals, move to a different, untouched patch. Look for a depth of at least four inches of fresh, powdery accumulation. If the surface layer appears crystalline or translucent, it has already undergone a freeze-thaw cycle and won’t provide the necessary texture. Avoid any snow located within five feet of a roadway or a treated walkway, as chemical runoff can contaminate the sample even after a heavy storm.
When this isn’t the right choice
This method isn’t suitable if you live in an urban environment where snow is likely to be contaminated by soot, exhaust, or chemical runoff from city streets. In these areas, the risk of consuming pollutants is too high. You should instead use crushed ice from your freezer and a high-quality ice cream maker to achieve a similar texture.
A common mistake is assuming that fresh, white snow is inherently clean. Even if the top layer looks pristine, snow acts as a sponge for airborne particulates. If you live within two miles of a busy highway or industrial zone, assume the snow contains heavy metals. The cost of ignoring this isn’t just a poor taste, but potential gastrointestinal distress.
If you have a compromised immune system or are preparing this for young children, skip the snow entirely. Use standard ice cubes made from filtered water. This decision rule is simple: if you can’t verify the purity of the source, don’t harvest it.
To determine if your local snow is safe, check the “melt test.” Place a cup of snow in a clear glass and let it liquefy indoors. If you see gray sediment or an oily sheen on the surface, the snow is unsafe for consumption. Following these alternatives ensures you get the texture you want without the health risks associated with environmental contaminants. By prioritizing filtered ice, you maintain the intended culinary experience while eliminating the variables of urban pollution.
Frequently asked questions
Can I use snow from my roof?
No, you should never use snow from a roof. Roofs contain shingles, tar, and other materials that can leach chemicals into the snow, making it unsafe to eat.
Is it safe to eat snow?
It depends on your environment. If the snow is fresh, white, and from an area free of pollution or chemicals, it’s generally considered safe for occasional consumption.
How long does it stay creamy?
It stays creamy for about 5 to 10 minutes. Because it lacks the stabilizers found in commercial ice cream, the heat from your room will cause it to melt quickly.
What happens if I use skim milk?
The ice cream will be much thinner and icier. Whole milk or heavy cream is recommended to provide the fat necessary for a creamy, smooth mouthfeel.
Does it matter what kind of sugar I use?
Granulated white sugar is best because it dissolves easily. Using brown sugar or coarse crystals may leave a gritty texture in your final dessert.
Can I add fruit to the mixture?
Yes, you can add small pieces of fruit, but add them at the very end. Adding them too early can make the mixture watery and cause it to melt faster.
Snow Ice, in short
To get started, check your local weather report to ensure a fresh, clean snowfall is expected in your area. Once the snow falls, gather your ingredients and a pre-chilled bowl to ensure the best texture. If you notice any debris or discoloration in the snow, stop immediately and discard the batch to avoid health risks.
Related guides
- How To Make A Ice Cream Maker At Home Using Simple Tools
- How Do I Make Snow Ice Cream: A Simple 4-Ingredient Recipe
- How To Make Snow Ice Cream With Snow: A Simple Recipe

Hello, This is Annie Walker, a 38-year-old blogger, founder, and editor of Cookware Guider from NY, USA. I am a cookware fanatic and passionate cooker. I love to cook with different types of cooking appliances (example: all types of cookware, rice cookers, slow cookers, etc) almost every day in my kitchen. I love to share my experience with my readers in my blog. Also, I enjoy helping people to solve their problems through my website. You can follow me on Twitter & Pinterest. To know details about my blog please check the about us page.