
You can make butter icing by beating one cup of softened unsalted butter with three cups of powdered sugar and two tablespoons of milk until the mixture is light and fluffy. How do I make butter icing that stays smooth and holds its shape? The result depends on the temperature of your butter and how long you whip the air into it. If your kitchen is warm, your icing will melt; if your butter is too cold, you’ll get lumps.
Who should make butter icing
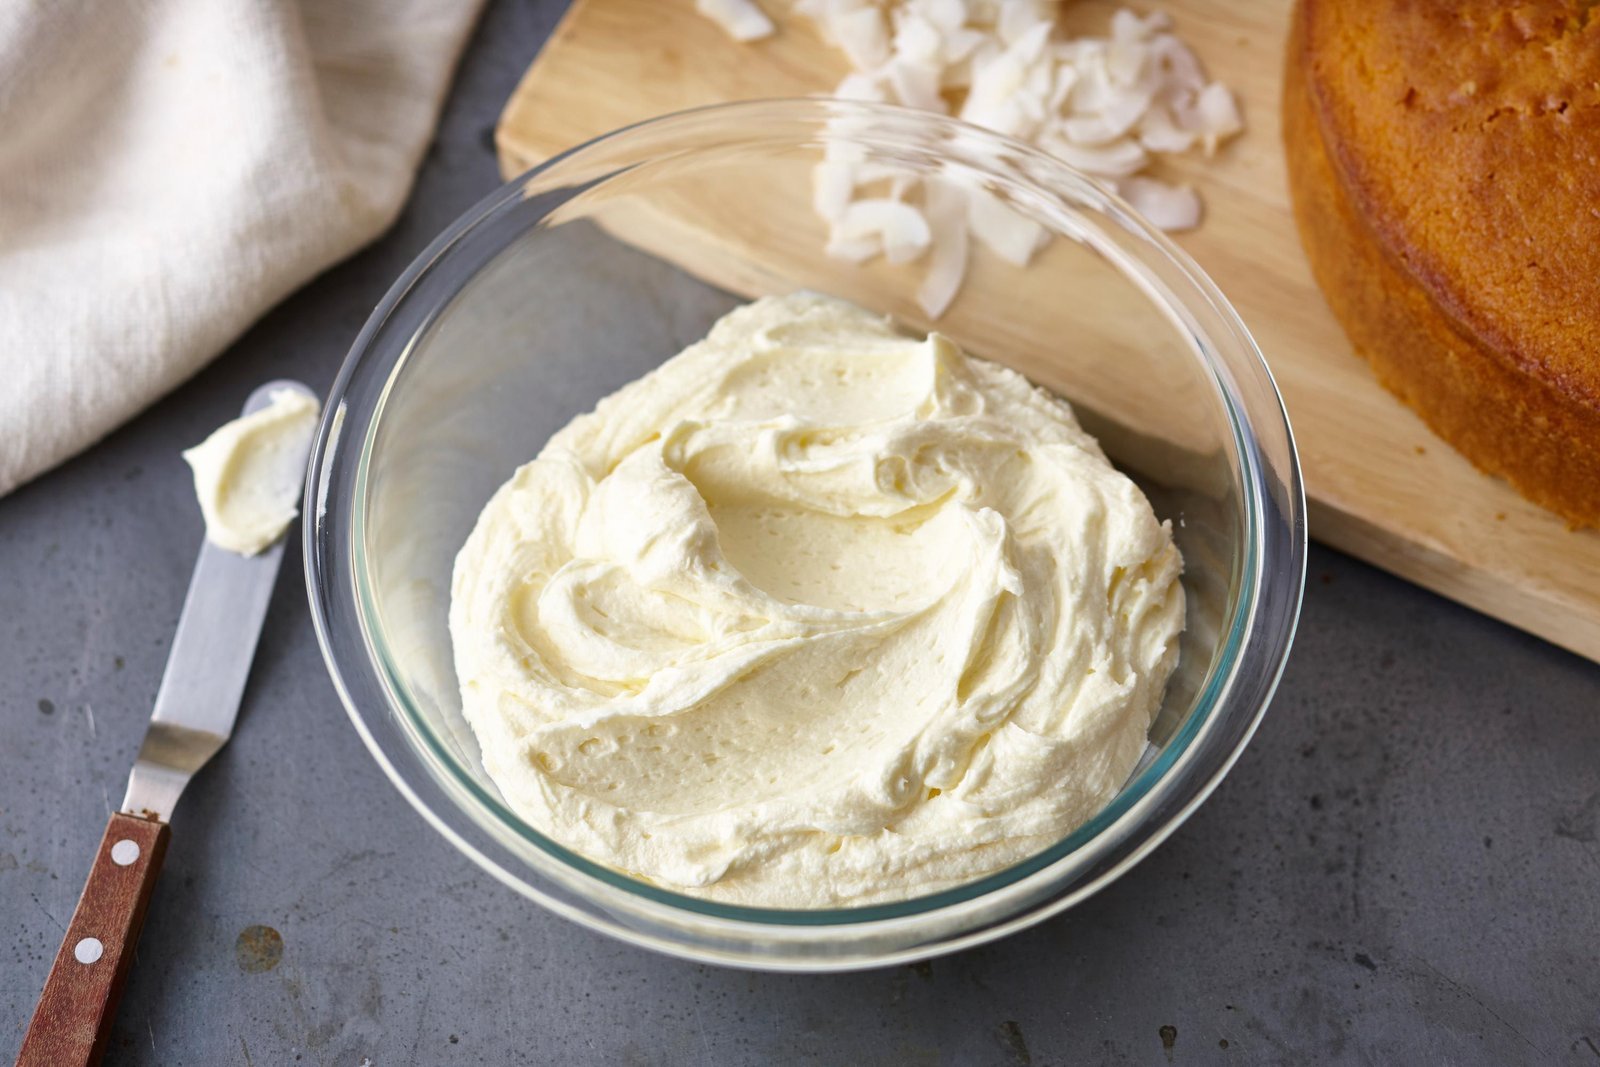
This guide serves home bakers who want to frost cakes or cupcakes using standard pantry ingredients. You might be a beginner who has only used canned frosting, or a regular baker looking for a reliable ratio that doesn’t require fancy equipment. This page assumes you have a hand mixer or a stand mixer. If you don’t have a mixer, you can use a sturdy whisk and a bowl, but expect to spend three times as long beating the ingredients to reach the same volume.
This information isn’t for professional pastry chefs who need to create stable decorations for outdoor events in high heat. Those situations require adding vegetable shortening to replace some of the butter, which changes the flavor and texture significantly. We focus here on the classic, high-quality butter-based version that works for birthday cakes and home treats. We assume you’re using standard unsalted butter, as salted butter can make the final result taste unbalanced depending on the brand.
What decides the outcome
The temperature of your butter is the most important factor in creating a smooth texture. If the butter is too soft or oily, the icing will be runny and hard to pipe. If it’s too firm, the sugar won’t incorporate, leaving you with a gritty finish. The butter should be cool to the touch but yield to light pressure from your finger.
The speed of your mixer changes how much air gets into the butter. Start on low speed to prevent the powdered sugar from flying out of the bowl, then move to medium-high speed once the sugar is incorporated. This change in speed creates the fluffy, cloud-like texture that makes butter icing spreadable.
The quality of your powdered sugar matters for the final consistency. If the sugar has hardened into large clumps in the bag, you must sift it before adding it to the butter. Skipping this step is the most common mistake people make, and it costs them a smooth finish because the lumps are almost impossible to beat out once combined with fat.
The amount of liquid you add acts as the final adjustment for thickness. If you’re piping complex shapes, use only one tablespoon of milk. If you’re spreading the icing over a flat cake, you might need the full two tablespoons or even a third to get the right flow. Always add liquid one teaspoon at a time to keep control.
How Do I Make Butter Icing: The Preparation
- Place one cup of softened unsalted butter into a large mixing bowl.
- Beat the butter on medium speed for three minutes until it turns pale yellow.
- Sift three cups of powdered sugar into a separate bowl to remove any hard lumps.
- Add one cup of the sugar to the butter and mix on low speed until combined.
- Add the remaining sugar and one tablespoon of milk, then increase speed to medium.
- Beat for four minutes, scraping the sides of the bowl with a spatula once.
- Add the second tablespoon of milk if the texture is too stiff to spread.
- Check the consistency by lifting your beaters; the icing should form a peak that curls slightly at the tip.
The secret is to stop mixing once the icing is smooth and holds its shape. If you overbeat the mixture, the butter will get too warm from the friction of the beaters and the icing will lose its structure.
The variations at a glance
| Situation | What to do | What it takes | What to watch for |
|---|---|---|---|
| Stiff piping | Use less milk | 5 minutes | Clumpy texture |
| Smooth spreading | Add more milk | 5 minutes | Runny consistency |
| Hot kitchen | Chill the bowl | 10 minutes | Melted butter |
| Rich flavor | Add vanilla extract | 1 minute | Color change |
| Large batch | Double the ratio | 15 minutes | Mixer strain |
When piping stiff decorations, incorporate milk one teaspoon at a time. If you exceed two tablespoons per cup of sugar, the structure will collapse under its own weight within thirty minutes of room-temperature exposure.
For smooth spreading, aim for a consistency that holds a peak without drooping. If the frosting drips off a tilted spatula, you have over-hydrated it. Correct this by sifting in additional powdered sugar in quarter-cup increments until the texture regains its body.
In kitchens exceeding 75 degrees, ambient heat will break your emulsion. If the frosting appears oily or translucent, stop immediately. Place the bowl in the freezer for exactly five minutes, then re-whip. Don’t exceed this time, or the butter will harden into unmixable chunks.
When scaling for a large batch, monitor your stand mixer closely. If the motor sounds labored or emits a faint burning odor, you have reached the machine’s torque limit. Divide the mixture into two smaller bowls to prevent the gears from stripping under the heavy load.
Finally, vanilla extract is potent. Use clear extract if you require a stark white finish. Dark, imitation, or high-quality bean-paste extracts will introduce brown flecks or an ivory tint that can ruin a pristine color palette. Always test a small dollop on a white plate before committing to the full batch.
Achieving the perfect texture
Controlling the temperature
Butter icing relies on the butter holding its shape while trapping tiny air bubbles. If your butter is too warm, it can’t hold those bubbles, and the icing will appear greasy or transparent. If you notice your icing looking oily, place the bowl in the refrigerator for five minutes, then beat it again on medium speed. This brings the fat back to a stable state so you can work with it again.
Mixing for consistency
Beginners often rush the mixing process, which results in a gritty, sugar-heavy taste. You must beat the butter and sugar for at least seven minutes to ensure the sugar is fully incorporated and the mixture is aerated. If you taste the icing and feel a sandy texture, it’s likely due to poorly sifted sugar or low-quality sugar that won’t improve with further beating. A well-mixed icing should feel like velvet against the roof of your mouth.
What goes wrong, and what to do
| What you notice | What it usually means | What to do first | How to stop it happening again |
|---|---|---|---|
| Grainy texture | Undissolved sugar | Beat longer | Sift sugar first |
| Runny icing | Too much liquid | Add more sugar | Measure liquid carefully |
| Stiff lumps | Cold butter | Warm the bowl | Soften butter longer |
| Separated fat | Overbeating | Chill and whip | Watch the time |
| Yellow color | Butter too warm | Cool the mixture | Use cooler butter |
Most bakers fail because they treat these signs as minor inconveniences rather than structural warnings. A grainy texture often hides a deeper issue: the sugar hasn’t bonded with the fat. If you continue beating without fixing the grain, the air pockets will collapse, leaving you with a dense, heavy crumb. Always test by rubbing a small amount between your fingers; if it feels like coarse sand, don’t add the eggs yet.
Runny icing is rarely just a measurement error. It frequently occurs when you add liquid to warm butter, which prevents the emulsion from setting. If your icing looks like soup, place the bowl in the refrigerator until the butter begins to firm up. This resets the fat crystals. If you skip this, adding more sugar will only create a gritty, overly sweet mess that lacks the necessary structure to hold a shape.
Separated fat is the most common point of no return. This happens when the emulsion breaks under high-speed agitation. You can tell you have crossed the line if the mixture looks like curdled milk. If you see this, stop the mixer immediately. Place the bowl in the refrigerator for a few minutes to firm the fat, then beat on low speed to re-emulsify.
Finally, watch your butter temperature. If it’s above 70°F, it won’t hold air, resulting in a greasy, yellow mess. Use a digital thermometer to ensure your butter is between 65°F and 68°F before you start. This specific range is the difference between a professional finish and a failed experiment.
The rules that apply
Follow general food safety guidelines, which suggest that perishable items containing dairy shouldn’t be left at room temperature for more than two hours. If your kitchen is warmer than 90°F, you must refrigerate the iced cake immediately to prevent bacterial growth. While butter itself is shelf-stable, the addition of milk creates a perishable environment that requires careful handling. If you’re storing the icing for more than one day, place it in an airtight container in the refrigerator. Before using it again, let it sit on the counter until it reaches room temperature, then give it a quick whip to restore the texture. Never taste the icing with the same spoon you use for mixing, as this introduces bacteria into the entire batch.
What it costs you
The cost of making butter icing is low, but the time investment is significant. You need about 15 minutes of active preparation time to ensure the texture is correct.
The financial cost depends on the brand of butter and sugar you choose at your local grocery store. If you’re on a budget, store-brand powdered sugar works just as well as name-brand options, provided it’s fresh and free of moisture.
The real cost is the waste if you don’t follow the ratios. You can’t easily fix a batch that has become too thin or too warm. If the mixture looks oily, you have likely overheated the butter; place the bowl in the refrigerator for five minutes before whipping again.
Always start with the amounts listed here, and only adjust by small increments to avoid wasting ingredients. A common mistake is adding liquid too quickly, which ruins the structure. If you add more than a teaspoon of milk at once, you risk losing the stable peaks required for piping. If your icing is already too runny, add sugar by the tablespoon until it holds its shape.
Keeping it right afterwards
Store your finished icing in an airtight container to keep it from drying out or picking up odors from other foods in your fridge. It will stay fresh for up to one week in the refrigerator. When you’re ready to use it, let it sit at room temperature for 30 minutes. If the icing looks dull or loses its fluffiness, beat it for one minute with a hand mixer to bring back the air. If you notice any sour smell or change in color, discard the batch immediately. Don’t attempt to fix or reuse icing that has been left out for more than two hours, as the risk of spoilage is too high for home kitchens.
When this is the wrong approach
If you need to decorate a cake for an outdoor party in the summer, this icing is the wrong choice because it will melt in the sun. The butter-heavy base loses structural integrity once ambient temperatures exceed 75 degrees Fahrenheit. Instead, use a crusting buttercream or a Swiss meringue buttercream, which are more stable in heat.
If you need a vegan option, you can’t simply swap the butter for margarine. The water content in margarine is too high, which prevents the icing from emulsifying properly. You must find a recipe specifically designed for shortening or plant-based fats that mimic the fat-to-water ratio of butter. Using the wrong fat source will lead to a greasy, unstable product that won’t hold its shape.
The most common mistake is attempting to substitute stick margarine for butter in a 1:1 ratio. This error typically costs you the entire batch, as the emulsion will break, resulting in a weeping, soupy mess that can’t be piped.
Apply this decision rule to determine if your environment is safe: If your workspace or party location is warmer than 72 degrees, abandon standard butter-based frostings entirely. If you’re working in a climate-controlled kitchen, you may proceed with traditional recipes. However, if you’re transporting the cake for more than thirty minutes, you must switch to a high-ratio shortening base. This ensures the decorations survive the transit without sliding off the sides of the cake. Always check the fat content on your packaging; if the fat percentage is below 80 percent, the icing will fail to set.
Frequently asked questions
Can I use salted butter?
Yes, you can use salted butter, but you should omit any extra salt from the recipe. Taste the icing after mixing; if it tastes too salty, you may need to add a small amount of extra powdered sugar to balance the flavor.
How do I color the icing?
Use gel food coloring instead of liquid drops to avoid changing the consistency of the icing. Add the color one toothpick-tip at a time, mixing thoroughly between each addition until you reach your desired shade of color.
Is it safe to leave out overnight?
No, it isn’t safe to leave butter icing out overnight because the milk content can spoil in room temperature conditions. Always store your finished icing or frosted cakes in the refrigerator if you aren’t serving them within two hours.
Why is my icing gritty?
Your icing is likely gritty because the powdered sugar wasn’t sifted or the sugar didn’t fully dissolve into the butter. Sifting the sugar through a fine-mesh sieve before mixing will remove the clumps that cause this issue.
How long does it stay fresh?
It stays fresh for up to one week when kept in an airtight container in the refrigerator. Always ensure the container is sealed tight so the icing doesn’t absorb the smell of other foods in your fridge.
What happens if I use water instead of milk?
You can use water, but the icing will lose some of its richness and creamy mouthfeel. Milk adds a small amount of fat and protein that helps the texture, so water is only a backup if you’re out of dairy.
Getting started
Begin by ensuring your butter is at exactly 65 degrees Fahrenheit. If the butter is too cold, it will leave small, hard yellow beads in your finished icing that clog piping tips. If it’s too warm, the emulsion will break, resulting in a grainy or oily texture that refuses to hold its shape.
Use a stand mixer fitted with a paddle attachment on medium-low speed. Beat the butter and sugar for at least five full minutes. You’re looking for a pale, ivory color and a volume increase of roughly 30 percent. If the mixture remains yellow or dense, you haven’t incorporated enough air to create a stable structure.
Before you begin piping, perform the “swipe test.” Take a small amount of icing on a spatula and swipe it against the side of the bowl. If the icing leaves a clean, smooth trail without jagged edges or air pockets, it’s ready. If you see streaks of butter or sugar crystals, the sugar wasn’t properly sifted or incorporated.
Butter Icing, in short
If the icing feels warm to the touch or appears greasy, stop immediately. Place the bowl in the refrigerator for five minutes. Don’t leave it longer, or the butter will harden too much to pipe. If the mixture is still too soft after chilling, add one tablespoon of powdered sugar and beat briefly to regain the necessary stiffness.

Hello, This is Annie Walker, a 38-year-old blogger, founder, and editor of Cookware Guider from NY, USA. I am a cookware fanatic and passionate cooker. I love to cook with different types of cooking appliances (example: all types of cookware, rice cookers, slow cookers, etc) almost every day in my kitchen. I love to share my experience with my readers in my blog. Also, I enjoy helping people to solve their problems through my website. You can follow me on Twitter & Pinterest. To know details about my blog please check the about us page.