
You can clean your Our Place Wonder Oven in about 20 minutes using warm water, mild dish soap, and a soft cloth. This method removes grease and food residue without damaging the ceramic interior or the heating elements. The exact time you need depends on how much baked-on food is inside and whether you let the oven cool completely first. Always check your specific model manual for any unique warnings before you start washing parts.
Who should clean this oven today
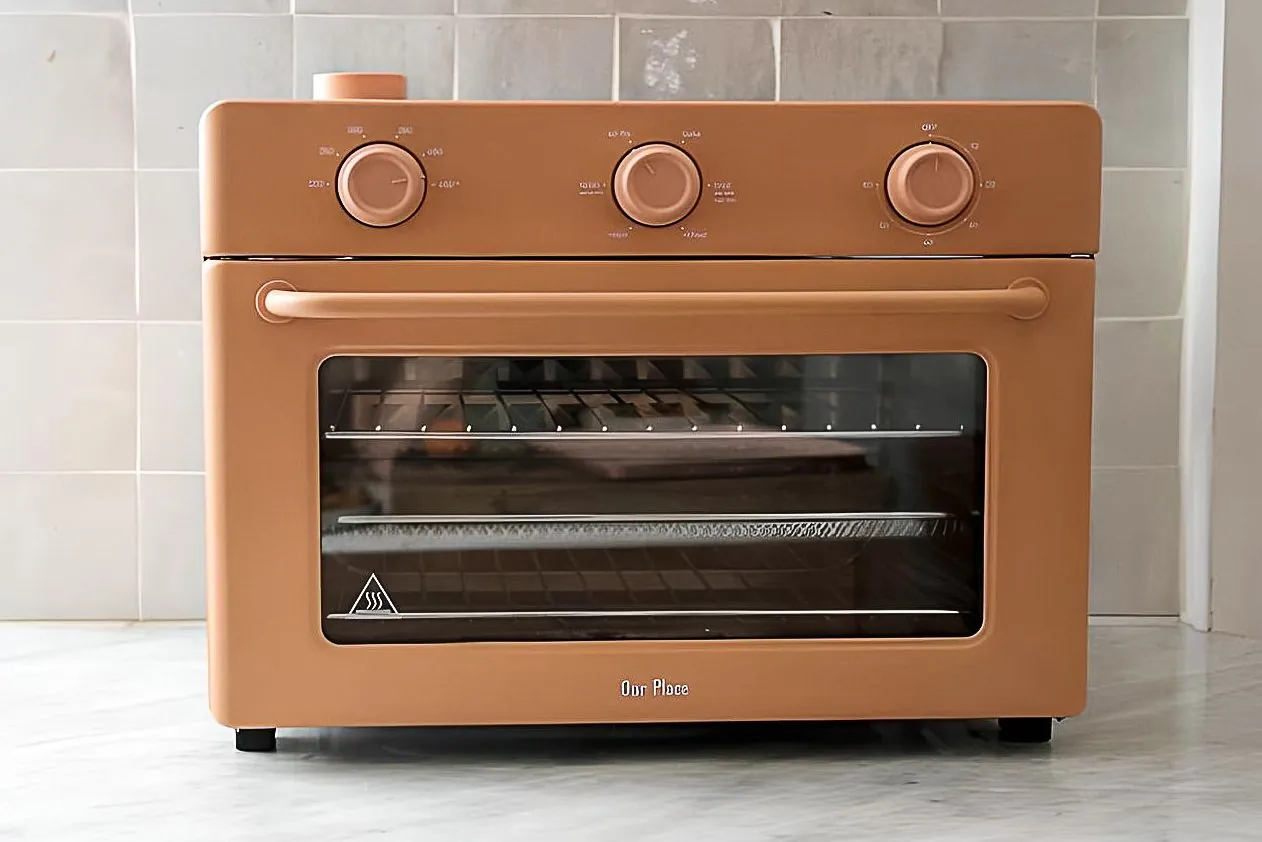
People search for cleaning guides when their kitchen appliance looks dull or smells like old food after cooking. Some users just finished a big family meal and see splatters on the glass door that won’t wipe away easily. Others have owned their unit for months and notice the non-stick surface isn’t working as well as it used to. This guide serves the home cook who wants to restore their oven safely without harsh chemicals or scratching the finish.
Wait to clean until the interior temperature drops below one hundred degrees Fahrenheit, or you risk burning your hands and setting off smoke alarms with evaporating grease. If you scrub while the metal is still warm, the cleaning paste dries too fast to lift stubborn carbon buildup from the corners.
This advice works for standard grime built up over three or four cooking sessions where the residue remains soft enough to dissolve with vinegar and baking soda. Skip this routine entirely if black crust has hardened into a thick shell that requires a razor blade to chip away, as aggressive scraping voids most manufacturer warranties on enamel coatings.
It isn’t for someone whose unit has electrical faults, strange burning smells from inside the machine, or visible damage to the power cord. If your oven sparks or trips the breaker, stop cleaning and call customer support immediately because water introduced to a compromised electrical system creates a severe shock hazard for anyone standing nearby.
We assume you have a functioning unit that simply needs routine maintenance to look new again. Check that the door seal feels flexible and closes tightly before applying any liquid, since leaking solution can pool under the floor panel and corrode heating elements over time.
What changes how clean it gets
The result of your cleaning effort depends mostly on how long you wait after cooking before you start wiping. Hot grease wipes away easily, but cold grease turns into a hard shell that requires scrubbing. Waiting even one hour makes the job twice as hard because the oil solidifies against the ceramic walls.
The type of food you cooked also changes the work needed. Sugary sauces and cheese leave sticky residues that water alone can’t remove, while plain vegetables usually need just a damp cloth. Heavy meats create more smoke and oil mist that settles on the heating element cover.
Water temperature matters more than people think. Cold water spreads grease around instead of lifting it, while very hot water can shock the ceramic if the oven was freezing cold. Warm tap water works best for almost every situation you’ll face in a home kitchen.
Many people make the mistake of using abrasive pads thinking they will clean faster. These pads scratch the glossy finish permanently, making future stains stick harder and ruining the non-stick claim. A soft microfiber cloth takes longer but keeps the surface smooth for years.
How to clean the wonder oven safely
Follow these steps to remove dirt without hurting the appliance or yourself. Always unplug the unit and let it sit until the outside feels cool to the touch before touching any internal parts.
- Unplug the power cord from the wall outlet and wait at least 30 minutes for the interior to reach room temperature.
- Remove the crumb tray located at the bottom and shake loose debris into the trash bin over a sink.
- Mix two cups of warm water with one teaspoon of mild liquid dish soap in a small bowl.
- Dip a soft non-abrasive sponge into the soapy water and wring it out until it’s barely damp.
- Wipe the interior walls gently in circular motions, focusing on spots with visible brown crust or oil streaks.
- Rinse your sponge in clean water, wring it dry, and wipe the inside again to remove any soap film.
- Dry all surfaces thoroughly with a clean dry towel to prevent water spots from forming on the glass.
- Wash the crumb tray separately in the sink with soap and water, then dry it completely before sliding it back in.
The single judgment call that separates a good clean from a bad one is knowing when to stop scrubbing a stubborn spot. If a stain doesn’t come off after three gentle passes, don’t press harder or switch to a rougher tool. Leave it for now and try again after the next use when the heat softens it naturally. Forcing it now risks scratching the coating, which costs you the non-stick benefit forever.
Cleaning cases at a glance
Different situations require slightly different approaches depending on what you cooked and how long it sat. Use this table to find the right method for your specific mess level.
| Situation | Action Required | Time Needed | Watch For |
|---|---|---|---|
| Light daily use | Wipe with damp cloth only | 5 minutes | Missed corners near door seal |
| Baked cheese spill | Soak with warm soapy rag | 15 minutes | Scratching while removing hardened bits |
| Greasy meat cooking | Degrease with vinegar solution | 20 minutes | Slippery residue on heating cover |
| Sugary sauce drip | Soften with steam trick | 10 minutes | Sticky film left behind after wipe |
| Smoke odor issue | Clean fan vent area | 25 minutes | Dust buildup blocking airflow holes |
| Glass door fog | Polish with glass cleaner | 8 minutes | Streaks drying in direct sunlight |
| Crumb tray overflow | Deep wash in sink | 12 minutes | Rust forming on metal edges |
Details experts get right
Timing the wipe down correctly
Experienced users wipe the interior walls while the oven is still slightly warm, not piping hot but not cold either. They aim for the ten-minute window after unplugging when the metal is warm to the touch but safe to handle. This warmth keeps the oils liquid so they lift onto the cloth instead of smearing across the surface.
Beginners often wait until the next day when the grease has hardened into a difficult crust that requires soaking. The sign you got the timing right is when the cloth picks up color immediately without needing pressure.
Choosing the right drying method
Pros always dry the unit with a separate clean towel rather than letting it air dry. Air drying leaves mineral deposits from tap water that show up as white spots on the black interior later. These spots attract dust and make the oven look dirty again within hours of cleaning.
Using a dry microfiber cloth removes the water completely and polishes the glass door to a shine. You know you did this step well when no water marks appear after the unit sits for an hour.
Troubleshooting common cleaning issues
Sometimes things don’t go perfectly even when you follow the steps carefully. This table helps you match what you see to the cause and the fix.
| What you notice | What it usually means | What to do first | How to stop it happening again |
|---|---|---|---|
| White streaks on glass | Hard water minerals left behind | Buff with dry microfiber cloth | Use distilled water for final rinse |
| Soap bubbles remain | Too much detergent used | Wipe again with plain water | Use half the soap amount next time |
| Rough texture on wall | Scratched coating from scrubbing | Stop using abrasive tools immediately | Switch to soft sponges only |
| Musty smell after wash | Moisture trapped in crevices | Leave door open for one hour | Dry all seams with cotton swab |
| Brown rings on tray | Burnt sugar not fully removed | Soak tray in hot soapy water | Liner tray with foil during cooking |
| Cloudy heating element | Oil mist settled on cover | Gently wipe with dry cloth | Cover food with lid when possible |
| Door hinge stiff | Water got into mechanism | Dry hinge area thoroughly | Avoid spraying water near hinges |
Safety rules for appliance care
Cleaning electrical appliances carries specific risks that manufacturers and safety agencies warn about clearly. The Consumer Product Safety Commission advises never immersing the main body of a countertop oven in water or running it under a faucet. Only removable parts like trays and racks should go into the sink for washing. You must always disconnect the power source before cleaning to eliminate the risk of electric shock or accidental activation.
Never use steel wool, wire brushes, or harsh chemical cleaners like bleach or ammonia on the interior surfaces. These substances can degrade the materials and create toxic fumes when the unit heats up later. For specific guidance on electrical safety during maintenance, you can review the general appliance safety tips provided by federal regulators. If your model has a self-cleaning cycle, don’t use chemical oven cleaners alongside it as this creates dangerous gas reactions.
What cleaning really costs you
The actual cost of keeping this oven clean is mostly your time and the cheap supplies you already own. You spend about 20 minutes every week if you wipe it down after each major use. Waiting until the weekend to tackle a Tuesday spill turns that twenty-minute task into an hour of scrubbing, effectively doubling your labor cost for the week.
Buying specialized ceramic cleaners is costly, but mild dish soap works just as well for a fraction of the price. The expensive sprays often contain harsh solvents that degrade the sealant over time, forcing you to replace the unit years earlier than necessary.
Replacing a scratched unit because you used the wrong pad costs hundreds of dollars, which is the real hidden price. Steel wool or green scouring pads leave micro-scratches that trap grease permanently, making future cleaning impossible without damaging the surface further.
Your biggest expense is potentially ruining the non-stick coating, which shortens the life of the appliance significantly. Once the coating flakes, food sticks instantly, and no amount of soap will restore the original smooth finish.
Check your local store for generic microfiber cloths that cost less than branded versions but do the same job. Look for packs labeled “lint-free” rather than specific kitchen brands to save money per pack without losing any cleaning power.
Keeping the oven fresh longer
After you finish cleaning, leave the door slightly open for an hour to ensure all internal moisture evaporates completely. This prevents mold growth and keeps the interior smelling neutral until the next time you cook. If your kitchen humidity runs high during summer months, extend this drying window to two hours to guarantee no dampness lingers in the corners.
Check the crumb tray once a week even if you didn’t cook anything messy, as tiny particles accumulate over time. These microscopic crumbs burn during the next preheat cycle, creating smoke that clings to the walls and triggers false alarms about electrical faults.
If you notice the glass door getting cloudy again quickly, it means your drying step wasn’t thorough enough. Repeat the drying process with a fresh towel whenever you see condensation forming on the inside of the glass. Don’t wipe wet glass with a cloth that has already absorbed water, or you’ll simply smear the moisture across the surface instead of removing it.
Store the unit with the door ajar if you won’t use it for several days to maintain airflow. Place a wooden spoon between the seal and the frame to hold the gap open without straining the hinges. This small trick stops musty odors from developing while the appliance sits idle in your kitchen.
When not to clean it yourself
Don’t attempt to clean the heating elements directly if they’re exposed or if the manual says they’re sealed. Trying to scrub these parts can bend the delicate coils or push debris deeper into the insulation. A bent coil often creates a hot spot that burns food instantly, forcing you to replace the entire element rather than just cleaning it.
If the power cord feels frayed, hot to the touch, or shows signs of melting, stop using the oven entirely and replace it. This isn’t a cleaning issue but a serious fire hazard that requires professional replacement. Ignoring a warm plug during operation can melt the wall outlet behind the appliance, turning a minor repair into a major electrical rewrite.
Also, avoid cleaning if the unit recently tripped your home circuit breaker, as this indicates an internal electrical fault. In these cases, contact the manufacturer support team or a qualified repair technician instead of risking injury. If the breaker trips only when the bake function engages, the fault lies in the lower element; if it trips immediately upon plugging the unit in, the short is in the main harness.
Attempting to wipe down a component with a compromised ground wire invites severe shock, especially if your hands are wet from cleaning solution. Let a certified technician isolate the live voltage before you ever touch a screwdriver or a sponge near the internal chassis.
Related guides
- Best Sponge For Ceramic Cookware: Top Picks for Scratch-Free Cleaning
- How Do You Clean Non Stick cookware? Easy Tips Inside!
- Best Ceramic Cooktop Cleaning Cream for Sparkling, Streak-Free Surfaces
Frequently asked questions
Can I put the whole oven in the sink?
No, never submerge the main body of the unit in water or run it under a tap. Only the removable trays and racks are dishwasher safe or sink-washable according to safety standards.
How long does the cleaning take?
A standard clean takes 15 to 20 minutes for a moderately used oven with some grease buildup. Heavier messes from sugary spills may require an extra 10 minutes for soaking.
Is vinegar safe for the ceramic interior?
Yes, a diluted vinegar solution is safe for wiping down the ceramic walls and helps cut through tough grease naturally. Mix one part vinegar with three parts water to avoid strong smells.
What happens if I use steel wool?
Using steel wool scratches the permanent non-stick coating, making food stick worse and ruining the surface forever. Once scratched, the damage can’t be repaired and you must live with it.
Does it matter if I leave soap behind?
Yes, leftover soap residue can burn and create unpleasant fumes or tastes in your next batch of food. Always do a second wipe with plain water to ensure no film remains.
Why does my glass door look streaky?
Streaks usually happen because the glass dried too slowly or the cleaner had too much detergent in it. Buffing with a dry microfiber cloth immediately after washing fixes this issue.
How often should I deep clean it?
You should do a full deep clean once a month if you use the oven daily for heavy cooking tasks. Light users can stretch this to every six weeks without problems.
First steps for a clean oven
Start by unplugging your unit and wiping the interior while it’s still slightly warm to lift grease easily. You’ll see the difference immediately as the cloth picks up dirt without needing hard scrubbing pressure. Wait exactly twenty minutes after turning off the heat so the metal cools enough to touch but stays hot enough to melt stubborn fat.
Use a microfiber towel instead of paper, which shreds when wet and leaves lint behind that burns during your next bake. Dip the corner in plain water only, since soap residue creates a film that attracts dust faster than bare metal ever would. Wipe from the top rack down to the floor of the oven so gravity pulls drips away from clean areas you just finished.
Stop and seek help if you see any sparks, smell burning plastic, or find damage to the power cord. Don’t attempt to clean around exposed wires or cracked insulation, as moisture here causes short circuits that ruin the control board permanently. Call a technician immediately if the door seal feels brittle or cracks when you press it, because escaping heat makes cleaning impossible and wastes energy every single time you cook.

Hello, This is Annie Walker, a 38-year-old blogger, founder, and editor of Cookware Guider from NY, USA. I am a cookware fanatic and passionate cooker. I love to cook with different types of cooking appliances (example: all types of cookware, rice cookers, slow cookers, etc) almost every day in my kitchen. I love to share my experience with my readers in my blog. Also, I enjoy helping people to solve their problems through my website. You can follow me on Twitter & Pinterest. To know details about my blog please check the about us page.