Poaching eggs in a saucepan might seem tricky, but once you know the simple steps, it’s easy and quick. Imagine biting into a perfectly soft, runny yolk that melts in your mouth—sounds delicious, right?
You don’t need fancy tools or a lot of time to make this happen. You’ll discover how to poach eggs like a pro using just a saucepan. By the end, you’ll feel confident to make restaurant-quality eggs at home anytime you want.
Ready to impress yourself and your taste buds? Let’s get started!

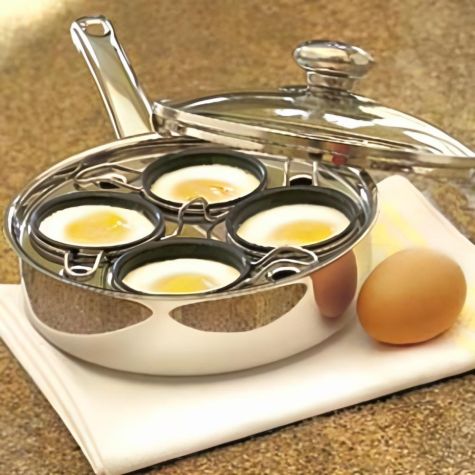
Credit: jennyeatwellsrhubarbginger.blogspot.com
Choosing Fresh Eggs
Choosing fresh eggs is the first step to poaching perfect eggs in a saucepan. Fresh eggs hold their shape better and create a neat, round poach. Old eggs spread out and become watery when cooked.
How To Check Egg Freshness
Test eggs with a simple water method at home:
- Fill a bowl with cold water.
- Gently place the egg in the water.
- Observe the egg’s position:
| Egg Position | Freshness | What It Means |
|---|---|---|
| Sinks and lies flat | Very fresh | Best for poaching, yolk stays firm |
| Sinks but stands upright | Still good | Good for cooking, still fine for poaching |
| Floats to the top | Old | Not fresh, avoid for poaching |
Look For Clear Signs On The Shell
- Clean and smooth shell: Indicates quality handling.
- No cracks or sliminess: Avoid eggs with damage.
- Uniform color: No spots or discoloration.
Buy Eggs With The Earliest Expiry Date
Choose eggs with the longest freshness time left. Check the carton for the pack and expiry dates. Use eggs before their expiry for best results.
Preparing The Saucepan
Preparing the saucepan correctly is a key step to poach eggs perfectly. The right preparation helps the eggs cook evenly and hold their shape. It also makes the process easier and less messy. A well-prepared saucepan keeps the water at the right temperature and creates the perfect environment for poaching eggs.
Selecting The Right Size
Choosing the right saucepan size matters a lot for poaching eggs. A saucepan that is too small makes it hard to cook more than one egg at a time. It also causes the water to boil over or crowd the eggs, which can make them stick together.
A medium to large saucepan works best. Here are some points to consider:
- Capacity: Aim for a saucepan that holds at least 2 to 3 liters of water.
- Depth: Choose one deep enough to keep the water at least 3 inches above the eggs.
- Width: A wider pan allows space between eggs, preventing them from merging.
| Pan Size | Ideal For | Water Capacity |
|---|---|---|
| Small (1-1.5 L) | 1 egg | Too small, risk of crowding |
| Medium (2-3 L) | 2-3 eggs | Good for home use |
| Large (4+ L) | 4+ eggs | Best for multiple eggs |
Using the right saucepan size saves time and results in well-shaped poached eggs.
Filling With Water
Filling the saucepan with water requires attention to quantity and temperature. Too little water limits egg movement. Too much water takes longer to heat and wastes energy.
Follow these steps for filling the saucepan:
- Fill the pan with cold water until it is about 3 inches deep.
- Cold water helps control the temperature better during heating.
- Make sure the water covers the eggs fully once they are added.
The water’s depth is important. It allows the eggs to float and cook evenly without touching the pan’s bottom.
Keep the water temperature just below boiling, about 180°F (82°C). This gentle heat cooks eggs slowly and keeps the whites tender.
Tips for filling water:
- Use filtered water if possible for a cleaner taste.
- Do not fill the pan too full to avoid spills when adding eggs.
- Adjust water level to maintain the right poaching depth.
Adding Vinegar And Salt
Adding vinegar and salt to the water improves egg poaching results. Vinegar helps the egg whites firm up quickly. Salt adds subtle flavor and can slightly increase water density.
Use these guidelines for adding vinegar and salt:
- Add 1-2 tablespoons of white vinegar per liter of water.
- Add a pinch of salt (about 1/4 teaspoon per liter) to enhance taste.
- Stir the water gently to mix vinegar and salt evenly before heating.
Vinegar’s acid causes the egg whites to coagulate faster. This helps the eggs keep a nice round shape. Salt can also increase the boiling point slightly, but mainly adds taste.
Be careful not to add too much vinegar. Excess vinegar can give the eggs a sour taste.
Here is a quick summary table:
| Ingredient | Amount per Liter | Purpose |
|---|---|---|
| White Vinegar | 1-2 tbsp | Helps egg whites firm quickly |
| Salt | 1/4 tsp | Adds flavor, slightly raises boiling point |
Preparing the saucepan with the right size, water level, and additives sets the stage for perfectly poached eggs.
Heating The Water
Poaching eggs in a saucepan requires gentle care, especially when heating the water. The water’s temperature affects how the egg cooks and its final texture. Heating the water just right makes the poaching process smoother and helps the egg white stay together. Understanding how to control water temperature is key for perfect poached eggs every time.
Achieving The Ideal Temperature
The best temperature to poach eggs is between 160°F and 180°F (70°C to 82°C). At this range, the water is hot enough to cook the egg but not so hot that it breaks the delicate white apart. Use a kitchen thermometer to check the temperature for accuracy.
Here are tips to reach the ideal temperature:
- Fill the saucepan with fresh, cold water.
- Heat the water over medium heat to control the temperature.
- Stir the water gently to keep the heat even.
- Use a thermometer to monitor the temperature closely.
The following table shows water temperatures and their effects on poaching:
| Water Temperature | Effect on Poached Egg |
|---|---|
| Below 160°F (70°C) | Egg cooks slowly; whites may spread too much. |
| 160°F – 180°F (70°C – 82°C) | Ideal; whites set gently, yolk stays soft. |
| Above 180°F (82°C) | Water too hot; egg may break or become tough. |
Keep the water temperature steady. Avoid fluctuations by heating slowly. This ensures the egg cooks evenly and holds its shape.
Avoiding A Rolling Boil
A rolling boil is when the water bubbles rapidly and breaks the egg apart. It creates strong currents that damage the egg white. To poach eggs perfectly, avoid this vigorous boiling.
Follow these steps to prevent a rolling boil:
- Bring water to a gentle simmer, not a full boil.
- Lower the heat as soon as small bubbles appear on the bottom.
- Keep the water moving slightly by stirring gently.
- Use a wide saucepan to give eggs room to cook.
Here is a quick guide to water states during poaching:
| Water State | Description | Suitability for Poaching |
|---|---|---|
| Simmer | Small bubbles rise slowly. | Perfect for poaching eggs. |
| Rolling Boil | Large bubbles rise rapidly, water moves fast. | Not suitable; breaks egg whites. |
Controlling heat is important. Turn down the heat once the water simmers. This keeps the egg intact and cooks it evenly.
Credit: www.williams-sonoma.com
Cracking And Adding Eggs
Poaching eggs in a saucepan needs care, especially when cracking and adding eggs. This step sets the stage for perfect, tender poached eggs. Cracking eggs directly into the water can break the yolk or cause the egg white to spread too much. Using the right technique helps keep the egg intact and shapes it nicely. Two key methods help: using a small bowl for cracking and creating a gentle whirlpool in the water before adding the egg.
Using A Small Bowl
Cracking eggs into a small bowl first is a smart way to control the process. This method helps check the egg’s freshness and avoid shell pieces falling into the water. It also makes it easier to slide the egg gently into the saucepan without breaking the yolk.
Follow these simple steps:
- Choose a small, shallow bowl. A ramekin or small cup works well.
- Crack the egg on a flat surface. This reduces shell fragments compared to cracking on an edge.
- Pour the egg gently into the bowl. Check for any shell bits or blood spots and remove them.
- Slide the egg slowly into the simmering water. This keeps the yolk whole and the white close around it.
This way, you control the egg better and reduce mess in the saucepan. It also helps when cooking multiple eggs one after another.
| Step | Why It Matters |
|---|---|
| Crack on flat surface | Prevents shell pieces from breaking inside egg |
| Use small bowl | Allows checking egg condition before cooking |
| Slide egg gently | Keeps yolk intact and shapes egg white |
Creating A Gentle Whirlpool
Creating a gentle whirlpool in the saucepan water helps the egg white wrap tightly around the yolk. This trick shapes the egg into a neat, round form. Stir the water slowly with a spoon or spatula just before adding the egg.
Steps to make a gentle whirlpool:
- Heat water to a low simmer, small bubbles forming at the bottom.
- Use a spoon to stir the water in a steady circular motion.
- Stop stirring just as you slide the egg from the bowl into the center of the whirlpool.
- Let the egg cook undisturbed until the white sets.
The swirling water pulls the egg white inward. It stops the white from spreading thinly across the water surface. This creates a firm, neat shape, perfect for serving on toast or salads.
Keep these tips in mind:
- Don’t stir too fast. The whirlpool should be slow and smooth.
- Use fresh eggs for best results; older eggs tend to spread more.
- Work quickly when adding eggs to keep the whirlpool active.
Cooking Time And Techniques
Poaching eggs in a saucepan is a simple yet delicate cooking method. The key to perfect poached eggs lies in the right cooking time and technique. Small changes can affect the texture of the egg white and yolk. Understanding these details helps create eggs that suit your taste. This section explains how long to cook eggs and how to adjust for different yolk firmness.
Timing For Soft Poached Eggs
Soft poached eggs have a tender white and a runny yolk. The cooking time is short, usually between 2 to 4 minutes. Start with fresh eggs for the best shape and texture. Use simmering water, not boiling, to avoid breaking the egg.
Follow these simple steps:
- Fill a saucepan with water about 3 inches deep.
- Heat the water until small bubbles form, around 180°F (82°C).
- Add a splash of vinegar to help the egg white firm up quickly.
- Crack the egg into a small bowl.
- Swirl the water gently and slide the egg in.
- Cook for 3 minutes for a soft, runny yolk.
The table below shows cooking times for different yolk consistencies:
| Yolk Type | Cooking Time | Description |
|---|---|---|
| Soft | 2-4 minutes | Runny yolk, tender white |
| Medium | 4-5 minutes | Semi-firm yolk, firm white |
| Firm | 6-7 minutes | Fully set yolk and white |
Adjusting For Firmer Yolks
Some prefer firmer yolks with a fully cooked center. To get this, increase the cooking time by 2 to 3 minutes. Keep the water at a gentle simmer to avoid rough edges or broken whites.
Use these tips for firmer yolks:
- Maintain water temperature below boiling point (about 180°F/82°C).
- Cook eggs for 5 to 7 minutes depending on yolk firmness.
- Remove eggs promptly and place in cold water to stop cooking.
Cooking longer without raising the temperature prevents overcooking the whites. Cold water helps peel the eggs easier if needed. Watch the time closely to avoid rubbery textures. Adjust the timing by 30-second increments for best results.
Credit: www.joyfulhealthyeats.com
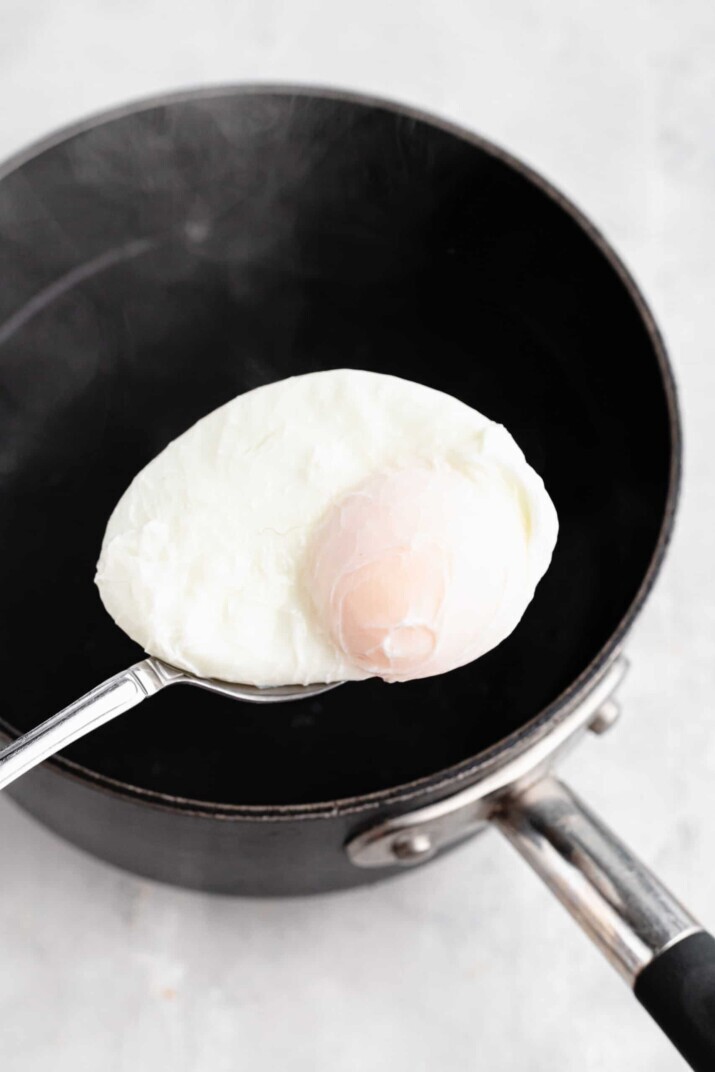
Removing And Draining
After poaching eggs in a saucepan, the next important step is removing and draining them properly. This process ensures your eggs keep their shape and do not become watery. Handling poached eggs gently prevents breakage and keeps them looking perfect for serving. Proper draining also removes extra water, making the eggs ready to eat or use in recipes without sogginess.
Using A Slotted Spoon
A slotted spoon is the best tool for lifting poached eggs from the hot water. It lets water drain back into the saucepan while holding the egg safely. Follow these tips for using a slotted spoon effectively:
- Choose a spoon with wide slots to allow quick water drainage.
- Gently slide the spoon under the egg to avoid breaking the yolk.
- Lift the egg slowly to keep it intact.
- Hold the spoon above the saucepan for a few seconds to let water drip off.
Using a slotted spoon reduces water clinging to the egg’s surface. This step is crucial for keeping the egg from becoming soggy when served. Below is a simple checklist for removing eggs with a slotted spoon:
| Step | Action |
|---|---|
| 1 | Hold the slotted spoon near the egg. |
| 2 | Slide spoon gently under the egg. |
| 3 | Lift egg carefully, keeping it steady. |
| 4 | Let water drain back into the pan. |
Draining Excess Water
After removing poached eggs, draining excess water is key to a perfect texture. Too much water makes the eggs watery and less tasty. Here are easy ways to drain excess water:
- Place eggs on a plate lined with paper towels.
- Let eggs rest for 30 seconds to absorb water.
- Gently pat the top of the eggs with another paper towel.
Another option is to use a fine mesh sieve or strainer. Transfer the eggs into the sieve and let water drip away. This method works well when handling multiple eggs at once.
Draining also helps eggs stay warm and ready for serving. Here is a simple guide to draining excess water:
- Use paper towels or a sieve.
- Let eggs rest briefly to soak up water.
- Pat dry gently to remove extra moisture.
Following these steps ensures poached eggs are firm, not watery. This keeps their flavor fresh and texture smooth, improving every bite.
Serving Suggestions
Poached eggs cooked in a saucepan create a soft, tender texture perfect for many dishes. Serving them right brings out their gentle flavor and makes any meal special. Simple seasoning and smart pairings turn plain poached eggs into a tasty, attractive plate. Below are ideas for seasoning and pairing to help serve poached eggs in ways everyone will enjoy.
Seasoning Options
Seasoning poached eggs enhances their mild flavor without overpowering them. You can keep it simple or get creative with herbs and spices. Here are easy ways to season your poached eggs:
- Salt and Pepper: The classic choice. Use sea salt or kosher salt and freshly ground black pepper for the best taste.
- Herbs: Sprinkle fresh parsley, chives, or dill. These add a fresh, green note that complements the eggs well.
- Spices: Try paprika, cayenne, or a pinch of turmeric for color and a little heat.
- Citrus Zest: Lemon or orange zest adds a bright, fresh twist.
Use a small pinch of seasoning at first. You can always add more if needed. Avoid heavy sauces that may hide the delicate flavor of the egg. Below is a simple seasoning chart for poached eggs:
| Seasoning | Flavor Profile | Recommended Amount |
|---|---|---|
| Sea Salt | Salty and clean | Pinch |
| Black Pepper | Spicy and sharp | Fresh grind, to taste |
| Fresh Chives | Mild onion flavor | 1 tsp, chopped |
| Smoked Paprika | Smoky and sweet | ¼ tsp |
| Lemon Zest | Bright and citrusy | ½ tsp |
Pairing Ideas
Poached eggs pair well with many foods for breakfast, lunch, or dinner. Their soft yolk adds richness and moisture to dishes. Here are some ideas that work beautifully:
- Toast or English Muffins: A simple base to catch the runny yolk.
- Avocado Slices: Creamy texture and healthy fats balance the egg.
- Salads: Place poached eggs on greens like spinach or arugula for a light meal.
- Roasted Vegetables: Asparagus, tomatoes, or mushrooms add flavor and color.
- Grains: Quinoa, brown rice, or couscous make a filling dish.
- Bacon or Smoked Salmon: For a savory and salty contrast.
Try this simple serving idea:
- Toast a slice of whole-grain bread.
- Spread mashed avocado with lemon juice.
- Place one or two poached eggs on top.
- Sprinkle with salt, pepper, and chives.
- Add a side of roasted cherry tomatoes.
This combo is fresh, healthy, and easy to prepare. Poached eggs also shine on dishes like eggs Benedict or shakshuka. Pair with light sauces like hollandaise or fresh tomato sauce to keep flavors balanced. Serving poached eggs with the right sides makes every bite enjoyable and satisfying.
Troubleshooting Common Issues
Poaching eggs in a saucepan seems simple, but common problems can spoil the result. Troubleshooting helps make perfect poached eggs every time. Small mistakes cause egg whites to spread or eggs to overcook. Knowing how to fix these issues saves time and frustration. This guide covers key tips for stopping egg whites from spreading and rescuing overcooked eggs. Follow these easy steps to improve your poaching skills and enjoy delicious, tender eggs.
Preventing Egg Whites From Spreading
One common problem is egg whites spreading too much in the water. This makes your poached eggs look messy and cook unevenly. Use these tips to keep the egg whites tight and neat:
- Use fresh eggs. Fresh eggs have firmer whites that hold together better.
- Add vinegar to the water. A teaspoon of vinegar helps egg whites coagulate faster.
- Keep water at a gentle simmer. Boiling water creates strong currents that break up egg whites.
- Create a water whirlpool. Stir the water to make a gentle whirlpool before adding the egg. This pulls the whites around the yolk.
- Crack eggs into a small cup first. This allows careful and slow sliding into the water, avoiding splashes.
Here is a quick table summarizing these tips:
| Problem Cause | Solution |
|---|---|
| Old eggs with runny whites | Use fresh eggs |
| Water boiling too hard | Lower heat to simmer |
| Egg whites spreading out | Add vinegar and create whirlpool |
Following these steps helps keep egg whites compact and produces beautiful poached eggs.
Fixing Overcooked Eggs
Overcooked poached eggs become tough and rubbery. The yolk loses its creamy texture. Fix this problem by adjusting your cooking time and water temperature. Here are some ways to avoid and fix overcooked eggs:
- Shorten cooking time. Poach eggs for 3 to 4 minutes for a runny yolk.
- Check eggs early. Use a slotted spoon to lift and check eggs after 3 minutes.
- Remove eggs from hot water immediately. Leaving eggs in hot water cooks them further.
- Use an ice bath. Transfer eggs to cold water or ice bath to stop cooking.
If eggs are already overcooked, try these tips:
- Serve over toast with butter or sauce to add moisture.
- Add soft ingredients like avocado or hollandaise sauce.
- Chop the egg and mix into salads or dishes where texture matters less.
Use this table to manage cooking times and temperatures:
| Egg Type | Cooking Time | Water Temperature |
|---|---|---|
| Runny yolk | 3 – 4 minutes | Gentle simmer (around 80-85°C) |
| Medium yolk | 4 – 5 minutes | Gentle simmer |
| Firm yolk | 5 – 6 minutes | Gentle simmer |
These simple adjustments ensure tender, perfectly cooked poached eggs every time.
Frequently Asked Questions
How Long Should You Poach Eggs In A Saucepan?
Poach eggs in simmering water for 3-4 minutes. This timing ensures the whites are set and yolks remain runny. Adjust time slightly for firmer yolks. Use gentle heat to avoid breaking the eggs during cooking.
What Water Temperature Is Best For Poaching Eggs?
Maintain water temperature just below boiling, around 180-190°F (82-88°C). This prevents eggs from breaking apart. Gentle simmering helps cook eggs evenly and keeps whites tender.
Should You Add Vinegar To The Poaching Water?
Yes, adding a teaspoon of vinegar helps egg whites coagulate faster. This keeps the eggs compact and prevents them from spreading. Use mild vinegar to avoid altering the egg’s flavor.
How To Prevent Eggs From Sticking To The Saucepan?
Use fresh eggs and simmer water gently. Adding a splash of vinegar also helps. Stir water gently before adding eggs to create a vortex, which keeps eggs together and prevents sticking.
Conclusion
Poaching eggs in a saucepan is simple and quick. Just use fresh eggs and keep the water at a gentle simmer. A little vinegar helps the egg hold its shape. With practice, you can make perfect poached eggs every time.
They taste great on toast or in salads. Try this easy method and enjoy healthy, tasty eggs at home. Cooking eggs this way adds variety to your meals without much effort. Give it a try and see how easy it can be!

Hello, This is Annie Walker, a 38-year-old blogger, founder, and editor of Cookware Guider from NY, USA. I am a cookware fanatic and passionate cooker. I love to cook with different types of cooking appliances (example: all types of cookware, rice cookers, slow cookers, etc) almost every day in my kitchen. I love to share my experience with my readers in my blog. Also, I enjoy helping people to solve their problems through my website. You can follow me on Twitter & Pinterest. To know details about my blog please check the about us page.