
Cooking rice may sound simple, but for many, it is a struggle to get the texture just right. The Instant Pot, a popular electric pressure cooker, promises perfect rice every time with less effort. But how long should you actually cook rice in an Instant Pot? The answer depends on the type of rice, your desired texture, and even the water-to-rice ratio. In this guide, you will learn not only the exact cooking times for different types of rice but also practical tips, common mistakes, and expert tricks for consistently fluffy results.
Many people switch to the Instant Pot to save time and avoid the mess of stovetop cooking. Still, confusion around settings, timing, and water ratios can lead to mushy, undercooked, or sticky rice. If you have ever wondered why your white rice turns out mushy or your brown rice remains hard, you are not alone.
This article will clear up these doubts, show you how to adjust for different rice varieties, and help you master rice in your Instant Pot—whether you’re a beginner or an experienced cook looking for better results.
Understanding How The Instant Pot Cooks Rice
The Instant Pot uses steam pressure to cook food faster than traditional methods. For rice, this means a shorter cooking time and less active supervision. When you set the Instant Pot to cook rice, the device builds pressure, then holds it for a set time. After cooking, it releases pressure either quickly (quick release) or slowly (natural release).
What makes the Instant Pot different from a regular rice cooker? Regular rice cookers use steady heat, but the Instant Pot’s pressure speeds up the cooking process. It also locks in moisture and flavor. But because pressure cooking is intense, the timing and water ratio are more critical.
Key point: Small changes in time or water can make a big difference in rice texture. Even one minute too long can mean mushy rice, while one minute too short can leave it undercooked.
Types Of Rice And Their Ideal Cooking Times
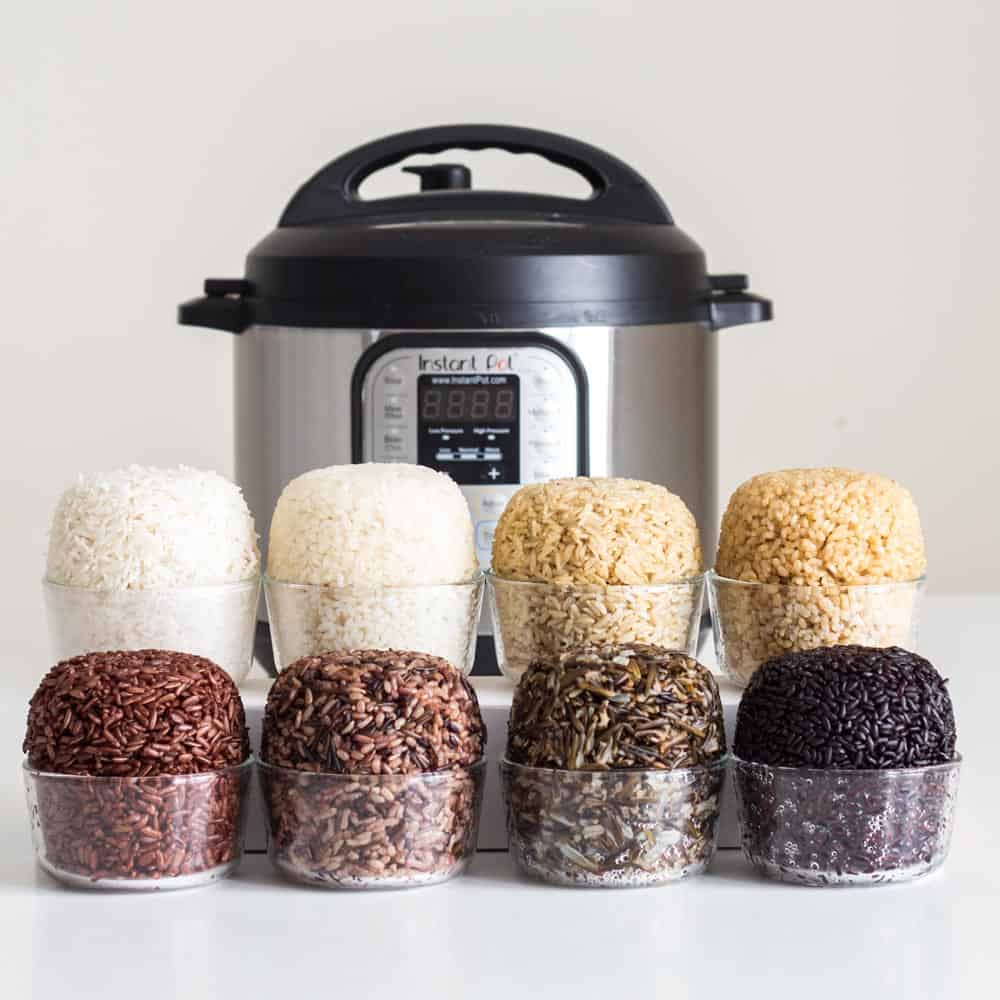
Not all rice is the same. Each type absorbs water differently and needs its own cooking time and water ratio. Below is a table summarizing cooking times and water ratios for common rice varieties in the Instant Pot.
| Type of Rice | Water-to-Rice Ratio | Pressure Cooking Time | Release Method |
|---|---|---|---|
| White (long grain, Jasmine, Basmati) | 1:1 | 3-5 minutes | Natural Release 10 minutes |
| Brown (short/long grain) | 1.25:1 | 22-24 minutes | Natural Release 10 minutes |
| Wild Rice | 1.5:1 | 28-30 minutes | Natural Release |
| Sushi Rice | 1:1 | 5 minutes | Natural Release 10 minutes |
| Arborio (Risotto) | 1.25:1 | 5-6 minutes | Quick Release |
Notice that most rice types use natural pressure release (NPR), which means you let the Instant Pot sit after cooking so pressure drops slowly. This prevents rice from sticking to the bottom or turning gummy.
White Rice (long Grain, Jasmine, Basmati)
- Water ratio: 1 cup rice : 1 cup water
- Cooking time: 3-5 minutes at high pressure
- Release: Natural release for 10 minutes
White rice is the easiest to cook and the most forgiving. For firmer rice, use the lower end of the time range. For softer rice, go a minute longer.
Brown Rice
- Water ratio: 1 cup rice : 1.25 cups water
- Cooking time: 22-24 minutes at high pressure
- Release: Natural release for 10 minutes
Brown rice takes longer because it has a tough outer layer. Do not use the white rice setting for brown rice—it will be undercooked.
Wild Rice
- Water ratio: 1 cup rice : 1.5 cups water
- Cooking time: 28-30 minutes at high pressure
- Release: Natural release
Wild rice is technically a grass, not true rice, and takes much longer to cook.
Sushi Rice
- Water ratio: 1 cup rice : 1 cup water
- Cooking time: 5 minutes at high pressure
- Release: Natural release for 10 minutes
Rinse well before cooking to avoid sticky clumps.
Arborio Rice (risotto)
- Water ratio: 1 cup rice : 1.25 cups water
- Cooking time: 5-6 minutes at high pressure
- Release: Quick release
Risotto is possible in the Instant Pot without constant stirring. The texture will be creamy but less starchy than traditional risotto.
How To Cook Rice In The Instant Pot: Step-by-step Guide
Cooking rice in the Instant Pot is simple once you know the right steps. Here is a practical guide for perfect rice every time.
- Measure your rice and water. Use the right ratio for your rice type.
- Rinse the rice. Place rice in a fine-mesh strainer and rinse until water runs clear. This removes extra starch and prevents sticky rice.
- Add rice and water to the Instant Pot. Add salt or oil if desired for flavor and texture.
- Close the lid and set the valve to Sealing.
- Select the correct program. Use the manual/pressure cook button and set the time based on the table above.
- Wait for pressure to build. This takes 5-10 minutes and is not part of the cooking time.
- Let the Instant Pot do its job. When it beeps, let pressure release naturally for 10 minutes (unless your recipe says Quick Release).
- Open the lid and fluff the rice. Use a fork for light, separate grains.
Tip: For extra flavor, swap water for broth or add a bay leaf, cinnamon stick, or other spices.
Common Mistakes To Avoid
Even experienced cooks make mistakes with rice in the Instant Pot. Here are problems beginners often face:
- Not rinsing the rice: Leads to gummy, sticky rice.
- Wrong water ratio: Too much water = mushy rice. Too little = hard, dry rice.
- Opening the pot too soon: Rice needs time to finish cooking during natural release.
- Overfilling: The Instant Pot should never be more than half full with starchy foods like rice.
- Using the wrong setting: The “Rice” button is for white rice only. Use manual/pressure cook for other types.
Water-to-rice Ratios: Why They Matter
Many people use the same water ratio for all rice types, but that leads to mixed results. The Instant Pot needs less water than the stovetop because almost none escapes during cooking.
For most white rice, a 1:1 ratio is perfect. For brown and wild rice, more water is needed. If your rice is too wet or dry, adjust by a tablespoon at a time until you find your perfect texture.
Here is a quick comparison for common rice types:
| Rice Type | Stovetop Ratio | Instant Pot Ratio |
|---|---|---|
| White Rice | 1:2 | 1:1 |
| Brown Rice | 1:2.25 | 1:1.25 |
| Wild Rice | 1:3 | 1:1.5 |
| Jasmine/Basmati | 1:1.5 | 1:1 |
Non-obvious insight: The Instant Pot’s sealed environment means the water you add is all the water your rice will get. Adding even 1/4 cup too much can change the texture dramatically.

Credit: www.reddit.com
Release Methods: Natural Vs. Quick Release
After the cooking time ends, the Instant Pot can release pressure two ways:
- Natural Pressure Release (NPR): Wait 10-15 minutes for pressure to drop naturally. This keeps rice fluffy and prevents sticking.
- Quick Release (QR): Turn the valve to vent steam quickly. Use for delicate rice types (like risotto) or when in a hurry, but be careful—steam can spray out.
For most rice, NPR is best. It allows grains to finish absorbing water and prevents mushy rice. Only use QR if the recipe says so.
When To Use Each Method
- NPR: White, brown, wild, and sushi rice
- QR: Arborio (risotto), some flavored rice mixes
Practical tip: If you leave the rice too long on NPR, it can get overcooked. Set a timer so you don’t forget.
Cooking Rice For A Crowd
If you need to make a large batch, the Instant Pot can handle it, but there are limits. Do not fill the pot more than half full with rice and water (because of foam and starch). Cooking time does not increase if you double or triple the recipe—pressure cooking is about the same, but it will take longer to come to pressure.
For example, cooking 3 cups of rice (with 3 cups of water for white rice) will take the same 3-5 minutes at pressure, but the pot may need 15 minutes to build pressure instead of 5.
Expert tip: For more than 4 cups of rice, stir in a teaspoon of oil to reduce foaming.
Adjusting For Altitude And Rice Age
High altitude can affect cooking. If you live above 3,000 feet, add 1 minute to your cooking time for every 1,000 feet above this level.
Older rice (stored for months) may need a bit more water, as it can be drier. Start with the standard ratio, and if the rice seems dry, add 2 tablespoons extra water next time.
Special Rice Varieties And International Dishes
The Instant Pot can cook many global rice dishes. Each has its own twist:
- Spanish Rice: Sauté onion, garlic, and tomato paste before adding rice and water. Use the white rice setting.
- Indian Basmati: Rinse well, soak for 15 minutes, then cook as above for more separate grains.
- Persian Rice (Tahdig): The Instant Pot alone cannot make the crispy bottom layer (tahdig), but you can finish it on the stove.
Sticky Rice
Sticky or glutinous rice needs to be soaked for 4-6 hours, then steamed using the pot-in-pot method. Do not cook it directly in the Instant Pot inner pot—it will turn mushy.
Credit: greenhealthycooking.com
Using The Pot-in-pot Method
The pot-in-pot (PIP) method is useful if you want to cook rice and a main dish together, or if you want to avoid rice sticking to the pot.
- Add 1 cup water to the main Instant Pot liner.
- Place a trivet inside.
- Put rice and water (using normal ratio) in a heat-safe bowl on the trivet.
- Cook as normal.
PIP allows you to cook rice and curry or chicken at the same time. Just match the rice cooking time to the main dish.
Non-obvious tip: Rice cooked PIP may need 2-3 extra minutes or 2 extra tablespoons water, as it is further from the heat.
Cleaning And Caring For Your Instant Pot After Cooking Rice
Rice can leave a sticky residue. To avoid smells and stains:
- Remove the silicone sealing ring and wash it separately.
- Soak the inner pot in warm water for 10 minutes before scrubbing.
- Dry the lid and pot completely to prevent odors.
Expert tip: If the sealing ring smells, run a steam cycle with water and a lemon slice.
Troubleshooting: Fixing Common Rice Problems
Even with the right timing, rice can sometimes go wrong. Here’s how to fix it:
- Rice too wet: Next time, reduce water by 2 tablespoons. For now, spread rice on a baking sheet and let it steam off, or sauté it in the pot for 2-3 minutes.
- Rice too dry: Add 2 tablespoons hot water, close the lid, and let it sit for 5 minutes on “Keep Warm.”
- Rice sticking to bottom: Add a teaspoon of oil before cooking. Make sure to use NPR.
If you forget to rinse rice and it turns gummy, use it for fried rice or rice pudding.
Comparing Instant Pot Rice To Other Methods
How does Instant Pot rice compare to stovetop or rice cooker methods? Here’s a quick look:
| Method | Cooking Time | Hands-On Time | Texture Control |
|---|---|---|---|
| Instant Pot | 3-30 min (depends on type) | Very low | High (with practice) |
| Stovetop | 15-50 min | Medium to high | Medium |
| Rice Cooker | 10-60 min | Very low | Medium |
Instant Pot rice is faster for brown and wild rice, but not much faster for white rice. The biggest advantage is the set-it-and-forget-it convenience and consistent results.
Helpful Add-ons And Tools
For even better rice, consider these add-ons:
- Nonstick inner pot: Helps prevent sticking, especially for sticky or sweet rice.
- Measuring cup: Use the same cup for rice and water for consistent results.
- Silicone spatula or rice paddle: Gentler on the pot and rice than metal utensils.
Pro tip: Avoid using the Instant Pot’s “Rice” button for anything except plain white rice. Manual settings give you more control.
Real-life Examples And Timing Adjustments
Here are sample results for different rice types cooked in a 6-quart Instant Pot:
- 2 cups jasmine rice, 2 cups water, 4 minutes high pressure, 10 minutes NPR: Soft, fluffy rice, not sticky.
- 1 cup brown rice, 1.25 cups water, 23 minutes high pressure, 10 minutes NPR: Chewy, separate grains.
- 2 cups wild rice blend, 3 cups water, 28 minutes high pressure, full NPR: Tender but not falling apart.
Beginner’s insight: If your rice is ever too mushy, don’t blame your Instant Pot. Measure water carefully with the same cup each time, and keep notes to find your perfect ratio.

Credit: www.loveandlemons.com
Frequently Asked Questions
How Do I Reheat Rice In The Instant Pot?
Add 1-2 tablespoons water to the cold rice, cover with a lid or foil (pot-in-pot method), and steam for 2-3 minutes on “Steam” or “Manual. ” This prevents rice from drying out.
Can I Cook Rice And Vegetables Together In The Instant Pot?
Yes, but choose vegetables that cook quickly (peas, corn, carrots). Place them on top of the rice before cooking. For harder vegetables, steam separately or cut into small pieces.
What Is The Best Way To Prevent Rice From Sticking To The Bottom?
Rinse rice until water is clear, use a little oil or butter, and always use natural pressure release for at least 10 minutes. Avoid stirring before cooking.
Can I Freeze Instant Pot Rice?
Absolutely. Cool rice completely, then portion into freezer bags. To reheat, add a splash of water and microwave or steam in the Instant Pot.
Is Instant Pot Rice Healthier Than Stovetop Or Rice Cooker Rice?
The method doesn’t change nutrition, but pressure cooking may retain more nutrients because of shorter cooking times and less water. For more on rice nutrition, see Harvard Nutrition Source.
Cooking rice in the Instant Pot offers speed, ease, and consistency. By understanding the right ratios, timing, and a few expert tricks, you can enjoy perfect rice every time—no more guesswork or sticky pots. Whether you’re making a quick side dish or a complex international recipe, the Instant Pot can handle it.
Try these methods, keep notes on your favorite results, and soon you’ll cook rice like a pro, every single time.

Hello, This is Annie Walker, a 38-year-old blogger, founder, and editor of Cookware Guider from NY, USA. I am a cookware fanatic and passionate cooker. I love to cook with different types of cooking appliances (example: all types of cookware, rice cookers, slow cookers, etc) almost every day in my kitchen. I love to share my experience with my readers in my blog. Also, I enjoy helping people to solve their problems through my website. You can follow me on Twitter & Pinterest. To know details about my blog please check the about us page.