
You should use a solution of one part white vinegar to ten parts water to sanitize your machine, as this simple method is how to clean ice maker units effectively without damaging internal components. If your machine produces cloudy ice or has a strange odor, you likely have mineral buildup or mold that requires a thorough descaling process. This procedure varies by model — check your specific appliance label for any unique requirements before starting.
Ideal users for this guide
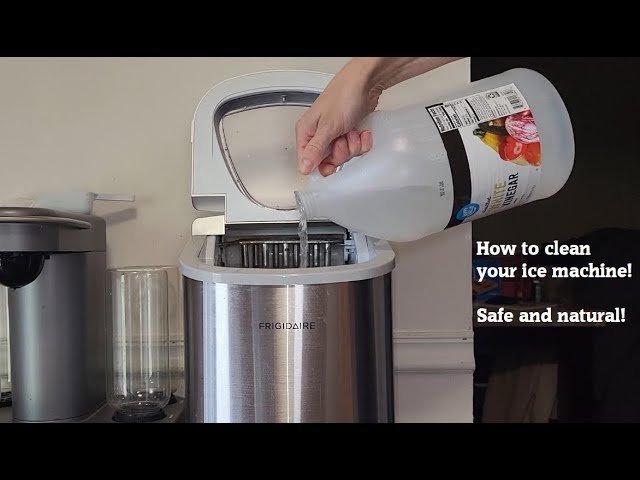
Homeowners and renters who notice their ice tastes metallic or looks cloudy are the main readers for this page. You likely have a standalone unit or a built-in refrigerator ice maker and want to restore performance without calling a professional. You already have basic household tools like a soft cloth, a spray bottle, and white vinegar on hand. If you’re looking for a guide on repairing broken motors or replacing electrical sensors, this page won’t help you; you should contact a certified repair technician instead.
We assume your appliance is currently functional but just needs a routine cleaning to remove scale and bacteria. This guide is built for standard residential models. If you have an industrial-grade machine found in a restaurant, the internal mechanics are much more complex and require specific manufacturer-approved sanitizers rather than vinegar. For those with smart appliances that have built-in self-cleaning cycles, you should prioritize the digital menu options before using manual methods. This information is designed for people who prefer a hands-on approach to routine home maintenance.
Factors influencing your cleaning success
The hardness of your local water supply is the primary factor affecting how quickly mineral deposits build up inside your machine. If you live in an area with high calcium content, you’ll need to perform this cleaning regularly to prevent scale from hardening on the evaporator plates. You can check your local utility website to see if your water is classified as hard or soft.
The age of your appliance also changes how you should handle the cleaning. Older units often have more brittle plastic components that can crack if you scrub too hard or use water that’s too hot. If your machine is an older unit, use a soft microfiber cloth instead of a sponge to minimize the risk of scratching the delicate surfaces.
The frequency of use matters significantly for bacterial growth. If you only use the ice maker occasionally, stagnant water can sit in the lines for weeks, creating a perfect environment for mold. If you find yourself in this position, you should empty the entire bin and run a full cleaning cycle once a month, regardless of whether the ice looks clean or not.
People often make the mistake of using bleach to clean their machines. This is a severe error that can corrode the metal parts of the ice mold and leave toxic residue in your future ice cubes. Always stick to mild, food-safe acids like white vinegar or approved NSF International food equipment cleaners to ensure your ice remains safe for consumption.
Cleaning your ice machine
- Turn off the ice maker by flipping the wire shut-off arm up or pressing the “off” button on the control panel.
- Empty the entire ice bin into the sink and discard all existing ice, as this may be contaminated.
- Mix a solution of one part white vinegar and ten parts warm water in a clean spray bottle.
- Spray the internal walls of the ice bin and the ice mold area thoroughly, ensuring you reach the corners.
- Use a soft-bristled brush or a microfiber cloth to wipe away any visible mineral deposits or slime.
- Rinse all surfaces you wiped with a clean, damp cloth to remove the vinegar scent and residue.
- Wipe the bin dry with a clean towel to prevent new water from freezing onto the surfaces immediately.
- Replace the bin, turn the power back on, and discard the first two batches of ice produced after cleaning.
The most important judgment call is ensuring you have wiped away all traces of the vinegar solution. If you leave vinegar behind, your first few batches of ice will have a distinct, unpleasant sour taste. If you notice a lingering smell after rinsing, wipe the areas down one more time with fresh water. If the machine requires deep disassembly of the internal pump or water lines, stop immediately. You should hire a professional for internal component work to avoid voiding your warranty or causing a leak.
Ice maker cleaning scenarios
| Situation | Cleaning Method | Time Required | Watch For |
|---|---|---|---|
| Minor scale | Vinegar spray | 15 minutes | Cloudy cubes |
| Heavy buildup | Vinegar soak | 45 minutes | Hard white spots |
| Musty smell | Deep scrub | 60 minutes | Mold growth |
| Monthly routine | Wipe down | 10 minutes | Water flow speed |
| New machine | Manual rinse | 5 minutes | Plastic residue |
If your cubes emerge cloudy, the mineral content in your water is likely high. Use a 1:1 ratio of white vinegar to water. If the spray fails to clear the scale after fifteen minutes, you have entered the heavy buildup category.
For heavy buildup, you must soak the evaporator plate. If you skip this, the scale becomes permanent, eventually pitting the metal and ruining the ice quality. You know you have reached this stage if you see hard, chalky white spots that don’t wipe away with a damp cloth.
Musty odors indicate trapped moisture in the bin. If you smell mildew, scrub the bin with a mild bleach solution, then rinse thoroughly. If the smell persists, check the drain line for a blockage. A clogged line keeps stagnant water near the ice, which is a common mistake that leads to bacterial growth.
Finally, always monitor water flow speed. If the flow slows, clean the intake filter immediately to prevent the pump from burning out.
Improving your cleaning results
Essential preparation steps
Successful cleaning starts with a completely empty reservoir. If you leave old ice in the bin, it will melt during the process and create a mess that’s hard to manage. Always verify that your water supply line is turned off if your model has a direct water connection, as this prevents water from cycling while you’re working. Using a flashlight allows you to see into the back corners of the ice mold, where mineral deposits often hide and cause jamming.
Maintaining the finish
Experienced users know that scratching the evaporator plate will cause ice to stick permanently in the future. Never use abrasive pads, steel wool, or harsh scouring powders on these surfaces. If you encounter stubborn scale that doesn’t come off with a light wipe, let the vinegar solution sit for five minutes to dissolve the minerals. This patience preserves the non-stick coating of the plate and ensures your machine continues to release ice smoothly for years to come.
Troubleshooting common issues
| What you notice | What it usually means | What to do first | How to stop it |
|---|---|---|---|
| Slow ice production | Filter is clogged | Replace water filter | Change filter yearly |
| Bad tasting ice | Stale water supply | Run full clean | Use ice regularly |
| White flakes in ice | Mineral scale buildup | Descale with vinegar | Use water softener |
| Moldy smell | Bacterial growth | Sanitize surfaces | Keep bin dry |
| Ice is stuck together | High humidity | Empty and reset | Keep door closed |
If your ice production drops by more than 50% in 24 hours, check the water line pressure before replacing the filter. A kinked line mimics a clogged filter but costs nothing to fix.
When ice tastes metallic, test your home’s water hardness. If your reading exceeds 7 grains per gallon, a standard carbon filter will fail within three months. You must install a dedicated inline scale inhibitor to prevent mineral leaching.
Most owners make the mistake of using bleach to sanitize the bin. This damages the plastic lining and leaves toxic residue. Always use a food-grade citric acid solution instead.
Replace the seal immediately to prevent internal frost buildup that forces the system to work harder.
Rules for safe maintenance
You must follow the specific cleaning intervals listed in your owner’s manual to maintain your manufacturer’s warranty. If your machine is part of a high-end refrigerator, the manufacturer often specifies a proprietary cleaning agent tested for compatibility with their specific seals and gaskets. Using an unauthorized chemical can cause these rubber parts to degrade, leading to leaks that damage your flooring.
If your ice maker is connected to a complex water filtration system, check the manual to see if you need to bypass the filter during the cleaning process. Some filters can be damaged by vinegar solutions. If you’re unsure about the safety of a specific cleaner, search the manufacturer’s official support website using your model number.
Never attempt to bypass safety switches or remove electrical covers to clean internal parts. This mistake often voids your warranty instantly. It also risks an electrical short that can fry the main control board, a repair that frequently costs more than a new unit.
If the machine stops producing ice after you have cleaned it, and the power is on, you have likely reached the limit of do-it-yourself maintenance. If the water line is clear but no ice forms, the issue is mechanical. Contact a licensed appliance technician to inspect the water valve or the control board. If the unit makes a humming sound but no water flows, shut off the supply immediately to prevent a flood.
The cost of maintenance
The financial cost of cleaning your ice maker is minimal, usually totaling a cheap part for a bottle of white vinegar and a fresh cloth. The real cost is your time, which typically ranges from fifteen to sixty minutes depending on the level of buildup. If you ignore this maintenance, the cost increases significantly. You may end up paying for a professional service call, which can often be less than a new unit, or you might have to replace the entire ice maker unit if the scale buildup causes the motor to burn out.
Most owners make the mistake of waiting for visible white flakes in their ice before taking action. By then, the internal evaporator plate is already pitted, which creates a rough surface that traps minerals faster. If you see cloudy ice, you’re already behind schedule.
You can reduce these costs by performing a quick wipe-down whenever you change your refrigerator’s water filter. This simple habit prevents heavy mineral deposits from accumulating, which saves you from needing a deep, time-consuming clean later.
If your ice tastes metallic or the cubes are smaller than usual, the internal lines are likely restricted. In this case, a basic vinegar wash won’t suffice; you must use a food-grade nickel-safe descaler to avoid damaging the plating. If you find your water is exceptionally hard, investing in a whole-home water softener is a long-term strategy to reduce the wear on all your water-using appliances, including your dishwasher and coffee maker, not just your ice machine.
Keeping your machine clean
After you have finished the cleaning process, you should monitor the quality of the ice for the next week. If the ice remains clear and odorless, you have successfully removed the contaminants. To maintain this result, avoid leaving the ice bin lid open, as this allows warm, humid air to enter and encourages mold growth.
If you notice the ice beginning to stick together, it’s a sign of temperature fluctuations or high humidity in the freezer. You don’t need to perform a full deep clean every time you see this; simply pull the bin out and wipe the interior with a damp cloth to remove the surface moisture. Check the water filter light on your refrigerator panel monthly. Most modern refrigerators are programmed to warn you when the filter has reached its capacity, which is based on time or water volume rather than mineral removal. If the ice starts to smell like your freezer’s contents, ensure you’re storing open food containers in sealed bags, as the ice can absorb odors from the surrounding air.
When to avoid this method
This cleaning method isn’t suitable for machines that have developed a mechanical leak or an electrical short. If you see water pooling underneath your refrigerator or hear a grinding noise coming from the ice maker, don’t attempt to clean it. These are signs of a component failure that requires a professional repair service. Attempting to clean a machine that’s already leaking can lead to water damage in your home or a risk of electrical shock.
If your machine is still under a manufacturer’s warranty, check the documentation before using any chemical cleaner. Some companies mandate the use of their own branded cleaning kits. Using a different product might void your coverage, leaving you responsible for the full cost of any future repairs. If you’re uncomfortable handling the internal components or if the machine is hard-wired into your home’s plumbing, it’s best to stop and call a professional. There’s no shame in seeking help when dealing with appliances that mix electricity and water.
Why does my ice have white bits in it?
This is usually caused by mineral deposits, or scale, that have built up inside the ice mold and are flaking off into your ice. You can fix this by running a vinegar cleaning cycle to dissolve the minerals and then flushing the system with fresh water.
How long does it take to clean the ice maker?
It typically takes about 15 to 60 minutes to clean an ice maker depending on how much buildup is present inside the unit. A quick wipe-down takes 15 minutes, while a deep soak to remove heavy mineral scale can take up to an hour of total time.
Is it safe to use bleach to clean the ice maker?
No, you shouldn’t use bleach, as it can be harmful if ingested and may corrode the metal parts of your ice maker. Stick to food-safe, mild acids like white vinegar or products specifically labeled as safe for food equipment to keep your ice clean and your machine protected.
How often should I clean my ice maker?
You should clean your ice maker at least every three to six months to prevent mold and mineral buildup. If you live in an area with hard water or use the machine very frequently, you may need to clean it more often to keep the ice quality high.
What happens if I don’t clean my ice maker?
If you don’t clean your ice maker, mineral deposits will build up and cause the ice to become cloudy, taste metallic, or smell bad. Over time, these deposits can clog the water lines or damage the internal pump, which may require expensive repairs or a full unit replacement.
Does the water filter type matter for cleaning?
Yes, the type of water filter you use impacts how quickly mineral scale builds up in your ice maker. Ensure you’re using the correct filter for your specific model and change it according to the manufacturer’s schedule to prevent excessive mineral deposits from reaching the ice mold.
Start by turning off the power to the ice maker and clearing out all existing ice. Follow the cleaning steps carefully to ensure every surface is sanitized, and remember to discard the first few batches of ice to clear out any remaining vinegar. If the machine continues to produce poor-quality ice after a thorough cleaning, it’s time to stop and contact a professional technician for help.
Related guides
- How To Clean Mold Off Cookware: Easy Steps for Sparkling Results
- Best Cleaner For Coffee Maker 2026: Top Picks for Sparkling Machines
- How To Get White Spots Off Stainless Steel Cookware: Easy Cleaning Hacks

Hello, This is Annie Walker, a 38-year-old blogger, founder, and editor of Cookware Guider from NY, USA. I am a cookware fanatic and passionate cooker. I love to cook with different types of cooking appliances (example: all types of cookware, rice cookers, slow cookers, etc) almost every day in my kitchen. I love to share my experience with my readers in my blog. Also, I enjoy helping people to solve their problems through my website. You can follow me on Twitter & Pinterest. To know details about my blog please check the about us page.