
To create a smooth, creamy glaze, you whisk two cups of powdered sugar with four tablespoons of softened butter, two tablespoons of milk, and one teaspoon of vanilla extract until the mixture is uniform. How to make icing for cinnamon rolls involves balancing these base ingredients to reach your preferred consistency.
The final texture depends on the temperature of your butter and the ratio of liquid to sugar. If you prefer a thicker, frosting-like layer, use less milk; if you want a thin, translucent glaze, add another teaspoon of milk until it reaches the right flow.
Why make your own cinnamon roll icing
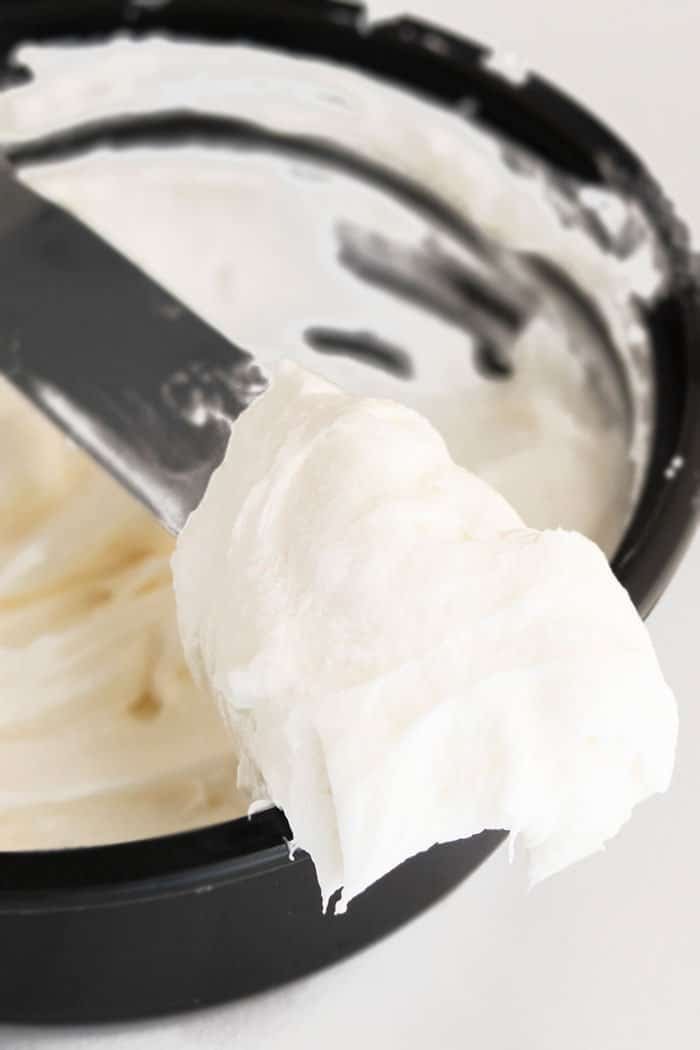
Home bakers usually make this icing to finish fresh-baked rolls, though some need a quick topping for store-bought dough. This guide serves those who want a classic, sweet glaze that sets well at room temperature. If you’re looking for a complex cream cheese frosting or a vegan alternative, you’ll need a different recipe, as this one assumes you have standard dairy and pantry staples on hand.
The reader who benefits most from this guide is the one who already has their cinnamon rolls in the oven and needs a reliable, quick recipe that doesn’t require special equipment. We assume you’re working in a standard kitchen environment with basic tools like a mixing bowl and a whisk or fork. If you have never made a glaze before, this method is the most forgiving. Those who want a professional-grade, high-volume bakery finish might find this approach too simple, as it focuses on speed and ease rather than advanced techniques like sugar crystallization or professional aeration. This page is for the person who wants the job done well without extra fuss.
Factors Affecting Your Glaze
The quality of your ingredients and the environment in your kitchen dictate how the icing sets. Butter temperature is the most critical factor, as cold butter creates lumps that are difficult to whisk away. Always ensure your butter is soft enough to press with a finger before you begin.
Humidity plays a larger role than most people realize. In a very humid kitchen, powdered sugar tends to absorb moisture from the air, which can make your icing appear thinner than it actually is. You may need to add an extra tablespoon of sugar to compensate if the air feels heavy or damp.
The type of milk you use changes the richness of the final product. Whole milk provides a creamier mouthfeel compared to skim milk or water. If you’re watching your intake, skim milk works, but the glaze will be more transparent and less velvety.
Most people make the mistake of adding all the liquid at once. This often leads to a runny mess that slides right off the rolls. Always start with half the milk, stir, and then add the remainder slowly. It’s easy to add more liquid, but fixing a glaze that’s too thin requires adding more sugar, which throws off your sweetness balance.
According to the FoodSafety.gov cold food storage charts, dairy products should be kept refrigerated until use to prevent bacterial growth. While this glaze is usually consumed quickly, keep your milk chilled until the moment you start mixing.
Making the Glaze
- Place 4 tablespoons of room-temperature, unsalted butter into a medium-sized mixing bowl.
- Sift 2 cups of powdered sugar into the bowl to remove any hard clumps.
- Pour in 1 teaspoon of vanilla extract and 1 tablespoon of milk.
- Whisk the ingredients firmly until the butter is fully incorporated into the sugar.
- Add the second tablespoon of milk slowly while continuing to whisk.
- Check the consistency by lifting your whisk; the icing should drip slowly in a thick ribbon.
- Add a tiny splash of extra milk, about 1/4 teaspoon at a time, if the mixture is still too stiff.
- Stop whisking as soon as the mixture is smooth to avoid introducing too much air, which can create bubbles.
- Drizzle the finished icing over your rolls while they’re slightly warm but not piping hot.
The key judgment call is the visual test: the glaze must be thick enough to coat the back of a spoon without running off immediately. If it’s too thin, the icing will soak into the dough; if it’s too thick, it will sit in a hard clump.
Glaze Troubleshooting Table
| Situation | Action | Effort | What to watch for |
|---|---|---|---|
| Too runny | Add more sugar | Low | Transparency |
| Too thick | Add tiny milk | Low | Spreading ease |
| Lumpy butter | Whisk vigorously | High | Smooth finish |
| Too sweet | Add pinch salt | Low | Balanced flavor |
| Grainy sugar | Sift first | Medium | Even texture |
If the glaze runs off the cake entirely, you have added too much liquid. Add confectioners’ sugar one teaspoon at a time. Stop immediately when the mixture coats the back of a metal spoon without dripping rapidly.
If the glaze feels like heavy paste, add milk by the half-teaspoon. A common mistake is adding too much liquid at once, which forces you to waste more sugar to thicken it again. This cycle ruins the batch consistency.
Lumpy butter usually occurs when the butter is too cold. If you see yellow streaks, place the bowl over a pot of simmering water for ten seconds. Whisk constantly. If the glaze turns oily, the butter has melted; stop heating immediately.
When balancing sweetness, use sea salt rather than table salt. Table salt often contains iodine, which creates a metallic aftertaste. A single pinch is usually enough to cut the cloying sugar profile.
If your sugar is grainy, verify the humidity in your kitchen. High moisture causes sugar to clump in the bag. If you can’t sift it, pulse the sugar in a food processor for five seconds before adding any liquid. This ensures a professional, glass-like finish.
Ensuring Success
Preparation and Technique
Experienced bakers always sift their powdered sugar. This simple step removes the small, hard lumps that occur during storage and ensures that your glaze is perfectly smooth. When you skip this, you’ll find yourself whisking for minutes trying to break down stubborn sugar balls, which often leads to over-mixing.
Order matters when combining your ingredients. By creaming the butter with the sugar before adding the milk, you create a stable foundation. Adding the milk in tiny portions allows you to control the thickness precisely. If you dump all the liquid in at once, you lose the ability to correct the consistency without adding significant amounts of extra sugar.
Monitoring the Result
Watch the temperature of your rolls before you apply the glaze. If the rolls are fresh from the oven and steaming, the butter in the icing will melt instantly and turn into a clear, sugary syrup. Wait about 10 minutes after pulling the rolls from the oven so they’re warm but not scorching.
Check the coating as you drizzle. The icing should cling to the sides of the rolls and settle into the crevices without pooling heavily at the bottom of the pan. If you see it pooling, your icing is too thin. Stop immediately and whisk in another tablespoon of powdered sugar. This adjustment is much easier to manage if you have only applied the icing to one or two rolls first.
Common Glaze Issues
| What you notice | What it usually means | What to do first | How to stop it |
|---|---|---|---|
| Glaze is clear | Rolls are too hot | Let rolls cool | Wait 10 minutes |
| White streaks | Butter not soft | Whisk more | Soften butter |
| Gritty texture | Sugar not sifted | Use a fork | Sift sugar |
| Slides off | Too much milk | Add more sugar | Add milk slowly |
| Tastes bland | Needs salt/vanilla | Add a pinch | Use real vanilla |
The Standards That Matter
Food safety standards focus on the stability of dairy-based toppings. Since this recipe uses milk and butter, it’s considered a perishable item. The USDA emphasizes that perishable foods shouldn’t remain in the “danger zone” of room temperature—defined as 40°F to 140°F—for more than two hours.
Many home bakers mistake the cooling process for safe storage. If the rolls are still warm when you cover them, you trap steam and create a humid environment that accelerates bacterial growth. Always allow the glaze to set completely at room temperature for no more than 60 minutes before moving the tray to a refrigerator.
If you’re preparing this for a large group or a bake sale, use the two-hour rule as your hard deadline. If the ambient temperature in your kitchen exceeds 80°F, cut that window in half. If the rolls will sit out for longer than these limits, you must refrigerate them.
The most common mistake is assuming that high sugar content acts as a preservative. While sugar draws out moisture, the dairy in this specific glaze provides enough protein and water activity to support microbial life. If you notice the glaze becoming tacky or developing an off-odor after four hours, discard the batch immediately.
If you have health concerns regarding dairy or sugar intake, consult your own dietary guidelines or your primary care physician for advice specific to your health needs. When serving guests, provide a small ingredient card listing the dairy content to ensure those with sensitivities can make an informed decision before their first bite.
The Real Cost of Glaze
The cost of this icing is very low, as it relies on basic pantry staples. You’re primarily spending money on butter and high-quality vanilla extract. Using imitation vanilla can save money, but the flavor difference is noticeable in a simple glaze where vanilla is the primary aromatic.
The effort involved is minimal, usually taking less than five minutes of active work. The biggest “cost” is time spent waiting for the rolls to cool; rushing this step ruins the visual appeal of the final product.
Many bakers assume that glaze thickness is a matter of preference, but it’s actually a matter of temperature control. If you apply the glaze while the rolls are above 110 degrees Fahrenheit, the butter will melt instantly. Instead of a glossy, opaque finish, you’ll end up with a transparent syrup that pools at the bottom of the pan.
To test if your rolls are ready, touch the center of the dough. If the surface feels warm to the touch but not hot, the glaze will set into a firm, creamy layer. If the rolls are cold, the glaze will be difficult to spread evenly.
A common mistake is adding too much liquid at once. Always start with one tablespoon of milk for every cup of sugar. If the glaze is too thin, add sugar by the teaspoon. If it’s too thick, add milk by the half-teaspoon. This precision prevents the waste of ingredients.
Maintaining Your Result
Once the icing has set, it will remain stable for the life of the cinnamon roll. If you have leftovers, cover the container tightly with plastic wrap to prevent the sugar from crusting or drying out.
If the icing hardens too much after a day, you can briefly warm the entire pan of rolls in a low-heat oven for three minutes to soften the glaze. Don’t exceed this time, or the butter in the icing will separate, leaving a greasy puddle rather than a smooth finish.
Never store the rolls in a humid environment, as the sugar will draw moisture and become sticky. A common mistake is placing them in the refrigerator while they’re still slightly warm. This traps condensation inside the airtight container, which ruins the texture within hours.
If the rolls feel firm to the touch but the glaze is tacky, move them to a dry, cool pantry.
Use this decision rule to ensure freshness: if you plan to eat them within 24 hours, keep them at room temperature in a sealed container. If you intend to save them for more than two days, freeze the rolls individually. Thaw them at room temperature for one hour before serving to restore the original crumb and glaze consistency.
When to Skip This Method
This recipe isn’t suitable for rolls that require a shelf-stable, high-fat cream cheese frosting. If you’re shipping these rolls or taking them to an outdoor event in the summer, this butter-and-milk glaze will melt and become messy. In those cases, choose a frosting that uses cream cheese or shortening, which holds its shape better at higher temperatures.
If you have specific dietary restrictions, such as a need for a sugar-free or dairy-free topping, this recipe won’t work for you. Look for specialized recipes that use sugar substitutes or coconut cream instead.
The primary mistake bakers make here is attempting to substitute the milk with a non-dairy alternative. You can substitute non-dairy milks, though the flavor and opacity may vary. This leads to a thin, translucent syrup rather than a thick, opaque glaze. If your liquid base separates, the glaze will soak entirely into the roll instead of coating the top.
Use this decision rule: if the ambient temperature is above 75 degrees Fahrenheit, skip this glaze. The butter will lose its structure, turning the topping into a greasy puddle within twenty minutes. If you must transport the rolls, wait until they’re completely cool to the touch. Applying glaze to warm rolls accelerates the melting process by an additional ten minutes. When in doubt, perform a test drip on a single roll before committing to the entire batch.
Frequently asked questions
Can I use water instead of milk?
Yes, you can use water instead of milk. The glaze will be slightly more transparent and lack the creamy mouthfeel that dairy provides. Use the same quantity of water as you would milk, but add it even more slowly, as water creates a thinner consistency faster than milk does.
Why is my icing lumpy?
Your icing is lumpy because the butter was too cold or the powdered sugar wasn’t sifted. To fix this, continue whisking until the butter melts into the sugar, or use a fork to press the lumps against the side of the bowl until they dissolve into the mixture.
How long does this icing last?
This icing should be refrigerated if stored for more than two hours. Because it contains dairy, it’s best to keep the rolls in a cool, dry place to prevent the icing from becoming sticky or absorbing odors.
Is it safe to leave out overnight?
Yes, it’s generally safe to leave this icing out at room temperature for up to two hours. If you plan to keep the rolls longer, store them in the refrigerator to maintain the quality of the dairy ingredients and prevent any risk of spoilage from the milk.
Does it matter what butter I use?
Yes, it matters because salted butter will add a savory note to your sweet glaze, while unsalted butter lets the vanilla flavor shine. If you only have salted butter, omit any extra salt from the recipe and taste the mixture before adding more to ensure it stays balanced.
What happens if I add too much milk?
If you add too much milk, the icing will become a thin syrup that soaks into the rolls instead of sitting on top. To fix this, add more powdered sugar one tablespoon at a time, whisking thoroughly between each addition, until the glaze reaches your desired thickness.
Icing Cinnamon, in short
Start by gathering your ingredients and ensuring your butter is at room temperature. Once you have mixed your glaze to a thick, ribbon-like consistency, drizzle it slowly over your warm rolls. If the icing begins to pool at the bottom of the pan, stop immediately, as this is the sign that your glaze is too thin and requires more sugar.

Hello, This is Annie Walker, a 38-year-old blogger, founder, and editor of Cookware Guider from NY, USA. I am a cookware fanatic and passionate cooker. I love to cook with different types of cooking appliances (example: all types of cookware, rice cookers, slow cookers, etc) almost every day in my kitchen. I love to share my experience with my readers in my blog. Also, I enjoy helping people to solve their problems through my website. You can follow me on Twitter & Pinterest. To know details about my blog please check the about us page.