
Cooking rice can seem simple, but getting it perfect is not always easy. Too much water and you get mushy rice; too little and it’s undercooked. The Instant Pot changes this. With this electric pressure cooker, you can make fluffy, consistent rice every time, whether you are a beginner or an experienced cook. In this guide, you’ll learn everything you need to know about how to cook rice in an Instant Pot, from water ratios and cooking times to common mistakes and expert tips. Even if you’ve struggled with rice before, you’ll soon feel confident making perfect rice for any meal.
Why Use An Instant Pot For Rice?
Traditional rice cookers and stovetop pots have been around for decades, but the Instant Pot has become a kitchen favorite in recent years. Why? The Instant Pot uses pressure cooking to speed up the process and make results more reliable. With a few button presses, you can walk away and come back to perfectly cooked rice. The device controls heat and pressure, so each grain cooks evenly. Plus, it frees up your stove and keeps your kitchen cooler.
One thing that surprises many people is that the Instant Pot is not just for white rice. It handles brown rice, jasmine, basmati, and even specialty grains. The key is knowing the right water ratio and cooking time for each type.
Types Of Rice You Can Cook In An Instant Pot
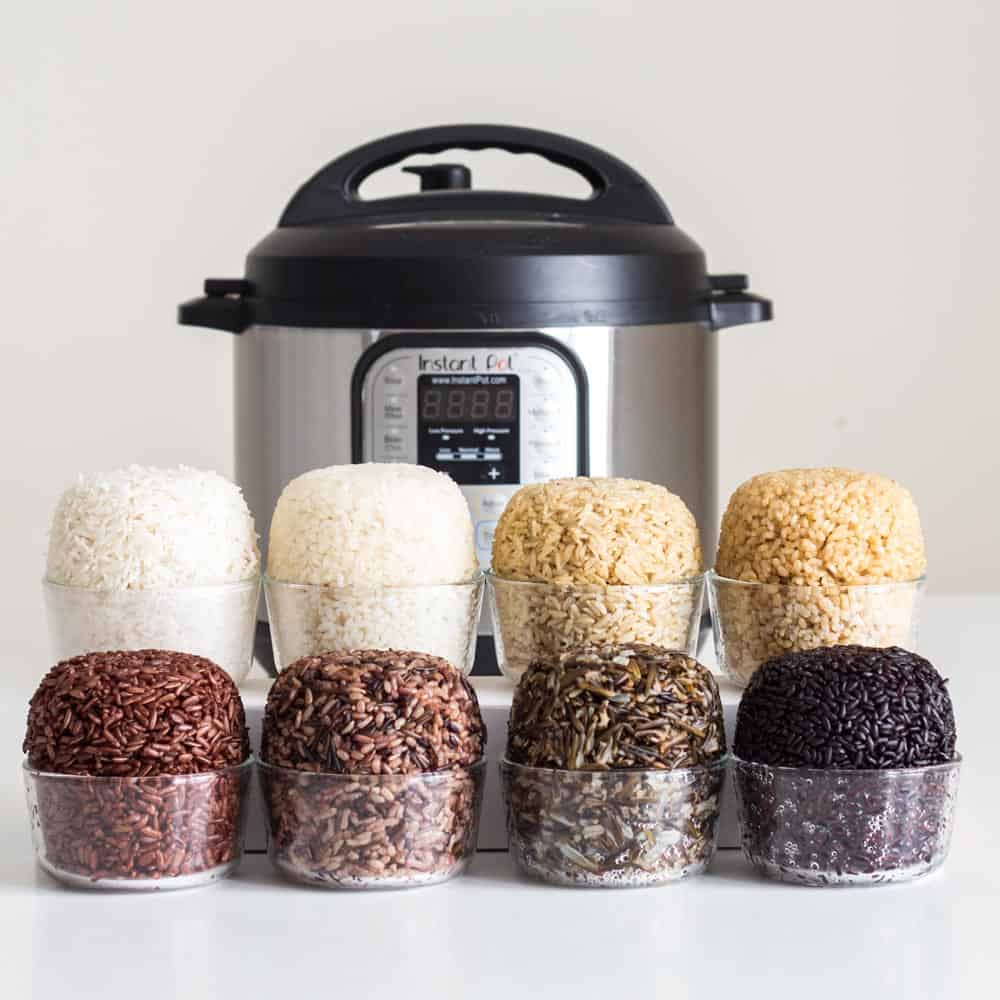
There are many types of rice, but not all cook the same way. Here are the most common varieties and what makes each unique:
- White Rice: This is the most popular type, including long-grain, short-grain, and medium-grain. It cooks quickly and has a light, fluffy texture.
- Jasmine Rice: A fragrant long-grain rice, common in Thai dishes. It’s soft and slightly sticky.
- Basmati Rice: A long-grain rice from India and Pakistan, known for its nutty aroma and separate, fluffy grains.
- Brown Rice: Less processed than white rice, it has more fiber and a chewy texture. It takes longer to cook.
- Wild Rice: Actually a grass seed, not true rice. It has a nutty flavor and chewy bite.
- Arborio Rice: Used for risotto, it’s short-grain and starchy, giving a creamy texture.
- Sushi Rice: Short-grain and sticky, perfect for sushi rolls.
Different types need different water ratios and cooking times. Getting these right is the secret to perfect rice.

Credit: www.proterra.at
Essential Equipment And Ingredients
You don’t need fancy tools to make rice in an Instant Pot. Here’s what you’ll use:
- Instant Pot: Any model with a pressure cook function works.
- Rice paddle or spatula: For fluffing the rice.
- Measuring cups: For accurate water-to-rice ratio.
- Fine mesh strainer: To rinse the rice.
- Ingredients:
- Rice (type and amount you want)
- Water (or broth for extra flavor)
- Salt (optional)
- Oil or butter (optional, for less sticking and extra taste)
Understanding Water-to-rice Ratios
The most important factor in Instant Pot rice is the water-to-rice ratio. Too much water gives soggy rice. Too little and it’s hard or undercooked. Because the Instant Pot is sealed and doesn’t lose steam, you need less water than on the stove.
Here’s a quick comparison of the most common rice types:
| Type of Rice | Rice (cups) | Water (cups) | Cook Time (minutes) | Pressure Release |
|---|---|---|---|---|
| White Rice | 1 | 1 | 4 | 10 min Natural |
| Jasmine Rice | 1 | 1 | 4 | 10 min Natural |
| Basmati Rice | 1 | 1 | 6 | 10 min Natural |
| Brown Rice | 1 | 1.25 | 22 | 10 min Natural |
| Wild Rice | 1 | 2 | 28 | 15 min Natural |
Natural release means letting the pressure drop on its own, which prevents rice from getting sticky or mushy.
Why Ratios Matter
Beginners often use the wrong ratios. Remember, the Instant Pot keeps all the steam in. On the stove, some water evaporates, but not here. If you use too much water, your rice turns out wet and clumpy. Trust the ratios above—they’re tested and reliable.
Step-by-step: Cooking Basic White Rice In An Instant Pot
Let’s walk through the process for making white rice, the most common choice. The steps are nearly the same for other types, with small changes for water and time.
Ingredients
- 1 cup white rice (long-grain, jasmine, or basmati)
- 1 cup water
- ½ teaspoon salt (optional)
- 1 teaspoon oil or butter (optional)
Instructions
1. Rinse The Rice
Place the rice in a fine mesh strainer. Rinse under cold water for about 1-2 minutes, moving the rice with your hand. This removes extra starch and prevents stickiness.
2. Add To The Instant Pot
Put the rinsed rice in the inner pot. Add water, salt, and oil or butter if using.
3. Close The Lid And Set Valve
Secure the Instant Pot lid. Make sure the steam release valve is set to Sealing.
4. Select Pressure Cook
Press the Pressure Cook or Manual button. Set the time for 4 minutes at high pressure.
5. Let Pressure Release Naturally
After cooking, let the Instant Pot sit for 10 minutes. This is called Natural Pressure Release (NPR). Then carefully turn the valve to Venting to release any remaining pressure.
6. Fluff And Serve
Open the lid. Use a rice paddle or fork to gently fluff the rice. Serve hot.
Cooking More Than 1 Cup
You can double or triple the recipe. Just keep the 1:1 ratio of rice to water. The cooking time stays the same.
How To Cook Other Types Of Rice
Different types of rice need small changes. Here’s how to adjust:
Jasmine And Basmati Rice
- Use 1 cup rice to 1 cup water.
- Cook for 4 minutes (jasmine) or 6 minutes (basmati) at high pressure.
- 10 minutes natural release.
Brown Rice
- 1 cup rice to 1¼ cups water.
- Cook for 22 minutes at high pressure.
- 10 minutes natural release.
Wild Rice
- 1 cup rice to 2 cups water.
- Cook for 28 minutes at high pressure.
- 15 minutes natural release.
Sushi And Arborio Rice
- Sushi: Use 1 cup rice to 1 cup water, cook for 5 minutes, 10 minutes natural release.
- Arborio: Use 1 cup rice to 1¼ cups water, cook for 6 minutes, 10 minutes natural release.
Here’s a quick look at the difference in cooking times and textures:
| Rice Type | Texture | Flavors Best With |
|---|---|---|
| White/Jasmine | Fluffy, soft | Stir-fries, curries |
| Basmati | Separate grains | Indian, Middle Eastern |
| Brown | Chewy, nutty | Buddha bowls, salads |
| Wild | Chewy, earthy | Pilafs, soups |
| Arborio | Creamy, starchy | Risotto |
Tips And Tricks For Better Rice
Anyone can follow a recipe, but a few small adjustments can make your rice even better. Here are some expert tips:
- Always rinse your rice. This removes starch so the rice doesn’t stick together.
- Add flavor. Cook your rice in broth instead of water, or add a bay leaf, a cinnamon stick, or a few cardamom pods for extra taste.
- Let it rest. When the cooking time is up, let the rice sit for a few minutes before fluffing. This allows the grains to firm up.
- Use oil or butter. A teaspoon helps prevent sticking, especially with stickier varieties.
- Don’t overfill. The Instant Pot manual usually says to fill the pot no more than halfway with rice and water, since rice expands.
- Use the right release. Natural release gives the best texture. Quick release can make rice gummy or cause foaming.
Non-obvious Insights
- Altitude Changes Cooking: If you live at a high altitude (above 3,000 feet), add 1-2 minutes to the cook time. Pressure cookers take longer to reach full pressure at high altitudes.
- Leftover Rice Is Better: Rice that sits in the fridge for a day is perfect for fried rice dishes. The grains firm up and absorb sauces better.
Common Mistakes And How To Avoid Them
Mistakes happen, but most are easy to fix or avoid.
- Too Much Water: Rice is mushy or sticky. Solution: Use less water next time, and always measure carefully.
- Not Enough Water: Rice is dry or crunchy. Solution: Make sure to use the correct ratio and level the rice before adding water.
- Forgot to Rinse: Rice is extra sticky. Solution: Rinse thoroughly in a fine mesh strainer before cooking.
- Quick Release Pressure: Rice is foamy or sticky. Solution: Use natural release for at least 10 minutes.
- Rice Stuck to Bottom: Did not use oil, or used too little water. Solution: Add a teaspoon of oil and don’t skimp on water.
- Lid Won’t Close: Rice or grains stuck around the sealing ring. Solution: Clean the lid and ring before sealing.
Using Rice Preset Vs. Manual Mode
Many Instant Pots have a Rice button. It’s designed for white rice and sets time and pressure automatically. But experienced cooks often prefer Manual or Pressure Cook for more control, especially for brown or specialty rices.
Here’s a side-by-side look:
| Setting | Best For | Can Adjust Time? | Results |
|---|---|---|---|
| Rice Button | White rice | No | Good, but less flexible |
| Manual/Pressure Cook | All types | Yes | Best control and results |
Pro tip: Use manual mode for brown, wild, or mixed rice. Use the rice button only for plain white rice.
How To Store And Reheat Cooked Rice
Cooking extra rice is a time-saver, but you need to store it safely. Rice can grow bacteria if left out too long.
- Cool Quickly: Transfer rice to a shallow container and place in the fridge within one hour.
- Store in the Fridge: Use cooked rice within 4-5 days.
- Freeze for Later: Rice freezes well. Place in freezer bags, remove extra air, and freeze for up to 2 months.
- Reheat Properly: Sprinkle a little water over the rice, cover, and microwave for 1-2 minutes. Or steam on the stove. Rice should be piping hot before eating.
Insight: Never leave rice at room temperature for more than 2 hours. Bacteria called *Bacillus cereus* can grow and cause food poisoning if rice is not chilled quickly.
Credit: greenhealthycooking.com
Making Rice For A Crowd
If you’re cooking for a group, the Instant Pot is up for the job. Most 6-quart models can handle up to 4 cups of uncooked rice (which makes about 12 cups cooked). Just keep the rice-to-water ratio the same, and don’t fill more than halfway.
Cooking time does not change.
Tip: After cooking, fluff the rice and keep the lid on the Keep Warm setting. Stir every 20-30 minutes to prevent clumping.
Rice Add-ins And Variations
Rice doesn’t have to be plain. You can add ingredients before cooking for more flavor and color.
- Vegetables: Peas, carrots, corn, or bell pepper.
- Spices: Turmeric, cumin, paprika, or saffron.
- Aromatics: Garlic, ginger, onion.
- Proteins: Beans, lentils, or small pieces of chicken.
How to do it: Add chopped veggies or spices to the pot with the rice and water. If adding meat, make sure it’s cut small and fully cooked by the end of the rice cooking time.
Credit: detoxinista.com
Troubleshooting: Fixing Rice That Didn’t Come Out Right
Sometimes things go wrong. Here’s how to fix common problems:
- Rice is too wet: Spread it on a baking sheet and let it air dry for a few minutes. Or, return to the Instant Pot, use Sauté mode, and stir gently for 1-2 minutes.
- Rice is undercooked: Add 2-3 tablespoons of water, close the lid, and cook on high pressure for 1 minute more. Natural release for 5 minutes.
- Rice is stuck or browned at bottom: This is called “fond” and is safe to eat, but avoid scraping too hard to prevent scratching your inner pot.
Using The Pot-in-pot (pip) Method
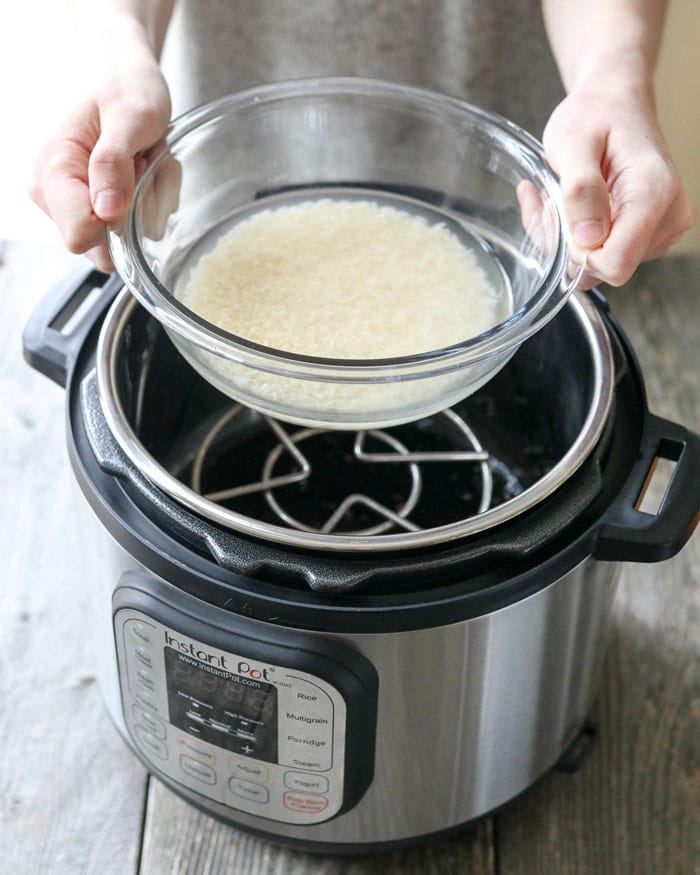
The Pot-in-Pot method lets you cook rice in a separate bowl above other food, like curry or steamed vegetables. It’s handy if you want to cook two things at once, or if you want less clean-up.
How To Use Pot-in-pot
- Put the trivet (metal rack) in the Instant Pot.
- Add 1 cup of water to the bottom of the main pot.
- In a separate oven-safe bowl, add your rice, water, and salt/oil.
- Place the bowl on the trivet.
- Pressure cook as usual.
Insight: PIP may need 1-2 extra minutes of cooking time since the heat takes longer to reach the rice.
Cleaning And Caring For Your Instant Pot
To keep your rice tasting great, clean your Instant Pot well after every use.
- Remove the inner pot and wash with warm, soapy water.
- Clean the sealing ring and lid. Rice can leave a starchy film.
- Wipe the outside with a damp cloth.
- Dry fully before storing.
Tip: If the sealing ring smells like rice, soak it in vinegar and rinse well.
Beyond Rice: Other Grains In The Instant Pot
The Instant Pot can handle more than just rice. Try these grains for variety:
- Quinoa: 1 cup quinoa + 1 cup water, 1 minute high pressure, 10 minutes natural release.
- Barley: 1 cup barley + 2½ cups water, 20 minutes high pressure, 10 minutes natural release.
- Farro: 1 cup farro + 2 cups water, 10 minutes high pressure, 10 minutes natural release.
Trying new grains can add nutrition and variety to your meals.
Frequently Asked Questions
How Do I Prevent Rice From Sticking To The Bottom Of The Instant Pot?
Add a teaspoon of oil or butter to the pot before cooking. Make sure to rinse your rice well to remove extra starch. Do not use less water than recommended, and always fluff the rice after cooking.
Can I Cook Rice And Other Foods At The Same Time In The Instant Pot?
Yes, with the Pot-in-Pot method or by placing rice above a main dish using a trivet. Make sure both foods have similar cooking times.
Is The Rice-to-water Ratio Different For Rinsed Versus Unrinsed Rice?
Rinsed rice absorbs some water during rinsing, but the standard Instant Pot ratios work for both rinsed and unrinsed rice. Rinsing is recommended for best texture.
How Do I Keep Rice Warm In The Instant Pot Without Drying Out?
Use the Keep Warm setting and keep the lid closed. Fluff the rice and stir every 30 minutes. If rice dries, sprinkle a little water and cover again.
What Is The Best Type Of Rice For Meal Prep Or Freezing?
White rice and brown rice freeze and reheat well. Let rice cool, divide into portions, and freeze in airtight bags. Reheat with a splash of water for best texture.
For more Instant Pot tips and trusted recipes, see the official Instant Pot recipes page.
Cooking rice in an Instant Pot is fast, easy, and reliable. Once you master the basics, you can explore endless flavor combinations and meal options. With the right ratios, timing, and a few smart tips, you’ll enjoy perfect rice every time—no guesswork, no wasted batches, just delicious grains ready for your table.

Hello, This is Annie Walker, a 38-year-old blogger, founder, and editor of Cookware Guider from NY, USA. I am a cookware fanatic and passionate cooker. I love to cook with different types of cooking appliances (example: all types of cookware, rice cookers, slow cookers, etc) almost every day in my kitchen. I love to share my experience with my readers in my blog. Also, I enjoy helping people to solve their problems through my website. You can follow me on Twitter & Pinterest. To know details about my blog please check the about us page.