Have you ever looked at your old cookware and wished it could look brand new again? Painting your cookware is a simple and affordable way to refresh your kitchen without buying new pots and pans.
Imagine turning dull, scratched surfaces into vibrant, eye-catching pieces that make cooking more enjoyable. You’ll discover easy steps and expert tips to paint your cookware safely and effectively. Ready to give your kitchen a fresh new look? Let’s dive in and transform your cookware together!
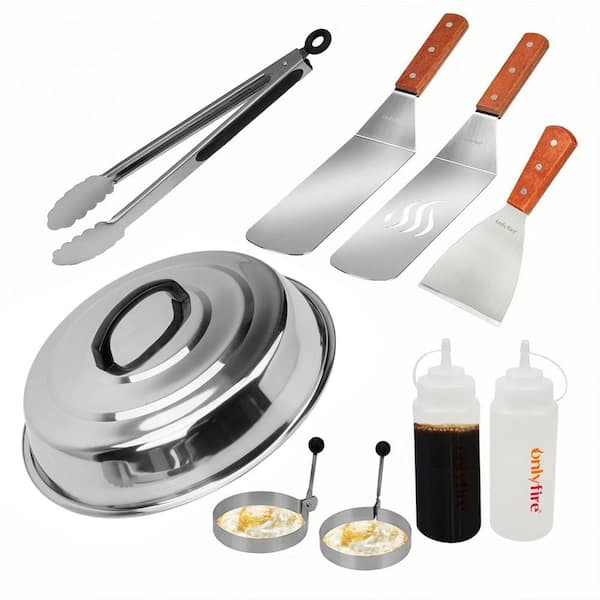
Credit: www.homedepot.com
Choosing The Right Paint
Choosing the right paint for your cookware is important. The paint must handle heat and stay safe for food use. Not all paints work well on pots and pans. This section explains the best paint types and brands for your project.
Types Of Paint For Cookware
Some paints stick well to metal and ceramic surfaces. Enamel paint is popular for cookware because it is smooth and durable. Acrylic paint can be used but needs a protective topcoat. Spray paints offer even coverage but check if they are heat-safe. Avoid regular house paint; it can peel or release toxins.
Heat-resistant Options
Cookware paint must resist high temperatures. Look for paints labeled as heat-resistant or heat-proof. These paints do not crack or fade with heat. Silicone-based paints work well for heat resistance. Oven paint is another option made for cooking tools. Always follow the paint’s instructions for heating and curing.
Safe Paint Brands
Choose brands known for non-toxic and food-safe products. Rust-Oleum and Krylon have heat-resistant spray paints. Some enamel paints come with FDA approval for indirect food contact. Check the label for safety details. Do not use paints with lead or harmful chemicals. Safety matters most when painting cookware.
Credit: www.sinogracechem.com
Preparing Your Cookware
Preparing your cookware is the first step to a smooth painting process. It helps the paint stick better and last longer. Proper preparation also keeps your cookware safe to use after painting.
Follow these simple steps to get your cookware ready for painting. Taking time here will improve your results.
Cleaning And Degreasing
Start by washing your cookware with warm, soapy water. Remove all food particles and grease. Use a sponge or cloth to scrub well. Rinse thoroughly and dry completely. Grease or dirt can stop paint from sticking properly.
Sanding The Surface
Lightly sand the cookware surface with fine-grit sandpaper. This creates a rough texture for the paint to grip. Sand evenly without pressing too hard. Wipe away dust with a clean cloth after sanding. Smooth surfaces make paint peel off easily.
Removing Rust And Old Paint
Check your cookware for rust spots or peeling paint. Use a wire brush or steel wool to scrub off rust. For old paint, scrape gently with a putty knife or use a paint remover. Clean the area well after removing rust and paint. A clean surface ensures better paint adhesion.
Setting Up Your Workspace
Setting up your workspace is the first step to painting cookware safely and neatly. A good workspace helps you work better and keeps your kitchen clean. Prepare your area before you start painting. Organize everything so you can focus on the task without distractions.
Ventilation Tips
Choose a well-ventilated place for painting your cookware. Open windows and doors to let fresh air flow through. Use a fan to push fumes outside if possible. Paint fumes can be harmful, so fresh air is important. Avoid small, closed rooms to protect your health.
Protecting Surfaces
Cover your work area with newspaper, plastic, or a drop cloth. This stops paint from spilling on tables or floors. Tape the edges to keep the cover in place. Protect nearby items to avoid accidental stains. Cleaning paint spills is hard, so prevention is key.
Gathering Tools And Materials
Collect all the tools and materials before you begin. You will need paint, brushes, sandpaper, and cleaner. Have gloves and masks ready to protect your skin and lungs. Keep a container of water or paint thinner nearby for cleaning brushes. Being prepared saves time and keeps the process smooth.
Painting Techniques
Painting cookware requires careful techniques to ensure a smooth and lasting finish. Each step matters for durability and appearance. The right method can protect the cookware and make it look new.
Priming The Cookware
Start by cleaning the cookware thoroughly. Remove all grease and dirt for better paint adhesion. Use a mild soap and water, then let it dry completely.
Apply a primer designed for metal surfaces. This creates a strong base for the paint. Use a thin, even layer and avoid drips. Let the primer dry as per instructions before moving on.
Applying The Paint
Choose heat-resistant paint made for cookware. Apply it in thin, even coats. Multiple thin layers work better than one thick coat.
Allow each layer to dry fully. Lightly sand between coats with fine sandpaper for smoothness. Follow the paint manufacturer’s drying times closely.
Using Brushes Vs. Sprays
Brushes give control and suit small areas or details. Use soft, clean brushes to avoid streaks. Brush strokes may show but can add texture.
Spray paint offers a smooth, even finish on large surfaces. Hold the can at a consistent distance. Move steadily to prevent drips and uneven spots.
Choose the method that fits your project size and comfort. Both can yield good results when done carefully.
Drying And Curing
Drying and curing are crucial steps after painting cookware. Proper drying ensures the paint sets well. Curing makes the paint strong and long-lasting. Skipping these steps can cause peeling or chipping.
Recommended Drying Times
After painting, let the cookware dry in a dust-free place. Most paints need at least 24 hours to dry fully. Some paints may require up to 48 hours. Check the paint label for exact drying times. Avoid touching or moving the cookware during drying.
Baking The Paint For Durability
Baking the painted cookware helps the paint bond firmly. Preheat your oven to the temperature suggested on the paint can. Place the cookware inside and bake it for the recommended time. This process cures the paint and makes it heat-resistant. Allow the cookware to cool inside the oven slowly.
Avoiding Common Mistakes
Don’t rush the drying process; paint needs time to harden. Avoid high oven temperatures that can burn the paint. Never use cookware painted with non-heat-resistant paint. Clean the cookware surface well before painting to avoid peeling. Handle painted cookware gently during the first use.
Maintaining Painted Cookware
Maintaining painted cookware helps keep it looking fresh and working well. Proper care stops the paint from peeling or fading. It also extends the life of your cookware. Simple steps in cleaning, handling, and touching up can protect your investment. Follow these tips to enjoy your painted cookware for a long time.
Cleaning Tips
Clean painted cookware gently to avoid damage. Use a soft sponge or cloth instead of rough scrubbers. Avoid harsh chemicals or abrasive cleaners. Warm water with mild soap works best. Rinse thoroughly and dry with a soft towel. Do not soak painted cookware for long periods. This prevents paint from loosening or chipping.
Handling And Storage
Handle painted cookware with care to prevent scratches. Avoid stacking heavy pots or pans directly on painted surfaces. Use cloth or paper towels between items when storing. Store cookware in a dry place to stop rust and paint damage. Do not drop or bang painted cookware. Small impacts can cause paint to chip.
Touching Up Chips And Scratches
Fix chips and scratches quickly to protect the cookware. Use paint made for high heat and metal surfaces. Clean the area before applying paint. Apply a thin layer and let it dry fully. Repeat if needed for better coverage. Proper touch-ups keep cookware safe and looking nice.

Credit: www.cuminco.com
Frequently Asked Questions
How Do I Prepare Cookware Before Painting?
Clean the cookware thoroughly with soap and water. Remove rust and grease using a scrub or sandpaper. Let it dry completely before applying paint for better adhesion and a smooth finish.
What Paint Is Safe For Painting Cookware?
Use high-temperature, food-safe enamel or heat-resistant spray paint. Avoid toxic paints to ensure safety while cooking. Always check the product label for food safety certification.
How Many Coats Of Paint Are Needed On Cookware?
Apply 2 to 3 thin coats for even coverage. Allow each coat to dry fully before applying the next. Thin layers prevent peeling and ensure a durable finish.
Can Painted Cookware Be Used For Cooking?
Yes, if painted with food-safe, heat-resistant paint. Avoid painting cooking surfaces directly. Use painted cookware mainly for decorative or serving purposes to ensure safety.
Conclusion
Painting cookware can give old pots and pans a fresh look. Choose the right paint and prepare surfaces well. Take time to apply paint evenly and let it dry fully. Always follow safety steps to keep your kitchen safe. Painted cookware adds style and saves money.
Try it yourself and enjoy a new kitchen feel. Simple steps, big change.

Hello, This is Annie Walker, a 38-year-old blogger, founder, and editor of Cookware Guider from NY, USA. I am a cookware fanatic and passionate cooker. I love to cook with different types of cooking appliances (example: all types of cookware, rice cookers, slow cookers, etc) almost every day in my kitchen. I love to share my experience with my readers in my blog. Also, I enjoy helping people to solve their problems through my website. You can follow me on Twitter & Pinterest. To know details about my blog please check the about us page.