If you use a food slicer regularly, you know how important a sharp blade is. Slicing meats, cheeses, and vegetables becomes effortless, safe, and precise. Over time, though, the blade can dull, making your slicer less effective and even unsafe. Many people worry about sharpening their food slicer blade, thinking it’s complicated or risky. But sharpening is easier than you think, and doing it yourself can save money and keep your slicer in top shape.
This guide will show you how to sharpen a food slicer blade step by step. Whether you own a manual or electric slicer, you’ll learn how to recognize when sharpening is needed, what tools to use, and how to avoid common mistakes.
We’ll cover safety, cleaning, and even how to choose a replacement blade if yours is too worn. By the end, you’ll feel confident keeping your slicer sharp and ready for perfect cuts every time.
Why A Sharp Food Slicer Blade Matters
A dull slicer blade can cause many problems. First, it makes slicing harder. You need more force, which can lead to uneven cuts or even injuries if the blade slips. Second, a dull blade tears food instead of slicing cleanly.
This damages the texture and appearance of meats, cheeses, and veggies. For businesses, such as delis or restaurants, poor presentation can affect customer satisfaction.
Studies show that sharp blades cut food up to 30% faster and with less waste compared to dull ones. For home users, a sharp blade means less effort and safer operation. It also helps keep your slicer motor healthy, as it doesn’t have to work so hard.
Signs Your Food Slicer Blade Needs Sharpening
Recognizing when to sharpen your blade is key. Here are some clear signs:
- Uneven slices – If your meats or cheeses look jagged or uneven, the blade is likely dull.
- Increased force – You need to push harder to slice through food.
- Strange noises – The slicer makes grinding or squeaking sounds.
- Food sticking – Slices stick to the blade or come off in chunks.
- Blade discoloration – Rust or dull spots appear on the blade surface.
If you notice any of these, it’s time to sharpen the blade. Waiting too long can damage the machine or lead to unsafe conditions.
Understanding Food Slicer Blade Types
Before sharpening, it’s important to know which type of blade your slicer uses. There are two main types:
- Smooth blade – Great for meats and cheeses. Provides clean, thin slices.
- Serrated blade – Best for bread and soft foods. The teeth help grip and cut.
Both types require different sharpening methods. Some slicers have a built-in sharpener, while others need an external tool. Always check your slicer’s manual before starting.
Here’s a quick comparison of blade types:
| Blade Type | Best For | Sharpening Difficulty |
|---|---|---|
| Smooth | Meats, cheeses, vegetables | Easy |
| Serrated | Bread, soft foods | Moderate |
Safety Precautions Before Sharpening
Sharpening a slicer blade can be risky if you don’t follow safety steps. Here are some essential precautions:
- Unplug the slicer – Never sharpen while the slicer is connected to power.
- Wear cut-resistant gloves – Protect your hands from accidental slips.
- Use protective eyewear – Prevent tiny metal shavings from getting in your eyes.
- Work in a well-lit area – Better visibility reduces mistakes.
- Read the manual – Each slicer is different; check for specific instructions.
Most injuries happen when people rush or skip these steps. Take your time and make safety your priority.
Tools Needed For Sharpening Food Slicer Blades
To sharpen your blade, you’ll need a few tools. The right tools make the job easier and safer.
- Sharpening stone – Also called a whetstone. Used for smooth blades.
- Blade sharpener attachment – Some slicers come with this; it fits on the blade for easy sharpening.
- Screwdriver – For removing the blade from the slicer.
- Cleaning brush – To remove debris before and after sharpening.
- Lubricant oil – Helps keep the blade smooth after sharpening.
A sharpening stone should be fine-grit (1000-3000), which is ideal for food slicer blades. Avoid using rough stones, as they can damage the blade.
Step-by-step Guide To Sharpening A Food Slicer Blade
Sharpening your blade doesn’t have to be complicated. Here’s a practical step-by-step guide that works for most slicers.
Step 1: Preparation
First, unplug the slicer and remove any food debris. Wash the blade and slicer body with warm, soapy water. Dry everything completely. If your slicer has a blade lock, engage it now.
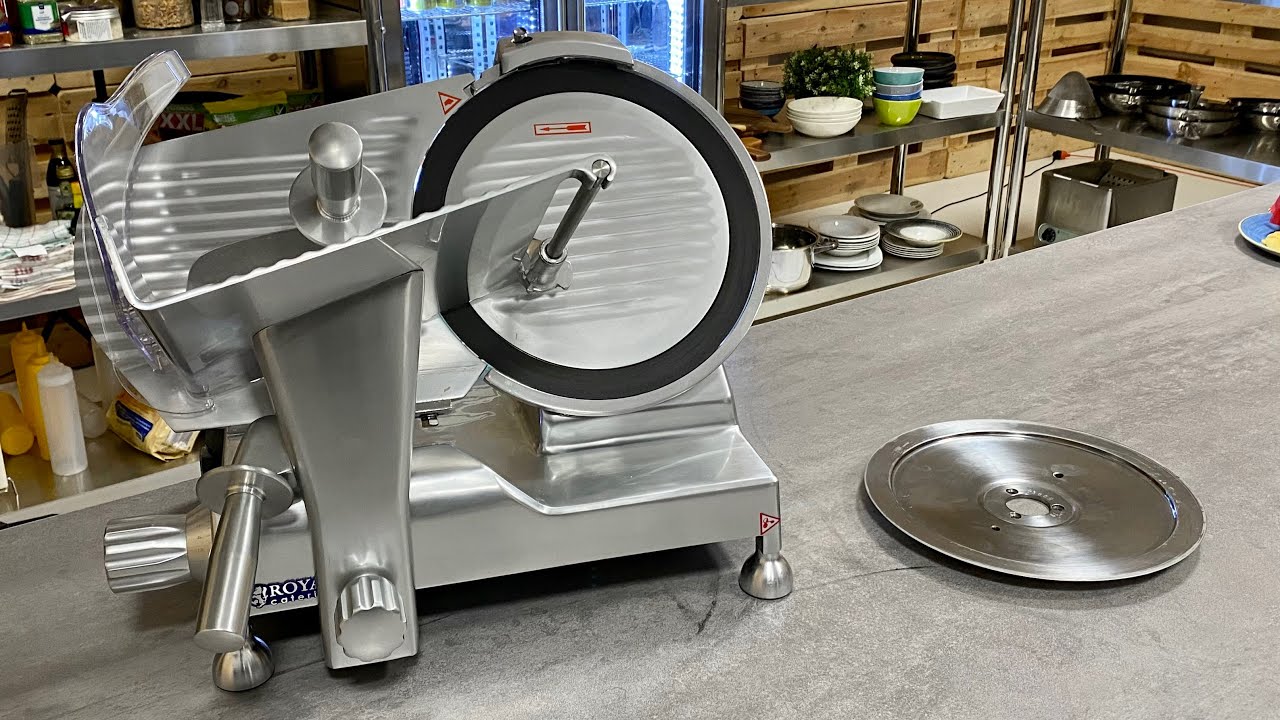
Step 2: Remove The Blade
Use a screwdriver to loosen the screws holding the blade. Carefully lift the blade out, holding it by the center hub or handle. Never touch the edge directly.
For slicers with a built-in sharpener, you may not need to remove the blade. Check your manual.
Step 3: Inspect The Blade
Look for chips, rust, or deep scratches. If the blade is severely damaged, sharpening may not help. In this case, consider replacing the blade.
Step 4: Sharpening With A Stone
If you’re sharpening a smooth blade:
- Wet the sharpening stone with water or oil, as recommended.
- Hold the blade at a 20-degree angle against the stone.
- Slide the blade in a circular or sweeping motion, covering the entire edge.
- Repeat for 10-15 strokes on each side.
- Check the edge for sharpness. If needed, repeat.
For serrated blades, use a ceramic rod or small file. Work each tooth gently, avoiding too much pressure.
Step 5: Using A Blade Sharpener Attachment
If your slicer has a sharpener attachment:
- Attach the sharpener to the blade as directed by the manual.
- Plug in the slicer and turn it on for a few seconds.
- Let the blade rotate against the sharpener.
- Turn off and unplug the slicer.
- Remove the attachment and check the blade’s sharpness.
This method is fast but only works on compatible slicers.
Step 6: Clean And Lubricate The Blade
After sharpening, clean the blade with a damp cloth to remove metal shavings. Dry it fully, then apply a small amount of lubricant oil to the edge. This prevents rust and keeps the blade smooth.
Step 7: Reinstall The Blade
Carefully place the blade back in the slicer. Tighten the screws and check that it’s secure. Plug in the slicer and test with a small piece of food to ensure smooth operation.
Sharpening Frequency: How Often Should You Sharpen?
How often you sharpen depends on usage. For home cooks, sharpening every 3-6 months is usually enough. For businesses, sharpen every 2-4 weeks. Heavy use may require even more frequent sharpening.
Here’s a quick reference table:
| Usage Level | Sharpening Frequency |
|---|---|
| Home (light) | Every 3-6 months |
| Business (moderate) | Every 2-4 weeks |
| Business (heavy) | Weekly |
Always check the blade before each use for signs of dullness.
Cleaning And Maintaining Your Slicer Blade
Sharpening is only part of the process. Cleaning and maintenance keep your blade in good shape longer.
- Wash the blade after each use with warm, soapy water.
- Dry the blade thoroughly to prevent rust.
- Store the slicer in a dry area, away from moisture.
- Lubricate the blade every month, especially after sharpening.
A well-maintained blade stays sharp longer and is safer to use.
Credit: waltons.com
Common Mistakes When Sharpening Food Slicer Blades
Many beginners make simple mistakes that can ruin their blade or cause injury. Avoid these common pitfalls:
- Using the wrong angle – Always use a 20-degree angle for smooth blades.
- Over-sharpening – Too much sharpening can thin the blade, making it weak.
- Skipping cleaning – Sharpening a dirty blade spreads bacteria and reduces effectiveness.
- Not checking for damage – Sharpening a damaged blade can make things worse.
- Ignoring safety gear – Gloves and goggles are essential.
If you’re unsure, start slowly and check your progress often.
When To Replace Your Food Slicer Blade
Sometimes, sharpening isn’t enough. If your blade is:
- Severely chipped
- Bent or warped
- Rusted beyond repair
- Does not hold a sharp edge after sharpening
…it’s time to replace it. Replacement blades cost $20-$50 for most models. Always buy the correct size and shape for your slicer.
Credit: www.youtube.com
Choosing A Replacement Food Slicer Blade
If you need a new blade, consider these key factors:
- Blade diameter – Match your slicer’s specifications.
- Material – Stainless steel is durable and rust-resistant.
- Edge type – Choose smooth or serrated, depending on your needs.
- Brand compatibility – Use blades recommended by your slicer manufacturer.
Avoid generic blades that may not fit properly. A poorly fitting blade can damage your machine or cause injuries.
Here’s a comparison of common blade materials:
| Material | Durability | Rust Resistance | Price Range |
|---|---|---|---|
| Stainless Steel | High | Excellent | $20-$50 |
| Carbon Steel | Very High | Moderate | $15-$40 |
| Ceramic | Moderate | Excellent | $30-$70 |
Stainless steel is the most popular for food slicers due to its balance of durability and rust resistance.
Sharpening Serrated Blades: Special Tips
Serrated blades need extra care. Instead of a sharpening stone, use a ceramic rod or small round file.
- Work slowly, focusing on each tooth.
- Avoid too much pressure; serrated teeth are more fragile.
- Clean the blade thoroughly after sharpening.
If sharpening doesn’t restore performance, consider professional sharpening or replacement. Serrated blades are harder to sharpen, and mistakes are costly.
Built-in Blade Sharpeners: Are They Worth It?
Some slicers come with a built-in sharpener. These are convenient but have limits.
Advantages:
- Fast and easy
- No need to remove the blade
- Safe for beginners
Disadvantages:
- May not sharpen evenly
- Only works for certain blade types
- Can wear out over time
For home use, built-in sharpeners are usually fine. For business use, manual sharpening may give better results.
Sharpening Electric Vs. Manual Food Slicer Blades
Electric slicers often have more complex blades and may require specific sharpening tools. Manual slicers are simpler but still need regular care.
Electric slicers:
- Usually have removable blades
- May have built-in sharpeners
- Need careful cleaning and lubrication
Manual slicers:
- Blades are fixed and easier to access
- Sharpening is more straightforward
- Less risk of electrical hazards
Always check your slicer’s manual for instructions. Improper sharpening can damage the motor or blade.
Professional Sharpening Vs. Diy Sharpening
Some people prefer professional sharpening. It costs $30-$60 per blade, but you get expert results.
DIY sharpening saves money and lets you control the process. However, it takes practice. If you’re unsure, try sharpening a small blade first.
Professional sharpening is best if:
- The blade is expensive or rare
- You use the slicer for business
- The blade is heavily damaged
Otherwise, DIY sharpening is fine for most home users.
Practical Tips For Sharpening Food Slicer Blades
Here are some expert tips to get the best results:
- Keep the sharpening stone clean. Metal particles can clog the surface.
- Use light, even pressure. Heavy pressure can damage the blade.
- Sharpen both sides evenly.
- Never use household knives or scissors sharpeners; they’re not designed for slicer blades.
- Test the blade after sharpening with a soft food, like a tomato. If it slices easily, it’s sharp.
Many beginners forget to check the sharpness after sharpening. Always test before using the slicer for larger jobs.
Troubleshooting After Sharpening
Sometimes, the blade still feels dull after sharpening. Here’s what to check:
- Did you use the correct angle (20 degrees)?
- Is the sharpening stone clean?
- Did you sharpen both sides evenly?
- Is the blade damaged beyond repair?
If the blade doesn’t improve, consider professional sharpening or replacement.
Real-world Examples: Sharpening Success Stories
A deli owner in Chicago reported slicing efficiency improved by 40% after sharpening their slicer blade monthly. Food waste dropped by 15%, and the slicer motor lasted longer. Home cooks often notice easier slicing and better presentation after sharpening.
One user shared that their slicer blade lasted over two years with regular sharpening and cleaning. They saved money by avoiding frequent replacements.

Credit: www.reddit.com
Expert Insights: What Beginners Often Miss
- Cleaning before sharpening is essential. Even small bits of food can affect sharpening results and spread bacteria.
- Lubricating after sharpening prevents rust and keeps the edge smoother.
- Checking for blade damage before sharpening saves time and prevents accidents.
Many people think sharpening alone solves every problem. But cleaning, lubrication, and blade inspection are just as important.
Frequently Asked Questions
How Do I Know If My Food Slicer Blade Is Sharp Enough?
A sharp blade slices food cleanly, without tearing or crushing. Try slicing a tomato or thin deli meat. If the cut is smooth and effortless, the blade is sharp. If you need to push hard or the food sticks, sharpening is needed.
Can I Sharpen A Serrated Slicer Blade Myself?
Yes, but it’s harder than sharpening a smooth blade. Use a ceramic rod or small round file, working each tooth gently. If you’re unsure, professional sharpening is safer.
How Long Does It Take To Sharpen A Food Slicer Blade?
Most blades can be sharpened in 10-20 minutes. Built-in sharpeners are faster, taking just a few seconds. Always allow extra time for cleaning and safety checks.
Is It Safe To Sharpen A Food Slicer Blade At Home?
Yes, if you follow safety steps. Unplug the slicer, wear gloves, and use the correct tools. Never rush or skip safety gear.
Where Can I Find Replacement Blades?
Replacement blades are available online, at kitchen supply stores, or from your slicer manufacturer. Always buy the right size and type. For reliable information, check Wikipedia’s page on food slicers.
Keeping your food slicer blade sharp is easier than most people think. Regular sharpening, cleaning, and proper maintenance help your slicer work better, cut safer, and last longer. Follow the steps above, and you’ll enjoy perfect slices every time. If you ever feel unsure, seek help from a professional or your slicer’s manufacturer. Remember: a sharp blade is a safe blade, and your kitchen will thank you for it.

Hello, This is Annie Walker, a 38-year-old blogger, founder, and editor of Cookware Guider from NY, USA. I am a cookware fanatic and passionate cooker. I love to cook with different types of cooking appliances (example: all types of cookware, rice cookers, slow cookers, etc) almost every day in my kitchen. I love to share my experience with my readers in my blog. Also, I enjoy helping people to solve their problems through my website. You can follow me on Twitter & Pinterest. To know details about my blog please check the about us page.