
Most people own a knife, but not everyone has a professional knife sharpener at home. Maybe you’re camping, cooking in a friend’s kitchen, or just don’t want to spend money on a tool you’ll rarely use. The good news: you can sharpen a knife without a sharpener, and it’s easier than you might think. With the right technique and some common household items, you can restore your blade’s edge and slice through food with ease again.
A dull knife is not just annoying—it’s also dangerous. You need to use more force, which can lead to slips and injuries. A sharp knife, on the other hand, gives you control and makes cooking a pleasure. This article will guide you through safe, effective ways to sharpen a knife without a commercial sharpener.
You’ll learn about practical tools you already have, step-by-step instructions, tips to avoid mistakes, and answers to the most common questions.
Let’s unlock the secrets to sharp knives—no fancy gadgets required.
Why Knife Sharpness Matters
A sharp knife is a must-have for both professional chefs and home cooks. Slicing tomatoes, dicing onions, or carving meat all become smoother with a keen edge. But there’s more to sharpness than speed and ease.
Safety is the top reason. A dull blade requires more pressure, making it more likely to slip and cut your hand. Studies from the U.S. Consumer Product Safety Commission show that thousands of kitchen accidents each year are caused by dull knives.
Food quality also changes. A sharp knife cuts cleanly, helping food keep its shape and texture. For example, a dull knife will crush herbs, releasing their juices and flavor before they reach your dish.
Finally, maintaining your knife’s edge extends its lifespan. Frequent, rough sharpening with the wrong tools can wear down the blade over time. Regular, gentle maintenance keeps your knife strong and effective.
How Knife Sharpening Works
Sharpening is about removing a small amount of metal from the blade to form a new, sharp edge. This is different from honing, which simply realigns the blade without removing metal. Both are important, but sharpening is what you need when your knife feels truly blunt.
The main goal is to create a fine, even bevel on each side of the blade. The angle of this bevel—usually between 15° and 20° for kitchen knives—affects sharpness and durability. Sharpening with the wrong angle can create a weak or jagged edge.
There are many ways to sharpen a knife, but the basic process remains the same:
- Find a hard, abrasive surface.
- Hold the blade at the correct angle.
- Slide the blade across the surface, removing a tiny layer of metal.
- Repeat until you feel a sharp edge.
Essential Safety Tips
Before you start, consider these safety basics:
- Always keep your fingers behind the blade edge.
- Use a stable, non-slip surface for sharpening.
- Move the knife slowly and steadily.
- Wipe the blade clean before testing its sharpness.
A common mistake is pressing too hard. You only need gentle, even pressure. If you’re nervous, practice with an old knife first.
Common Household Items For Sharpening
You don’t need a sharpening stone or professional kit. Many everyday objects can sharpen your knife effectively. Here are the most reliable options:
1. Ceramic Mug Or Plate
The unglazed bottom ring on many mugs and plates is slightly rough—perfect for sharpening.
2. Sandpaper
Medium-grit sandpaper (400–600 grit) is abrasive enough to sharpen but not damage most kitchen knives.
3. Nail File (emery Board)
A nail file or emery board can sharpen small blades or touch up a dull edge.
4. Car Window
The top edge of a car window (the rolled-down part) is uncoated glass and works much like a ceramic rod.
5. Flat Stone
A smooth, flat stone from outside can act as a basic sharpening stone if it’s hard and clean.
6. Leather Belt
While not for sharpening, a leather belt can polish and realign the edge—this process is called stropping.
7. Steel Rod (honing Rod)
If you have a steel rod (often sold with knife blocks), you can realign the edge, but it doesn’t remove metal.
Not all household items are safe—avoid using surfaces that are too rough (like concrete) or too soft (like wood), as they can damage your blade.
How To Sharpen A Knife With A Ceramic Mug
This is one of the easiest and safest ways to sharpen a knife without a professional tool. Most kitchens have a ceramic mug with an unglazed ring underneath.
Step-by-step Instructions
- Turn the mug upside down and place it on a flat, stable surface like a countertop or table.
- Clean the mug’s bottom with a damp cloth to remove dirt and debris.
- Hold the knife at a 15°–20° angle to the unglazed edge. The spine (back of the knife) should be slightly raised.
- Draw the blade across the ceramic, moving from the heel to the tip, as if slicing a thin layer off the mug. Use light, even pressure.
- Repeat 8–10 times per side, alternating sides to keep the edge even.
- Wipe the blade with a damp towel to remove any metal particles.
- Test the sharpness by slicing a piece of paper or tomato.
Pro Tips
- Use the whole length of the mug ring for a consistent edge.
- Don’t use chipped or broken mugs—they can damage your knife.
- Check your angle frequently. Too steep or too flat will dull the knife further.
Sharpening With Sandpaper
Sandpaper is affordable and available at most hardware stores. It’s an effective way to sharpen a knife if you don’t have a whetstone.
How To Use Sandpaper
- Choose medium-grit (400–600) sandpaper. Finer grits (800–1000) can polish the edge after sharpening.
- Place the sandpaper on a flat, stable surface, such as a cutting board or table.
- Hold the knife at a 15°–20° angle to the sandpaper.
- Draw the blade across the sandpaper, from heel to tip, using smooth, controlled strokes.
- Repeat 10–15 times per side.
- Switch to a finer grit for 5–10 finishing strokes if you want a smoother edge.
- Clean the blade before testing.
Additional Advice
- Always keep the sandpaper flat—wrinkles can create uneven edges.
- Replace the sandpaper if it becomes clogged with metal.
- For outdoor knives, you can tape the sandpaper to a board for more stability.
Using A Nail File (emery Board)
A nail file, especially the rougher side, can sharpen smaller knives or fix minor dullness. It’s not ideal for large chef’s knives but works in a pinch.
How To Sharpen With A Nail File
- Hold the file on a solid surface so it doesn’t move.
- Hold the knife at a 15°–20° angle to the file.
- Draw the blade across the file, from heel to tip, using gentle pressure.
- Repeat 8–12 times per side.
- Clean and test the blade.
When To Use
- Small kitchen knives
- Pocket knives or scissors
- Quick touch-ups
Avoid using nail files with very fine grit—they won’t remove enough metal.
Sharpening With A Car Window
It may sound odd, but the uncoated edge of a car window is similar to a ceramic honing rod.
How To Do It
- Roll down the car window halfway so the top edge is exposed.
- Hold the blade at a 15°–20° angle to the glass edge.
- Draw the knife across the glass, from heel to tip, with light pressure.
- Repeat 8–10 times per side.
- Clean the knife before using.
Safety Note
- Make sure the car is parked and the window is clean.
- Use slow, controlled movements to avoid chipping the blade.
Using A Flat Stone From Outdoors
Not all rocks are suitable, but a smooth, hard stone (like river rock or granite) can work if you’re outdoors.
How To Select And Use A Stone
- Find a flat, hard stone—avoid sandstone or crumbly rocks.
- Clean the stone with water and a brush.
- Wet the stone slightly—this helps carry away metal filings.
- Hold the knife at a 15°–20° angle to the stone.
- Draw the blade across the stone, from heel to tip, in a sweeping motion.
- Repeat 10–15 times per side.
- Rinse and dry the knife.
Common Mistakes
- Using a stone that’s too rough can chip the edge.
- Don’t use painted or dirty stones.
Stropping With A Leather Belt
Sharpening removes metal, but stropping with leather polishes and realigns the edge for a razor-sharp finish.
How To Strop A Knife
- Lay a leather belt flat on a hard surface, smooth side up.
- Hold the knife at a shallow angle (10°–15°).
- Draw the blade backward across the leather, away from the edge (not cutting into the belt).
- Repeat 10–20 times per side.
- Check the sharpness—stropping can make a sharp knife even keener.
When To Use Stropping
- After sharpening with another method
- For final polishing
- To maintain an already sharp edge
A common misconception is that stropping will sharpen a dull knife—it only polishes and realigns the edge.
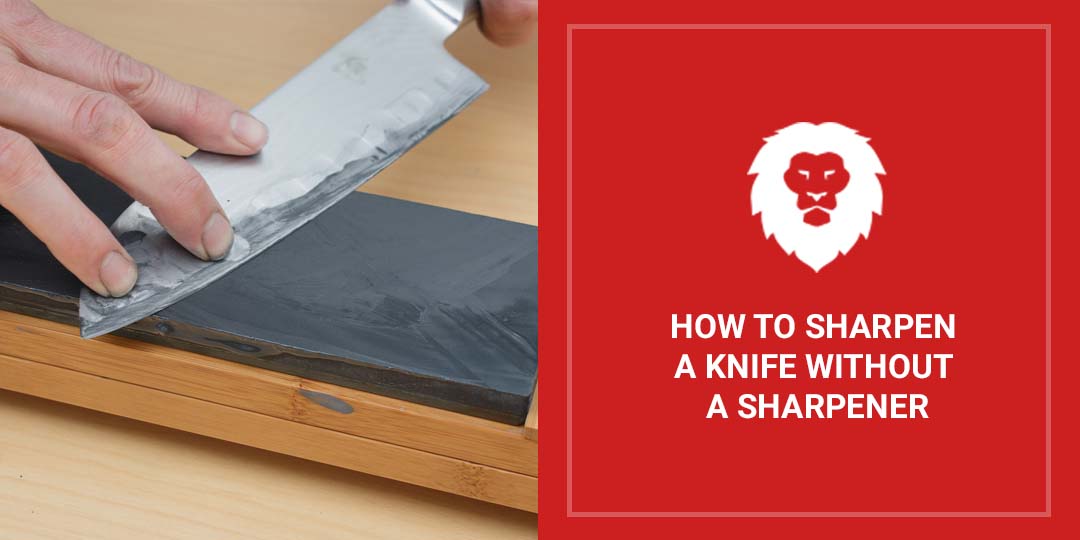
Credit: www.redlabelabrasives.com
Comparing Diy Sharpening Methods
Here’s a quick comparison of common household sharpening methods:
| Method | Effectiveness | Best For | Risks |
|---|---|---|---|
| Ceramic Mug | High | Kitchen knives | Chipping mug or blade if careless |
| Sandpaper | Medium–High | All-purpose knives | Uneven edge if grit is too rough |
| Nail File | Medium | Small blades | Wearing out file quickly |
| Car Window | Medium | Outdoor/Survival | Scratching window, chipping blade |
| Outdoor Stone | Medium | Survival/Camping | Damaging knife with rough stone |
| Leather Belt | Low (Polishing only) | Finishing touch | None if used properly |
How Often Should You Sharpen Your Knife?
The answer depends on how much you use the knife and what you cut. For home cooks, sharpening every 3–6 months is typical. But, regular honing or stropping after each use will keep the edge longer.
Professional chefs may sharpen weekly or even daily, especially if slicing tough foods. If you notice squashed tomatoes or slipping on onions, it’s time to sharpen.
Signs Your Knife Needs Sharpening
Not sure if your knife is dull? Here are clear signs:
- Struggles to cut tomatoes or soft fruit—the blade squashes instead of slicing.
- Slips off onions or hard vegetables—a sharp knife bites into the surface easily.
- Tears bread instead of slicing—even non-serrated knives should cut cleanly.
- Fails the paper test—a sharp knife slices paper without snagging.
- Needs more force—if you push instead of glide, the edge is dull.
The Right Angle For Sharpening
Maintaining the correct sharpening angle is key to a long-lasting edge. For most kitchen knives, the ideal angle is 15°–20°. Japanese knives often use 12°–15°, while outdoor knives may go up to 25° for a tougher edge.
Too steep an angle (over 25°) makes the edge dull. Too shallow (under 10°) makes it sharp but fragile.
Here’s a quick reference:
| Knife Type | Recommended Angle | Notes |
|---|---|---|
| Western kitchen knife | 15°–20° | Standard for most home knives |
| Japanese chef’s knife | 12°–15° | Sharper, but more delicate |
| Pocket knife | 20°–25° | Durable for hard use |
| Outdoor/survival knife | 22°–25° | Withstands rough tasks |

Credit: www.knafs.com
Step-by-step: Full Diy Sharpening Routine
Here’s a complete at-home routine for sharpening your knife without a sharpener, combining the best methods:
- Clean the knife thoroughly with soap and water. Dry well.
- Choose your sharpening surface (ceramic mug, sandpaper, stone).
- Hold the blade at the correct angle (15°–20° for most kitchen knives).
- Sharpen one side: Draw the blade from heel to tip across the surface 10–15 times, using gentle pressure.
- Sharpen the other side: Repeat the same number of strokes.
- Alternate sides: Do 5 strokes per side, then 2, then 1, to balance the edge.
- Polish or strop: Use a leather belt or fine sandpaper for a few light finishing strokes.
- Clean the blade: Remove any metal dust.
- Test the sharpness: Slice a piece of paper, tomato, or onion.
- Store the knife safely: Avoid tossing it in a drawer, which dulls the edge.
Extra Tips For Best Results
- Consistent angle is more important than pressure.
- Use light oil or water on stones or sandpaper to reduce friction.
- Don’t rush—slow, even strokes prevent mistakes.
- Sharpen only as much as needed. Over-sharpening wears out the blade.
- Test with a tomato or paper, not your finger. Finger tests can be dangerous.
Common Mistakes And How To Avoid Them
- Using the wrong angle—leads to a blunt or chipped edge.
- Pressing too hard—removes too much metal and shortens knife life.
- Uneven sharpening—creates an unbalanced edge that cuts poorly.
- Skipping cleaning—metal dust left on the knife can end up in food.
- Using unsuitable surfaces—like concrete, which can ruin the blade.
- Not finishing with honing or stropping—leaves a rough edge that dulls quickly.
Sharpening Serrated Knives
Serrated knives (like bread knives) are more challenging. The methods above are mostly for straight-edge knives. For serrated blades:
- Use a round ceramic rod or tapered sharpening tool.
- Focus on each groove, moving the rod along the serration.
- Avoid flat surfaces—these will ruin the teeth.
If you don’t have a proper tool, serrated knives usually stay sharp longer and need less frequent sharpening.
When To Get Professional Help
If your knife has large chips, a bent tip, or a seriously damaged edge, it’s better to let a professional sharpener handle it. They have the tools and expertise to reshape and restore the blade safely.
Some knife makers offer lifetime sharpening—check your warranty.
Knife Care After Sharpening
A sharp knife needs proper care to stay sharp:
- Hand wash and dry—dishwashers dull knives quickly.
- Store in a knife block, sheath, or on a magnetic strip—never loose in a drawer.
- Hone regularly—a steel rod realigns the edge between sharpenings.
- Cut on wood or plastic boards—avoid glass, stone, or metal surfaces.
Regular maintenance means you won’t need to sharpen as often.

Credit: www.youtube.com
Myths About Diy Knife Sharpening
Myth: “You need a special stone or tool.”
Fact: Ceramic, sandpaper, or even a car window can give you a sharp edge.
Myth: “Sharpening ruins your knife.”
Fact: Gentle, proper sharpening extends your knife’s life.
Myth: “All knives need the same angle.”
Fact: Different blades need different angles for best results.
Myth: “You can test sharpness by running a finger along the edge.”
Fact: This is dangerous. Use the paper or tomato test instead.
When Not To Sharpen At Home
There are situations where DIY sharpening isn’t the best choice:
- Expensive or heirloom knives—risk of damage if you’re not confident.
- Extremely dull or chipped blades—these need special tools.
- Serrated or specialty blades—require unique methods.
If unsure, it’s safer to use a professional service or consult your knife’s manufacturer.
Environmental Impact Of Diy Methods
Sharpening at home with household items reduces waste and avoids buying single-use gadgets. Using sandpaper or ceramic mugs is eco-friendly if you use existing items and recycle or reuse them when possible.
Resources For Learning More
If you want to go deeper, check out this guide from Wikipedia for more on sharpening stones and techniques.
Frequently Asked Questions
How Can I Tell If My Knife Is Sharp Enough?
A sharp knife slices cleanly through paper or a tomato with little pressure. If it snags, tears, or squashes food, it needs more sharpening.
Is It Safe To Use Sandpaper Or A Mug For Sharpening?
Yes, as long as you use gentle pressure and the right angle. Clean surfaces before use, and avoid damaged mugs or very rough sandpaper.
Can I Use Aluminum Foil Or Other Kitchen Items To Sharpen My Knife?
Aluminum foil does not sharpen knives—it can only realign a very fine edge. For real sharpening, stick to ceramic, sandpaper, or glass.
How Often Should I Strop My Knife With A Leather Belt?
Strop your knife after each sharpening, or every few uses, to maintain a razor-sharp edge. Stropping alone cannot sharpen a dull knife.
What Should I Do If My Knife Is Still Dull After Trying These Methods?
Check your technique—especially the sharpening angle and pressure. If the edge is damaged or very dull, professional sharpening may be needed.
A sharp knife makes cooking safer and more enjoyable. With these simple methods, you can keep your blades in top shape, even without a specialized tool. Remember, the right technique matters more than fancy equipment. Stay safe, sharpen smart, and enjoy the difference a keen edge makes in your kitchen.

Hello, This is Annie Walker, a 38-year-old blogger, founder, and editor of Cookware Guider from NY, USA. I am a cookware fanatic and passionate cooker. I love to cook with different types of cooking appliances (example: all types of cookware, rice cookers, slow cookers, etc) almost every day in my kitchen. I love to share my experience with my readers in my blog. Also, I enjoy helping people to solve their problems through my website. You can follow me on Twitter & Pinterest. To know details about my blog please check the about us page.