
Sharpening your kitchen knives can feel intimidating, especially if you are not used to handling sharpening tools. But a handheld knife sharpener makes the process simple, safe, and fast. Whether you cook daily or only sometimes, learning to use a handheld sharpener can transform your kitchen experience. Sharp knives make slicing easier, reduce accidents, and help you prepare food more efficiently. Many people think only professionals can sharpen knives well, but you can do it yourself with the right steps. This guide will help you understand handheld sharpeners, show you how to use them correctly, and answer common questions so you gain confidence and skill.
Understanding Handheld Knife Sharpeners
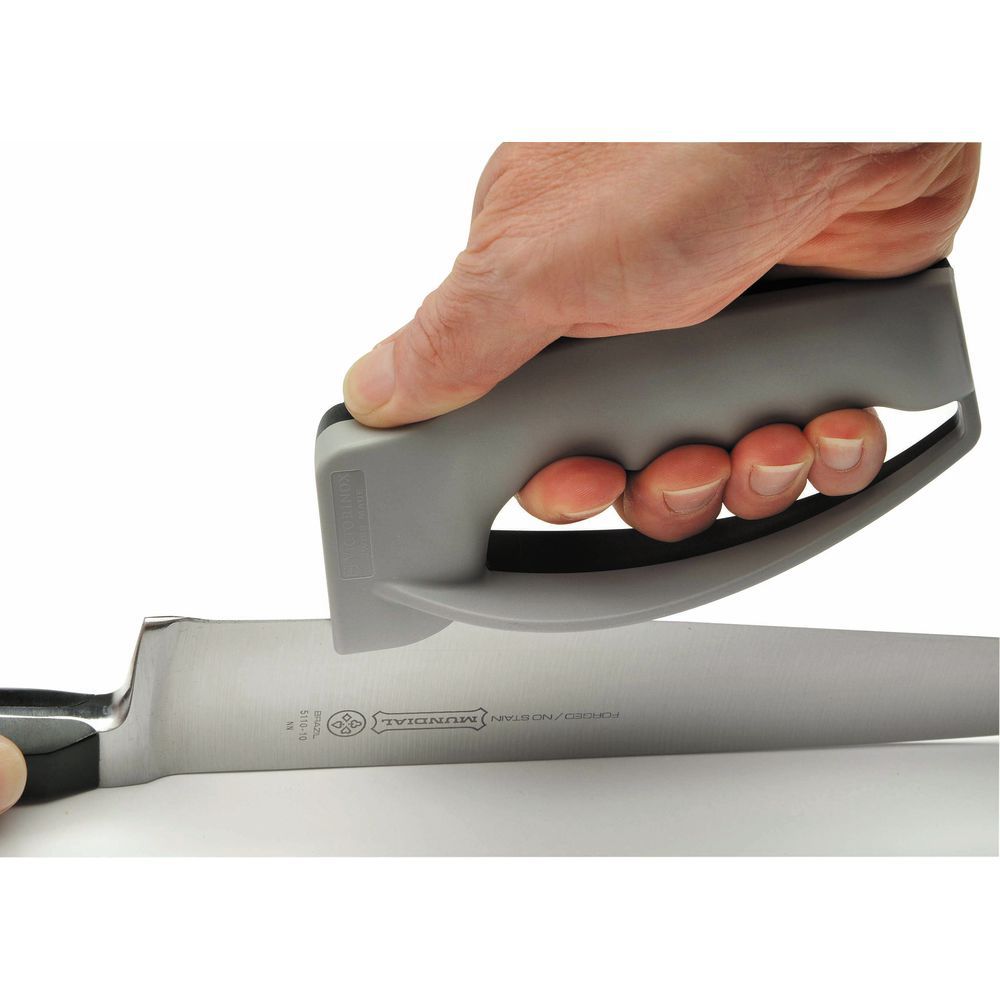
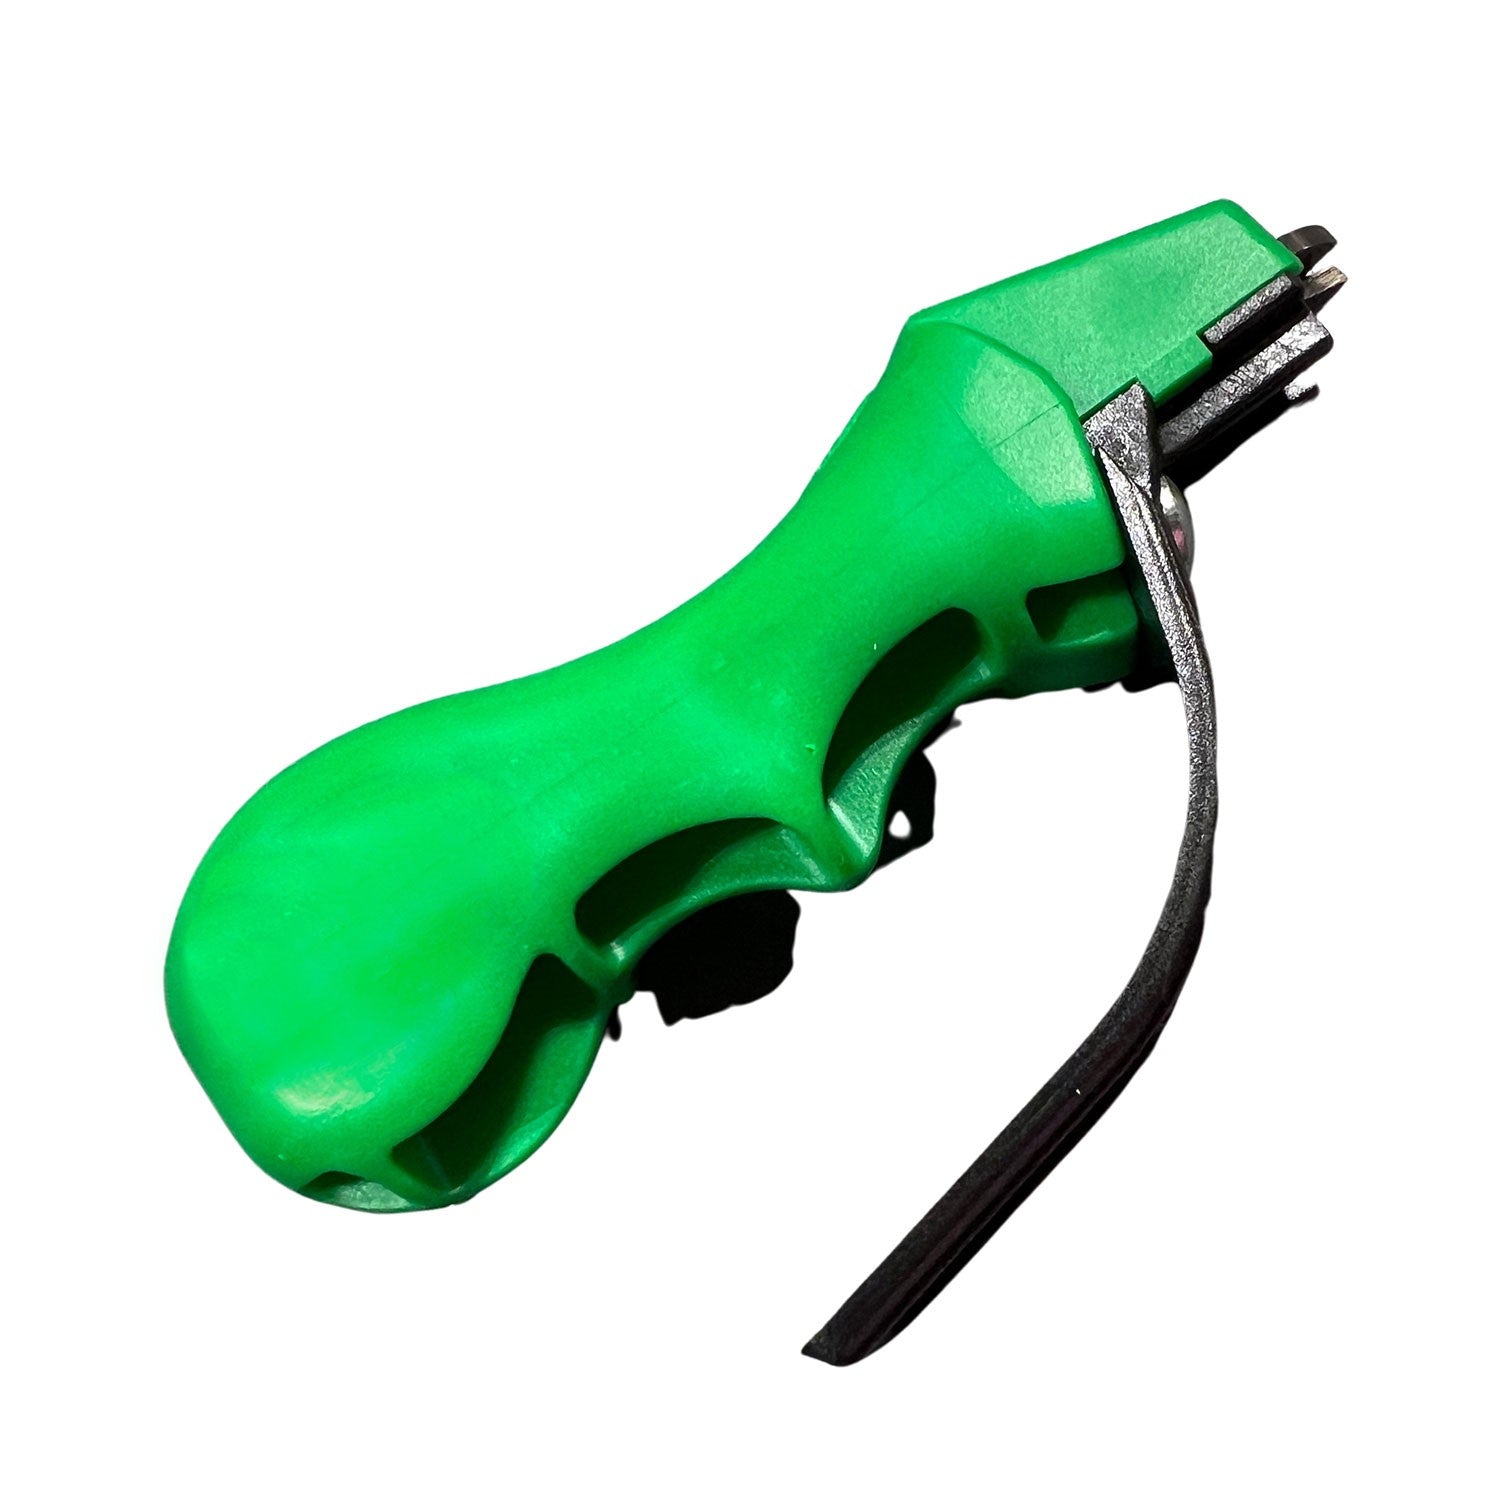
Handheld knife sharpeners are popular in homes because they are easy to use and affordable. They come in different shapes and sizes, but most share the same core features. Before learning the sharpening steps, you need to understand what these tools are, how they work, and what makes them different from other sharpeners.
Types Of Handheld Knife Sharpeners
There are several types of handheld sharpeners. Each works slightly differently, so knowing which one you have is important.
- Pull-through sharpeners: The most common type. You pull your knife through slots containing sharpening materials.
- Rod sharpeners: Sometimes called sharpening sticks. You run the blade along the rod.
- Compact multi-stage sharpeners: These have more than one slot for different levels of sharpening—usually coarse and fine.
Most handheld sharpeners use ceramic, diamond, or carbide for sharpening. Each material affects how much metal is removed and how sharp your knife becomes.
How Do They Work?
Handheld sharpeners use friction to sharpen your knife. When you pull the blade through the slot or along the rod, the rough surface scrapes away tiny bits of metal. This creates a new, sharp edge. The coarse slot fixes very dull knives, while the fine slot polishes and smooths the edge for daily maintenance.
Comparing Handheld Sharpeners To Other Tools
People sometimes confuse handheld sharpeners with electric sharpeners or whetstones. Here is a comparison to help you see the differences:
| Sharpening Tool | Ease of Use | Control | Best For | Cost |
|---|---|---|---|---|
| Handheld Sharpener | Easy | Moderate | Home cooks | Low |
| Electric Sharpener | Very easy | Low | Busy kitchens | Medium to high |
| Whetstone | Hard | High | Professionals | Medium |
| Sharpening Rod | Medium | High | Daily maintenance | Low |
Handheld sharpeners are a good balance between ease, price, and control. They are less complicated than whetstones and safer for beginners than sharpening rods.
What Knives Can You Sharpen?
Most handheld sharpeners work best with straight-edged knives like chef’s knives, utility knives, and paring knives. They do not work well for serrated knives, cleavers, or specialty blades. Always check your sharpener’s instructions to see which knives it can handle.
Preparing Your Knife And Sharpener
Good preparation leads to better sharpening results. Many beginners skip this step, but it makes the process safer and more effective.
Clean Your Knife
Before sharpening, wash the blade with warm soapy water and dry it thoroughly. Dirt or food on the blade can damage the sharpener or create uneven sharpening.
Inspect The Blade
Look closely at your knife’s edge. If you see chips, bends, or deep scratches, handheld sharpeners may not fix these problems. They are best for regular sharpening, not heavy repair. For badly damaged knives, consider professional help.
Check Your Sharpener
Make sure your sharpener is clean, stable, and not worn out. If you see cracks or loose parts, it is safer to replace it. Some sharpeners have suction cups or grips to hold them in place—check that these are working.
Choose The Right Surface
Place the sharpener on a flat, non-slip surface. A kitchen countertop is best. Avoid sharpening on uneven or slippery tables, which can cause accidents.
Wear Safety Gear
While most people sharpen without gloves, beginners may want to wear cut-resistant gloves. This protects your hands if you slip.
Step-by-step Guide: Using A Handheld Knife Sharpener
This section will walk you through each step in detail. Follow these carefully, and you will sharpen your knives safely and effectively.
1. Hold The Sharpener Steady
Place the sharpener on your chosen surface. Hold it firmly with one hand. If your sharpener has a handle or suction cup, use it to secure the tool. Stability is key—never let the sharpener move during use.
2. Identify The Sharpening Slots
Most handheld sharpeners have two slots:
- Coarse slot: For sharpening dull knives.
- Fine slot: For finishing or maintaining the edge.
If your knife is very dull, start with the coarse slot. If your knife only needs a touch-up, use the fine slot.
3. Insert The Knife Correctly
Place the heel (the part closest to the handle) of the blade into the slot. Hold the knife at a slight angle—usually 15 to 20 degrees. Many sharpeners are designed to help you find the correct angle, but if not, aim for a gentle tilt.
4. Pull The Knife Through
Apply gentle, steady pressure. Pull the knife through the slot from heel to tip in one smooth motion. Do not saw back and forth; always move in one direction.
Repeat this motion:
- Coarse slot: 3–5 times for very dull knives.
- Fine slot: 3–6 times for a polished edge.
Do not press too hard. Too much force can damage the blade or sharpener.
5. Check Progress
After every few pulls, check your knife’s edge. Run your finger gently along the blade (side, not edge) to feel for sharpness. You can also try slicing a sheet of paper—if the knife cuts easily, it is sharp.
6. Clean The Knife
After sharpening, wipe the blade with a damp cloth. This removes metal dust or residue. Wash the knife before using it on food.
7. Store Your Knife Safely
Once your knife is sharp, store it in a safe place. Never leave sharp knives loose in a drawer. Use a knife block, magnetic strip, or blade guard.
Common Mistakes And How To Avoid Them
Even experienced cooks make mistakes when sharpening knives. Avoiding these errors will help you get the best results and keep your knives in good shape.
Using Too Much Pressure
Many people think pressing harder makes the knife sharper. This is not true. Too much force can damage the blade and wear out the sharpener quickly. Always use gentle, steady pressure.
Sharpening Too Often
Sharpening every day is not needed. It wears out your knife faster. For home cooks, sharpening once every few weeks is enough. If you cook often, sharpen once a week.
Ignoring The Correct Angle
Handheld sharpeners are designed for a certain angle. If you use the wrong angle, your knife will not get sharp and can become uneven. Read your sharpener’s instructions for the proper angle.
Forgetting To Clean Up
Metal dust from sharpening can get on your food or hands. Always clean the knife and sharpener after use.
Skipping Maintenance
Handheld sharpeners need care. Over time, the sharpening surfaces get dirty or worn out. Clean them with a brush or cloth, and replace the sharpener if it stops working well.
Advanced Tips For Better Results
Once you are comfortable with basic sharpening, these advanced tips can help you get even sharper blades and extend your knife’s life.
Use Both Slots For Best Results
If your sharpener has coarse and fine slots, use both even if your knife is only slightly dull. The coarse slot creates the edge; the fine slot polishes it. This two-step process gives you a sharper, longer-lasting blade.
Sharpen Different Knife Sizes Separately
Small knives (like paring knives) need less pressure and fewer pulls. Large knives (like chef’s knives) need more careful alignment. Adjust your technique for each knife.
Maintain Your Sharpener
Every few months, check your sharpener for wear. Clean it with a dry brush or compressed air. Do not use water unless your sharpener’s instructions say it is safe.
Track Your Results
Keep a simple log of when you sharpen each knife and how many pulls you used. This helps you spot patterns and avoid sharpening too often.
Combine Sharpening With Honing
Sharpening removes metal and creates a new edge. Honing (using a honing rod) straightens the edge without removing metal. Hone your knife every few uses; sharpen every few weeks.
Safety Considerations
Knife sharpening can be safe if you follow a few simple rules. These tips will help you avoid accidents and protect your tools.
Keep Fingers Away From The Blade
Always grip the sharpener’s handle, not the sharpening slot. Keep your other hand away from the blade path.
Use A Stable Surface
A wobbly table or uneven counter increases the risk of slips. Always sharpen on a flat, solid surface.
Wear Protective Gear
If you are new to sharpening or nervous, wear cut-resistant gloves. They are affordable and can prevent injury.
Store Tools Properly
Keep the sharpener and knives in a safe place, away from children. Cover sharpener slots with the provided cap if possible.

Credit: www.wikihow.com
Comparing Popular Handheld Sharpeners
With so many models on the market, choosing the right handheld sharpener can be confusing. Here is a comparison of some popular options:
| Brand | Slots | Sharpening Material | Price Range | Special Features |
|---|---|---|---|---|
| Smith’s Pocket Pal | 2 | Carbide, Ceramic | $10–$15 | Compact, keychain |
| Kitchen IQ Edge Grip | 2 | Carbide, Ceramic | $8–$12 | Edge grip, anti-slip |
| Victorinox Knife Sharpener | 1 | Ceramic | $15–$20 | Swiss design, compact |
| Chef’sChoice Manual Sharpener | 2 | Diamond, Ceramic | $20–$30 | Ergonomic handle |
Choose a sharpener based on your budget, knife types, and kitchen space. Compact models are good for small kitchens or travel. Multi-slot sharpeners work well for regular home use.
How Often Should You Sharpen Your Knives?
The right sharpening schedule depends on how often you use your knives and what you cut.
- Daily cooks (lots of chopping): Sharpen every 1–2 weeks.
- Occasional cooks: Sharpen every 3–4 weeks.
- Professional chefs: Sharpen as needed, sometimes daily.
Signs your knife needs sharpening:
- It cannot slice tomatoes or onions easily.
- It slips off food instead of cutting smoothly.
- It tears food rather than slicing cleanly.
Remember, frequent honing helps keep your knife sharp longer. Only sharpen when the blade feels dull.
Credit: www.hubert.com
Real-life Example: Sharpening A Chef’s Knife
Let’s walk through a real-life scenario using a pull-through handheld sharpener.
- Start by cleaning the chef’s knife and checking for damage.
- Place the sharpener on a steady kitchen counter.
- Insert the knife into the coarse slot, holding it at a 15-degree angle.
- Pull the knife through 4 times with gentle pressure.
- Switch to the fine slot and pull through 3 times.
- Check sharpness by slicing a piece of paper.
- Wipe the blade and store it safely.
Most chef’s knives respond well to this process. If you notice uneven sharpening, adjust your angle or reduce pressure.
Sharpening Specialty Knives
Handheld sharpeners do not work well for all knives. Here’s what to do for special blades:
- Serrated knives: These require special sharpeners or professional help.
- Cleavers: Some handheld sharpeners can handle thin cleavers, but thick blades need whetstones.
- Japanese knives: Many have a sharper edge angle. Use sharpeners designed for 15-degree angles.
Always check your sharpener’s manual before using it on specialty knives.
Caring For Your Handheld Sharpener
A well-maintained sharpener lasts longer and works better. Here are some tips for care:
Cleaning
After each use, brush away metal dust. Some sharpeners can be rinsed with water—check instructions. Dry completely before storing.
Storage
Keep the sharpener in a dry place. Avoid high humidity, which can rust metal parts.
Checking For Wear
If you notice the sharpener is not working as well, inspect the slots. If the sharpening materials are worn or cracked, replace the sharpener.
Replacement
Most handheld sharpeners last 1–3 years with regular use. Replace sooner if you notice damage or poor performance.
Sharpening Tips For Beginners
If you are new to sharpening, start with these simple tips:
- Practice with a less expensive knife first.
- Watch online videos to see the technique in action.
- Take your time—rushing can cause mistakes.
- Always follow the sharpener’s instructions.
As you gain confidence, try sharpening different knives and adjusting your technique.
Sharpening Myths And Facts
There are many myths about knife sharpening. Let’s clear up some common misunderstandings.
Myth: Sharpening Damages Knives
Fact: Proper sharpening improves knife performance and does not damage the blade if done correctly.
Myth: Only Professionals Can Sharpen
Fact: Anyone can sharpen knives with a handheld sharpener, following simple steps.
Myth: More Pulls Make Knives Sharper
Fact: Too many pulls can wear out the blade. The right number is 3–6 per slot, depending on dullness.
Myth: All Knives Need The Same Angle
Fact: Different knives have different edge angles. Most Western knives are sharpened at 20 degrees; Japanese knives at 15 degrees.
Sharpening For Left-handed Users
Most handheld sharpeners work for both right- and left-handed people. If your sharpener feels awkward, look for models with symmetrical handles or slots.
Environmental Impact And Sustainability
Handheld sharpeners last longer than disposable sharpeners and do not use electricity. By maintaining your knives and sharpener, you reduce waste and save money. Choosing quality tools helps the environment and your kitchen.
Expert Insight: Why Sharp Knives Matter
Professional chefs always use sharp knives. Studies show that dull knives are more dangerous because they require more force and can slip easily. A sharp knife improves safety and makes cooking faster. According to the National Safety Council, most kitchen accidents are caused by dull blades.
Comparing Handheld Sharpeners: Durability Vs. Cost
Here is another comparison to help you choose the best handheld sharpener:
| Sharpener Type | Average Lifespan | Cost | Replacement Frequency |
|---|---|---|---|
| Basic pull-through | 2 years | $10–$15 | Every 2 years |
| Multi-stage | 3 years | $20–$30 | Every 3 years |
| Rod sharpener | 5+ years | $15–$25 | Rarely |
Multi-stage sharpeners cost more but last longer. Rod sharpeners are durable but require more skill.
Troubleshooting: What If Your Knife Won’t Get Sharp?
Sometimes, even after sharpening, a knife stays dull. Here are some possible reasons:
- The blade is damaged beyond repair (chips, bends).
- You are using the wrong angle.
- The sharpener is worn out.
- The knife steel is too soft or too hard for your sharpener.
Try adjusting your angle and technique. If the knife still won’t sharpen, consider professional service.
Credit: kasco.com
Frequently Asked Questions
How Do I Know If My Knife Is Sharp Enough?
A sharp knife should cut through paper smoothly, slice tomatoes easily, and feel smooth on the edge. If it tears or crushes food, it is still dull.
Can I Sharpen Serrated Knives With A Handheld Sharpener?
Most handheld sharpeners cannot sharpen serrated blades. You need a special sharpener or professional help for serrated knives.
How Long Does A Handheld Knife Sharpener Last?
With regular use, a handheld sharpener lasts 1–3 years. Clean and store it properly to extend its life.
Is It Safe To Use A Handheld Sharpener?
Yes, handheld sharpeners are safe if you follow instructions, use gentle pressure, and keep your fingers away from the blade.
Where Can I Find More Information About Knife Maintenance?
You can learn more at the WikiHow Knife Sharpening Guide for step-by-step videos and tips.
Using a handheld knife sharpener is a skill every home cook can learn. With the right tool, correct technique, and regular care, your knives will stay sharp for years. Remember to clean your knife and sharpener after each use, follow safety tips, and avoid common mistakes.
Sharp knives make cooking safer, easier, and more enjoyable. Take your time, practice, and soon sharpening will feel like a natural part of your kitchen routine.

Hello, This is Annie Walker, a 38-year-old blogger, founder, and editor of Cookware Guider from NY, USA. I am a cookware fanatic and passionate cooker. I love to cook with different types of cooking appliances (example: all types of cookware, rice cookers, slow cookers, etc) almost every day in my kitchen. I love to share my experience with my readers in my blog. Also, I enjoy helping people to solve their problems through my website. You can follow me on Twitter & Pinterest. To know details about my blog please check the about us page.