
Sharpening a Rival food slicer blade can transform how well your machine slices and how safe it is to use. Many people use their slicers for years, not realizing a dull blade can cause problems like uneven cuts, extra strain on the motor, and even accidents.
If you own a Rival food slicer, learning to sharpen its blade isn’t just a handy skill—it’s essential for performance and safety.
In this guide, you’ll discover everything you need to know to sharpen a Rival food slicer blade. You’ll learn about the tools you need, how to disassemble and clean your slicer, the exact sharpening process, and how to reassemble and test your machine.
Along the way, you’ll find practical tips, expert insights, and real-life examples to help you avoid mistakes and get the best results. Let’s dive in so you can keep your slicer working like new.
Why Sharpening Your Rival Food Slicer Blade Matters
A sharp blade does more than just cut food. It makes every task easier, safer, and faster. Here’s why keeping your Rival slicer blade sharp is so important:
- Consistent Slices: A dull blade tears food, leaving you with uneven pieces. A sharp blade creates smooth, even slices every time.
- Less Effort: You’ll use less force, which means less risk of slipping and cutting yourself.
- Protects the Machine: A sharp blade puts less stress on the motor and gears, helping your slicer last longer.
- Food Quality: Delicate foods like tomatoes or cooked meats hold their shape better when sliced with a sharp blade.
Many people don’t realize that sharpening isn’t just about restoring performance—it’s also about safety. Most slicer injuries happen when users push too hard on a dull blade.
Understanding Your Rival Food Slicer Blade
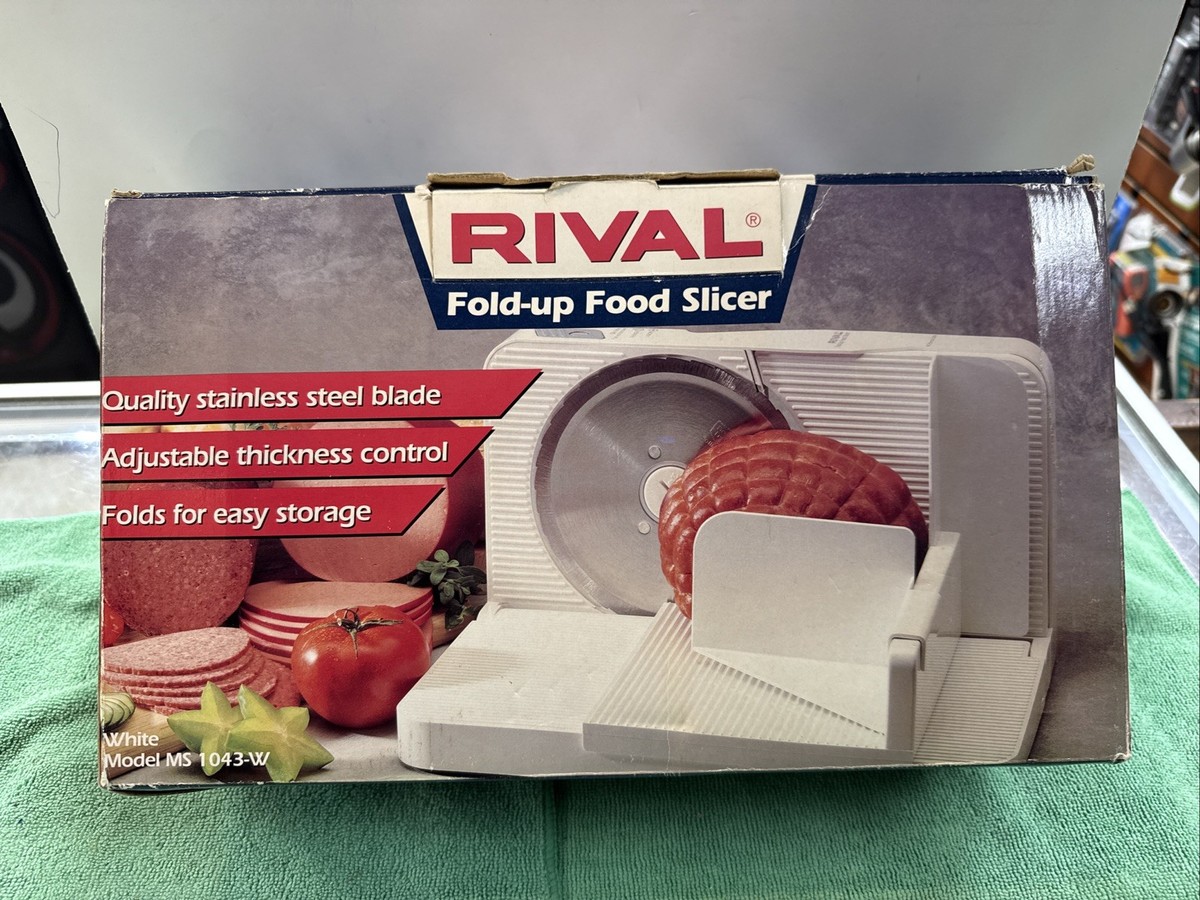
Before sharpening, it helps to know what you’re working with. Rival slicers use a circular stainless steel blade that rotates to cut food. Most home models have blades between 7 and 9 inches in diameter. These blades are designed to be removable for cleaning and sharpening.
Rival food slicer blades are usually serrated or have a fine-toothed edge. This design helps them cut through a variety of foods, from bread to cheese to meat. However, serrated blades require a slightly different sharpening technique than plain-edged blades.
Types Of Rival Blades
Here’s a quick comparison of typical Rival slicer blade types:
| Blade Type | Edge Shape | Best For | Sharpening Difficulty |
|---|---|---|---|
| Serrated | Small Teeth | Bread, Cheese, Soft Meat | Moderate |
| Smooth (Non-serrated) | Straight Edge | Roasts, Hard Cheese, Firm Veggies | Easy |
Most Rival food slicers for home use have serrated blades. Serrated blades stay sharp longer, but when they do get dull, sharpening requires attention to each tooth.
Credit: www.ebay.com
Tools And Materials Needed
Sharpening a Rival slicer blade is straightforward if you have the right tools. Here’s what you’ll need:
- Screwdriver (usually Phillips-head, to remove the blade)
- Protective gloves (cut-resistant)
- Soft cloth or paper towels
- Mild dish soap and warm water
- Sharpening stone (medium and fine grit) or a special blade sharpening kit
- Small brush (like a toothbrush)
- Food-safe lubricant (optional, for reassembly)
Some Rival slicers come with a built-in sharpener. If yours does, you can use that instead of a separate stone. However, manual sharpening gives you more control and often better results.
Safety Precautions
Sharpening a slicer blade is not risk-free. Even a dull blade can cut you badly if you’re not careful. Here are a few safety rules to follow:
- Unplug the slicer before starting any work.
- Wear cut-resistant gloves at all times.
- Handle the blade by the center, not the edge.
- Keep your workspace clean and dry.
- Never rush—take your time to avoid mistakes.
A common mistake is forgetting to unplug the slicer. This can lead to serious injuries, so always double-check before you begin.

Credit: www.youtube.com
Disassembling Your Rival Food Slicer
Before you can sharpen the blade, you need to remove it from the slicer. The steps below work for most Rival home slicer models, but always check your user manual for specifics.
Step-by-step Blade Removal
1. Unplug The Slicer
Always disconnect from power before you start.
2. Remove The Food Tray And Guard
Slide off any trays or guards that block access to the blade.
3. Locate The Blade Mount
Most Rival slicers use a large central screw or locking ring to hold the blade.
4. Unscrew The Blade
Using a screwdriver, carefully loosen the screw or locking ring. Hold the blade steady with a gloved hand.
5. Lift Out The Blade
Grasp the blade by its center hub and lift it out slowly. Avoid touching the edge.
6. Set Aside All Parts
Keep screws, washers, and other small parts in a safe place.
| Step | Action | Tip |
|---|---|---|
| 1 | Unplug Slicer | Double-check for power |
| 2 | Remove Tray & Guard | Set aside carefully |
| 3 | Locate Blade Mount | Look for screw or ring |
| 4 | Unscrew Blade | Hold blade by hub |
| 5 | Lift Out Blade | Do not touch edge |
Many people lose small screws during this step. A simple trick is to use a small dish to hold parts as you work.
Cleaning The Blade Before Sharpening
Never sharpen a dirty blade. Food residue can hide nicks and make sharpening less effective.
1. Wash The Blade
Use warm water and mild dish soap. Scrub gently with a soft cloth.
2. Clean Serrations
Use a small brush to get into the teeth if the blade is serrated.
3. Rinse And Dry
Dry the blade completely with a towel. Moisture during sharpening can cause rust or poor results.
If you see any dark stains or food buildup, spend extra time cleaning. Even small bits can damage your sharpening stone or make your edge uneven.
How To Sharpen A Rival Food Slicer Blade
Now, the main task: sharpening. The technique you use depends on whether your blade is serrated or smooth.
For Serrated Blades
Serrated blades have small teeth. You must sharpen each tooth individually.
1. Choose A Tapered Sharpening Rod
A round or conical sharpening rod works best for serrations.
2. Sharpen Each Tooth
Insert the rod into each groove and move back and forth gently, following the original angle.
3. Repeat Around The Blade
Work all the way around, sharpening each tooth. This is slow but gives the best results.
4. Remove Burrs
After sharpening, flip the blade and lightly brush the flat side to remove any metal shavings (burrs).
For Smooth Blades
If your Rival slicer uses a plain edge, follow these steps:
1. Select The Right Stone
Use a medium-grit stone first, then a fine-grit stone for a polished edge.
2. Hold The Blade At The Correct Angle
Most slicer blades have a 20-degree edge. Try to keep the same angle as you sharpen.
3. Move The Blade In Circular Motions
Gently rub the edge against the stone in small circles, working your way around the blade.
4. Switch To Fine Grit
After a few passes, switch to a fine stone for a sharper finish.
5. Remove Burrs
Wipe the blade with a soft cloth to remove tiny metal bits.
| Sharpening Tool | Best For | Skill Needed |
|---|---|---|
| Tapered Rod | Serrated Blades | Moderate |
| Flat Stone | Smooth Blades | Beginner |
| Built-in Sharpener | Both Types | Easy |
Key Sharpening Tips
- Sharpen lightly—removing too much metal shortens blade life.
- Check the edge often—stop sharpening when the blade feels sharp, not just when it looks shiny.
- Stay consistent—use even pressure and motion for the best results.
Many beginners press too hard or sharpen too long, thinking the blade will get razor-sharp. In reality, gentle sharpening is best. Over-sharpening can change the blade’s shape and ruin its performance.
Checking And Testing Sharpness
After sharpening, always check your work before reassembling the slicer.
1. Visual Inspection
Look for a clean, even edge with no nicks or shiny spots.
2. Paper Test
Carefully hold the blade (wear gloves) and try slicing a sheet of paper. A sharp blade should cut smoothly with little effort.
3. Tomato Test
If you want to be sure, slice a tomato. The skin should cut cleanly with almost no pressure.
If your blade passes these tests, you’re ready to reassemble the slicer. If not, repeat sharpening as needed.
Reassembling The Rival Food Slicer
Putting the slicer back together is as important as sharpening.
1. Clean All Parts
Wipe down the blade mount, guards, and tray before reassembly.
2. Lubricate Moving Parts (optional)
A drop of food-safe lubricant on moving parts can keep your slicer running smoothly.
3. Replace The Blade
Insert the blade carefully, aligning it with the mount.
4. Secure The Blade
Tighten the screw or locking ring. Make sure it’s snug, but don’t overtighten.
5. Reattach Guards And Tray
Return all parts to their original positions.
6. Check For Loose Parts
Gently wiggle each piece to make sure everything is secure.
7. Plug In And Test
Turn on the slicer and run it empty for a few seconds. Listen for unusual sounds.
If you notice vibration or scraping, stop immediately and check for misaligned parts.
Maintenance After Sharpening
A sharp blade needs care to stay sharp. Here’s how to keep your Rival slicer blade in top shape:
- Clean after every use—don’t let food dry on the blade.
- Wipe with a dry cloth before storage to prevent rust.
- Sharpen regularly—every 3-6 months if you use the slicer often.
- Inspect for chips or bends—replace the blade if damaged.
One non-obvious tip: even if you don’t use your slicer much, humidity can dull the blade over time. Check sharpness at least twice a year.
Common Problems And How To Fix Them
Even with good technique, you might face issues. Here’s how to solve the most frequent problems:
Blade Won’t Come Out
- Solution: Double-check for hidden screws or clips. Some Rival models have a safety lock under the blade hub.
Blade Feels Dull After Sharpening
- Solution: Make sure you’re sharpening at the right angle. For serrated blades, you may have missed some teeth.
Slicer Makes Grinding Noise
- Solution: This usually means the blade isn’t seated properly. Remove and reinstall, making sure everything is aligned.
Uneven Slices After Sharpening
- Solution: Clean the blade and check for bent sections. If the blade is warped, it may need replacement.
Blade Rusts Quickly
- Solution: Always dry the blade completely after cleaning and consider applying a light coat of food-safe oil.
When To Replace The Blade Instead Of Sharpening
Sharpening works for normal wear, but sometimes a blade is too damaged to fix.
Replace your Rival slicer blade if:
- You see large chips, cracks, or bends.
- Sharpening does not restore cutting ability.
- The blade feels loose on the mount, even when tightened.
Replacement blades are available online and in kitchen stores. Always buy the correct size and model for your slicer.
Professional Vs. Diy Sharpening
Should you sharpen at home or pay a pro? Here’s a quick comparison:
| Sharpening Method | Cost | Quality | Time Needed |
|---|---|---|---|
| DIY with Stone/Rod | Low (one-time tool cost) | High (if careful) | 30–60 minutes |
| Professional Service | Medium to High ($10–$40) | Very High | Several Days |
| Built-in Sharpener | Free (if included) | Medium | 10–15 minutes |
Most home users can sharpen their Rival slicer blade with good results. However, if you’re not confident, or the blade is expensive, professional sharpening is a safe option.
Expert Tips For Better Sharpening
Here are some advanced tips that most beginners miss:
- Mark your starting point with a marker on the blade. This helps you track your progress as you work around the edge.
- Don’t skip cleaning—even a tiny piece of food can ruin your sharpening stone.
- Use light oil on the sharpening stone if the manufacturer recommends it. This can make sharpening smoother and help prevent overheating.
- Keep your sharpening tools clean—metal filings can build up and scratch your blade.
Real-life Example: Sharpening A Rival 1040 Food Slicer Blade
Let’s look at a typical home sharpening process:
Maria owns a Rival 1040 food slicer she uses every week for bread and cheese. She noticed her slices were ragged and the motor sounded strained.
Following the steps above, Maria:
- Unplugged her slicer and removed the blade, wearing gloves.
- Cleaned the blade thoroughly, paying special attention to the serrations.
- Used a tapered sharpening rod to gently hone each tooth.
- Wiped away burrs and tested the edge on a sheet of paper.
- Reassembled the slicer and made test cuts on a tomato and a loaf of bread.
Her slices were smooth and even, and the motor sounded normal again. Maria’s sharpening took about 45 minutes, but now she plans to sharpen the blade every three months.
Additional Resources
If you want to see a Rival slicer blade sharpening in action, there are video tutorials on sites like YouTube. For more detailed information on food slicer maintenance, the Wikipedia Food Slicer page is a reliable resource.
Credit: www.ebay.com
Frequently Asked Questions
How Often Should I Sharpen My Rival Food Slicer Blade?
For home use, sharpen the blade every 3–6 months, or whenever you notice the slicer struggling to cut cleanly. If you use your slicer daily, check the blade monthly.
Can I Use A Regular Knife Sharpener On My Rival Slicer Blade?
No, regular knife sharpeners are not designed for circular slicer blades, especially serrated types. Use a sharpening stone, rod, or a compatible blade sharpener for best results.
What If My Rival Slicer Has A Built-in Sharpener?
If your model includes a built-in sharpener, follow the manual’s instructions. These sharpeners are usually easy to use and safe, but may not give as fine an edge as manual sharpening.
Is It Safe To Sharpen The Blade At Home?
Yes, if you follow safety steps: always unplug the slicer, wear gloves, and work slowly. If you’re unsure, a professional sharpening service is a good alternative.
How Do I Know When It’s Time To Replace The Blade?
Replace the blade if you see cracks, chips, or warping, or if sharpening no longer improves performance. A loose or damaged blade is a safety risk and should be replaced immediately.
Keeping your Rival food slicer blade sharp is one of the best ways to ensure safe, smooth slicing and long machine life. With the right tools and care, you can enjoy perfect slices every time.

Hello, This is Annie Walker, a 38-year-old blogger, founder, and editor of Cookware Guider from NY, USA. I am a cookware fanatic and passionate cooker. I love to cook with different types of cooking appliances (example: all types of cookware, rice cookers, slow cookers, etc) almost every day in my kitchen. I love to share my experience with my readers in my blog. Also, I enjoy helping people to solve their problems through my website. You can follow me on Twitter & Pinterest. To know details about my blog please check the about us page.