Cooking with silicone bakeware is a game changer for both beginner and seasoned bakers. These bright, flexible pans are everywhere—from your local supermarket to professional kitchens. But many home cooks are unsure how to use them correctly. Do you need to grease them?
Will your cake brown? Can silicone go in the freezer? This article will give you everything you need to bake confidently with silicone. By the end, you’ll know exactly how to get the best results every time you use your silicone pans.
Why Choose Silicone Bakeware?
Silicone bakeware has become popular for good reasons. First, it’s nonstick—which means your cakes, muffins, or breads come out easily, often without extra grease. Second, it’s flexible and can handle both high and low temperatures, so you can use it in the oven, microwave, and even the freezer. Third, it’s lightweight and usually dishwasher safe, making cleanup simple.
One less obvious benefit: silicone heats up and cools down quickly, which can help prevent overbaking. Plus, most silicone products are BPA-free and safe for food. It’s important to buy quality brands with FDA approval to avoid cheap, unsafe versions.
Understanding Silicone Bakeware
Before you start baking, it helps to know what makes silicone bakeware unique.
- Material: High-quality silicone is made from a mixture of silicon (a natural element) and oxygen. This makes it safe for food and very flexible.
- Heat resistance: Most silicone pans are safe up to 428°F (220°C), though some brands may go a bit higher. Always check the label.
- Color: Bright colors are common, but color doesn’t affect baking. However, darker silicone can absorb more heat and may brown the edges a bit more.
Silicone bakeware is perfect for:
- Muffins and cupcakes
- Cakes and brownies
- Breads (especially quick breads)
- Ice cubes and frozen desserts
- Savory items like frittatas or quiches
But it’s not ideal for recipes needing crisp, brown crusts (like pies or pizza).
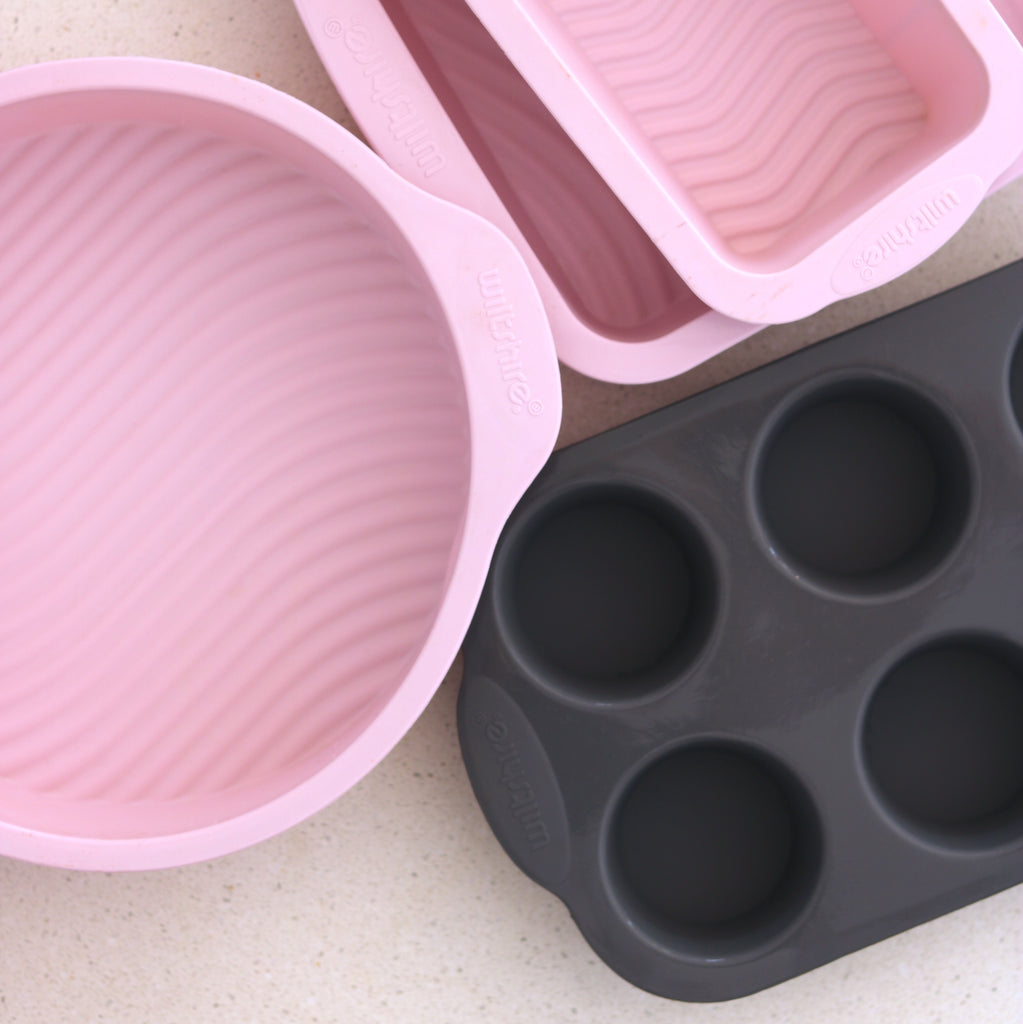
Credit: bakeclub.com.au
How To Use Silicone Bakeware: Step-by-step
Switching from metal or glass to silicone is easy, but there are a few steps to get the best results.
1. Wash Before First Use
Always wash new silicone pans with warm, soapy water. This removes any factory residue and prevents odd smells or tastes in your food.
2. Grease Lightly (sometimes)
Most silicone is nonstick, but a light grease (butter or oil spray) helps, especially the first few times. This is extra important for items with a lot of sugar, which can stick. After a few uses, you may not need to grease at all.
3. Place On A Baking Sheet
Silicone pans are flexible—sometimes too flexible! Always put your silicone pan on a metal baking sheet before filling it. This keeps it stable and helps with even heat distribution.
4. Fill And Bake
Pour your batter into the silicone pan as usual. Fill to the same level you’d use with metal pans. Place the baking sheet (with the pan on it) in the oven.
Pro tip: Silicone may need a few extra minutes of baking compared to metal pans. Start checking for doneness at the regular time, but don’t be surprised if it needs 3–5 minutes longer.
5. Check For Doneness
Since silicone doesn’t brown as much, use a toothpick or cake tester. Insert it in the center—if it comes out clean, your cake is ready.
6. Cool Before Removing
Let your baked goods cool in the silicone pan for 5–10 minutes. This helps them firm up and come out easily. To remove, gently bend the sides or push from the bottom.
7. Clean Up
Most silicone bakeware is dishwasher safe. If washing by hand, use a non-scratch sponge. Avoid strong-smelling soaps, as silicone can sometimes absorb odors.
Comparing Silicone With Other Bakeware
Bakers often wonder how silicone compares to metal or glass pans. Here’s a quick look:
| Bakeware Type | Heat Distribution | Nonstick | Best For | Care |
|---|---|---|---|---|
| Silicone | Even, but slower | Yes | Muffins, cakes, quick breads | Dishwasher safe |
| Metal | Fast, can brown more | Needs greasing | Pies, cookies, crusty breads | Hand wash preferred |
| Glass | Even, holds heat longer | Needs greasing | Casseroles, brownies | Dishwasher safe |
Common Mistakes When Using Silicone Bakeware
Even experienced bakers make mistakes with silicone. Here are some to watch out for:
- Skipping the baking sheet: Silicone bends easily and batter can spill if you try moving it alone.
- Overfilling molds: Silicone is flexible, but it doesn’t support extra weight well. Only fill to about two-thirds.
- Using sharp tools: Knives or metal spatulas can cut or damage silicone. Use plastic or silicone utensils.
- Baking at too high a temperature: Stick to the maximum temperature on the label—usually 428°F (220°C).
- Not adjusting baking time: Baked goods in silicone can take longer. Always check for doneness with a toothpick, not just by color.
Tips For Perfect Results
Here are some practical tips for better baking with silicone:
- Place molds on a cold tray before filling, not after. This prevents spills.
- Let items cool before removing to keep shapes neat.
- For sticky foods (like caramels), spray lightly with oil—even if it’s nonstick.
- Don’t use under broilers or open flame. Silicone can melt with direct high heat.
- Avoid strong odors: Store silicone away from smelly foods, as it can absorb odors over time.
- If food sticks after several uses, try “seasoning” your pan: Rub with a bit of oil and bake empty for 10 minutes at 350°F (175°C).
Baking Time And Temperature Adjustments
Silicone bakeware can change how heat moves through your batter. Usually, you don’t need to change your oven temperature, but baking time can be slightly longer (3–8%). If a cake usually takes 30 minutes in a metal pan, it might need 32–33 minutes in silicone.
Here’s a quick comparison for common items:
| Recipe | Metal Pan Time | Silicone Pan Time |
|---|---|---|
| Muffins (12-cup) | 18–20 min | 20–22 min |
| Loaf Cake | 50–55 min | 55–60 min |
| Brownies | 25–28 min | 28–32 min |
Cleaning And Maintaining Silicone Bakeware
Proper care helps your silicone bakeware last for years.
- Dishwasher safe: Most products can go in the top rack of your dishwasher. For deep molds, check for stuck crumbs.
- Hand washing: Use warm, soapy water. Avoid scrubbing with metal pads.
- Removing stains and odors: If your pan smells, soak it in a mix of warm water and baking soda for an hour. Rinse well.
- Storing: Stack molds or roll them up, but don’t fold sharply, as this can create cracks.
- Inspect for damage: If your pan has cracks or white spots, it’s time to replace it.
A less-known tip: occasionally, silicone can develop a thin, oily layer. Wash with vinegar or baking soda to remove it and keep the surface truly nonstick.
Silicone Bakeware For Freezer And Microwave Use
One advantage of silicone is its temperature range. You can go from oven to freezer without worry. Make sure the pan is at room temperature before sudden changes (like freezer to hot oven), as this prevents warping.
- For ice cream, frozen yogurt bars, or chocolate molds, silicone is perfect. Baked goods also release easily when frozen—just let them sit at room temperature a few minutes before removing.
In the microwave, silicone won’t get hot itself, but the food inside does. Always use oven mitts when removing hot items.
When Not To Use Silicone Bakeware
Silicone is not the best choice for every recipe. Avoid it for:
- Crispy crusts: Like pizza or pie, where you want a brown, crisp base.
- Broiling: The direct heat can melt or damage silicone.
- Sharp knives or cutting: Never cut baked goods inside the silicone pan.
For everything else—especially cakes, muffins, breads, and molded desserts—silicone is a smart choice.

Credit: cooknchic.com
Advanced Tips: Getting The Most From Your Silicone
To take your baking to the next level, try these less obvious tricks:
- Double up thin molds: If your silicone is very flexible, stacking two together adds stability.
- Use for savory dishes: Silicone is great for egg muffins, meatloaf, or baked oatmeal.
- Creative freezing: Make homemade chocolate, shaped butter, or single-serve smoothie cubes.
- Check for FDA approval: Not all silicone is equal. Quality brands list food safety certifications. Learn more at the FDA’s official guide.
Frequently Asked Questions
What Temperature Can Silicone Bakeware Handle?
Most quality silicone pans are safe up to 428°F (220°C). Check your product’s label for the maximum safe temperature. Avoid using under broilers or in direct flame.
Do I Need To Grease Silicone Bakeware?
Usually, no, especially after a few uses. For sticky or sugary recipes, a light spray of oil or butter helps. Greasing also makes cleaning easier.
Why Does My Cake Take Longer To Bake In Silicone?
Silicone is a poor conductor of heat compared to metal. This means heat travels through it more slowly, so baking can take 3–8% longer. Always check for doneness with a toothpick.
Can I Put Silicone Bakeware In The Dishwasher?
Yes! Most silicone pans are dishwasher safe. Place them on the top rack. For deep molds, check for any stuck bits after washing.
How Do I Stop Silicone From Absorbing Odors?
If your pan smells, soak in baking soda and water for an hour, then rinse well. Store away from strong-smelling foods to prevent odors in the future.
Cooking with silicone bakeware opens up creative options in your kitchen. With the right steps, you’ll enjoy easy release, simple cleanup, and perfectly baked treats. Try it out with your favorite recipes and see the difference for yourself.
Credit: www.youtube.com

Hello, This is Annie Walker, a 38-year-old blogger, founder, and editor of Cookware Guider from NY, USA. I am a cookware fanatic and passionate cooker. I love to cook with different types of cooking appliances (example: all types of cookware, rice cookers, slow cookers, etc) almost every day in my kitchen. I love to share my experience with my readers in my blog. Also, I enjoy helping people to solve their problems through my website. You can follow me on Twitter & Pinterest. To know details about my blog please check the about us page.