
Knives are essential tools in every kitchen, whether you cook daily or only sometimes. A sharp knife makes slicing easier, safer, and faster. But knives lose their sharpness after many uses, which can make cutting difficult and even dangerous. That’s where a Good Cook Knife Sharpener comes in. This tool helps you keep your knives in top condition, so every cut is smooth. If you’re new to sharpening or wondering how to use your Good Cook sharpener properly, this guide will walk you through each step, clarify important details, and help you get the best results—without confusion or guesswork.
Why Knife Sharpening Matters
A sharp knife is more than just a convenience—it’s a necessity for safe and effective cooking. When your knife is dull, you need to push harder, which increases the chance of slipping and cutting yourself. Studies show that kitchen accidents often happen with blunt knives, not sharp ones.
Sharp knives make food prep quicker and more accurate, especially when slicing vegetables, meat, or bread.
Many people think sharpening is difficult or only for professionals, but modern sharpeners like the Good Cook Knife Sharpener make it easy for anyone. Using a sharpener regularly extends the life of your knives and keeps them performing well. You also save money because you won’t need to replace knives as often.
Understanding Your Good Cook Knife Sharpener
Before you start sharpening, it’s important to know the features and design of your tool. The Good Cook Knife Sharpener is designed for home kitchens. It usually has two slots—one for coarse sharpening and one for fine honing. The body is made from durable plastic, and the sharpening blades are often made from tungsten carbide or ceramic materials.
Key Features
- Dual sharpening slots: The first slot removes nicks and restores the basic edge. The second slot smooths and polishes the blade.
- Ergonomic handle: Provides a secure grip, so you don’t slip while sharpening.
- Non-slip base: Keeps the sharpener steady on your countertop.
- Compact size: Easy to store and use in small kitchens.
Types Of Knives You Can Sharpen
The Good Cook Knife Sharpener works with most straight-edged kitchen knives, including:
- Chef’s knives
- Paring knives
- Utility knives
- Slicing knives
Avoid using it on serrated knives or specialty blades unless the sharpener is specifically labeled for those.
| Knife Type | Sharpenable with Good Cook Sharpener? | Notes |
|---|---|---|
| Chef’s Knife | Yes | Ideal for daily sharpening |
| Paring Knife | Yes | Works well, easy to handle |
| Serrated Bread Knife | No | Use specialty sharpener |
| Cleaver | Yes | Check blade thickness |
| Utility Knife | Yes | Safe and effective |
Credit: worksharptools.com
Preparing Your Knife And Sharpener
Sharpening starts with preparation. Many beginners skip this step, but it makes the process safer and more effective.
- Clean the knife: Wash and dry the blade. Dirt or moisture can affect sharpening and damage the sharpener.
- Inspect the blade: Look for chips or bends. If the blade is severely damaged, sharpening may not fix it.
- Place sharpener on stable surface: Use a countertop or sturdy table. The non-slip base should grip well.
- Check the slots: Make sure there’s no debris or metal shavings in the sharpener.
Taking a few minutes to prepare can prevent mistakes and accidents. It also helps you get a cleaner, sharper edge.
Step-by-step Guide: How To Use Good Cook Knife Sharpener
Using your sharpener is easy if you follow these steps carefully. Don’t rush—steady movements work best.
Step 1: Choose The Right Slot
Most Good Cook sharpeners have two slots:
- Coarse slot: For dull or damaged blades. Use this first if your knife doesn’t cut well.
- Fine slot: For regular maintenance or finishing the edge. Use after coarse sharpening or for slightly dull knives.
Step 2: Hold The Sharpener And Knife Correctly
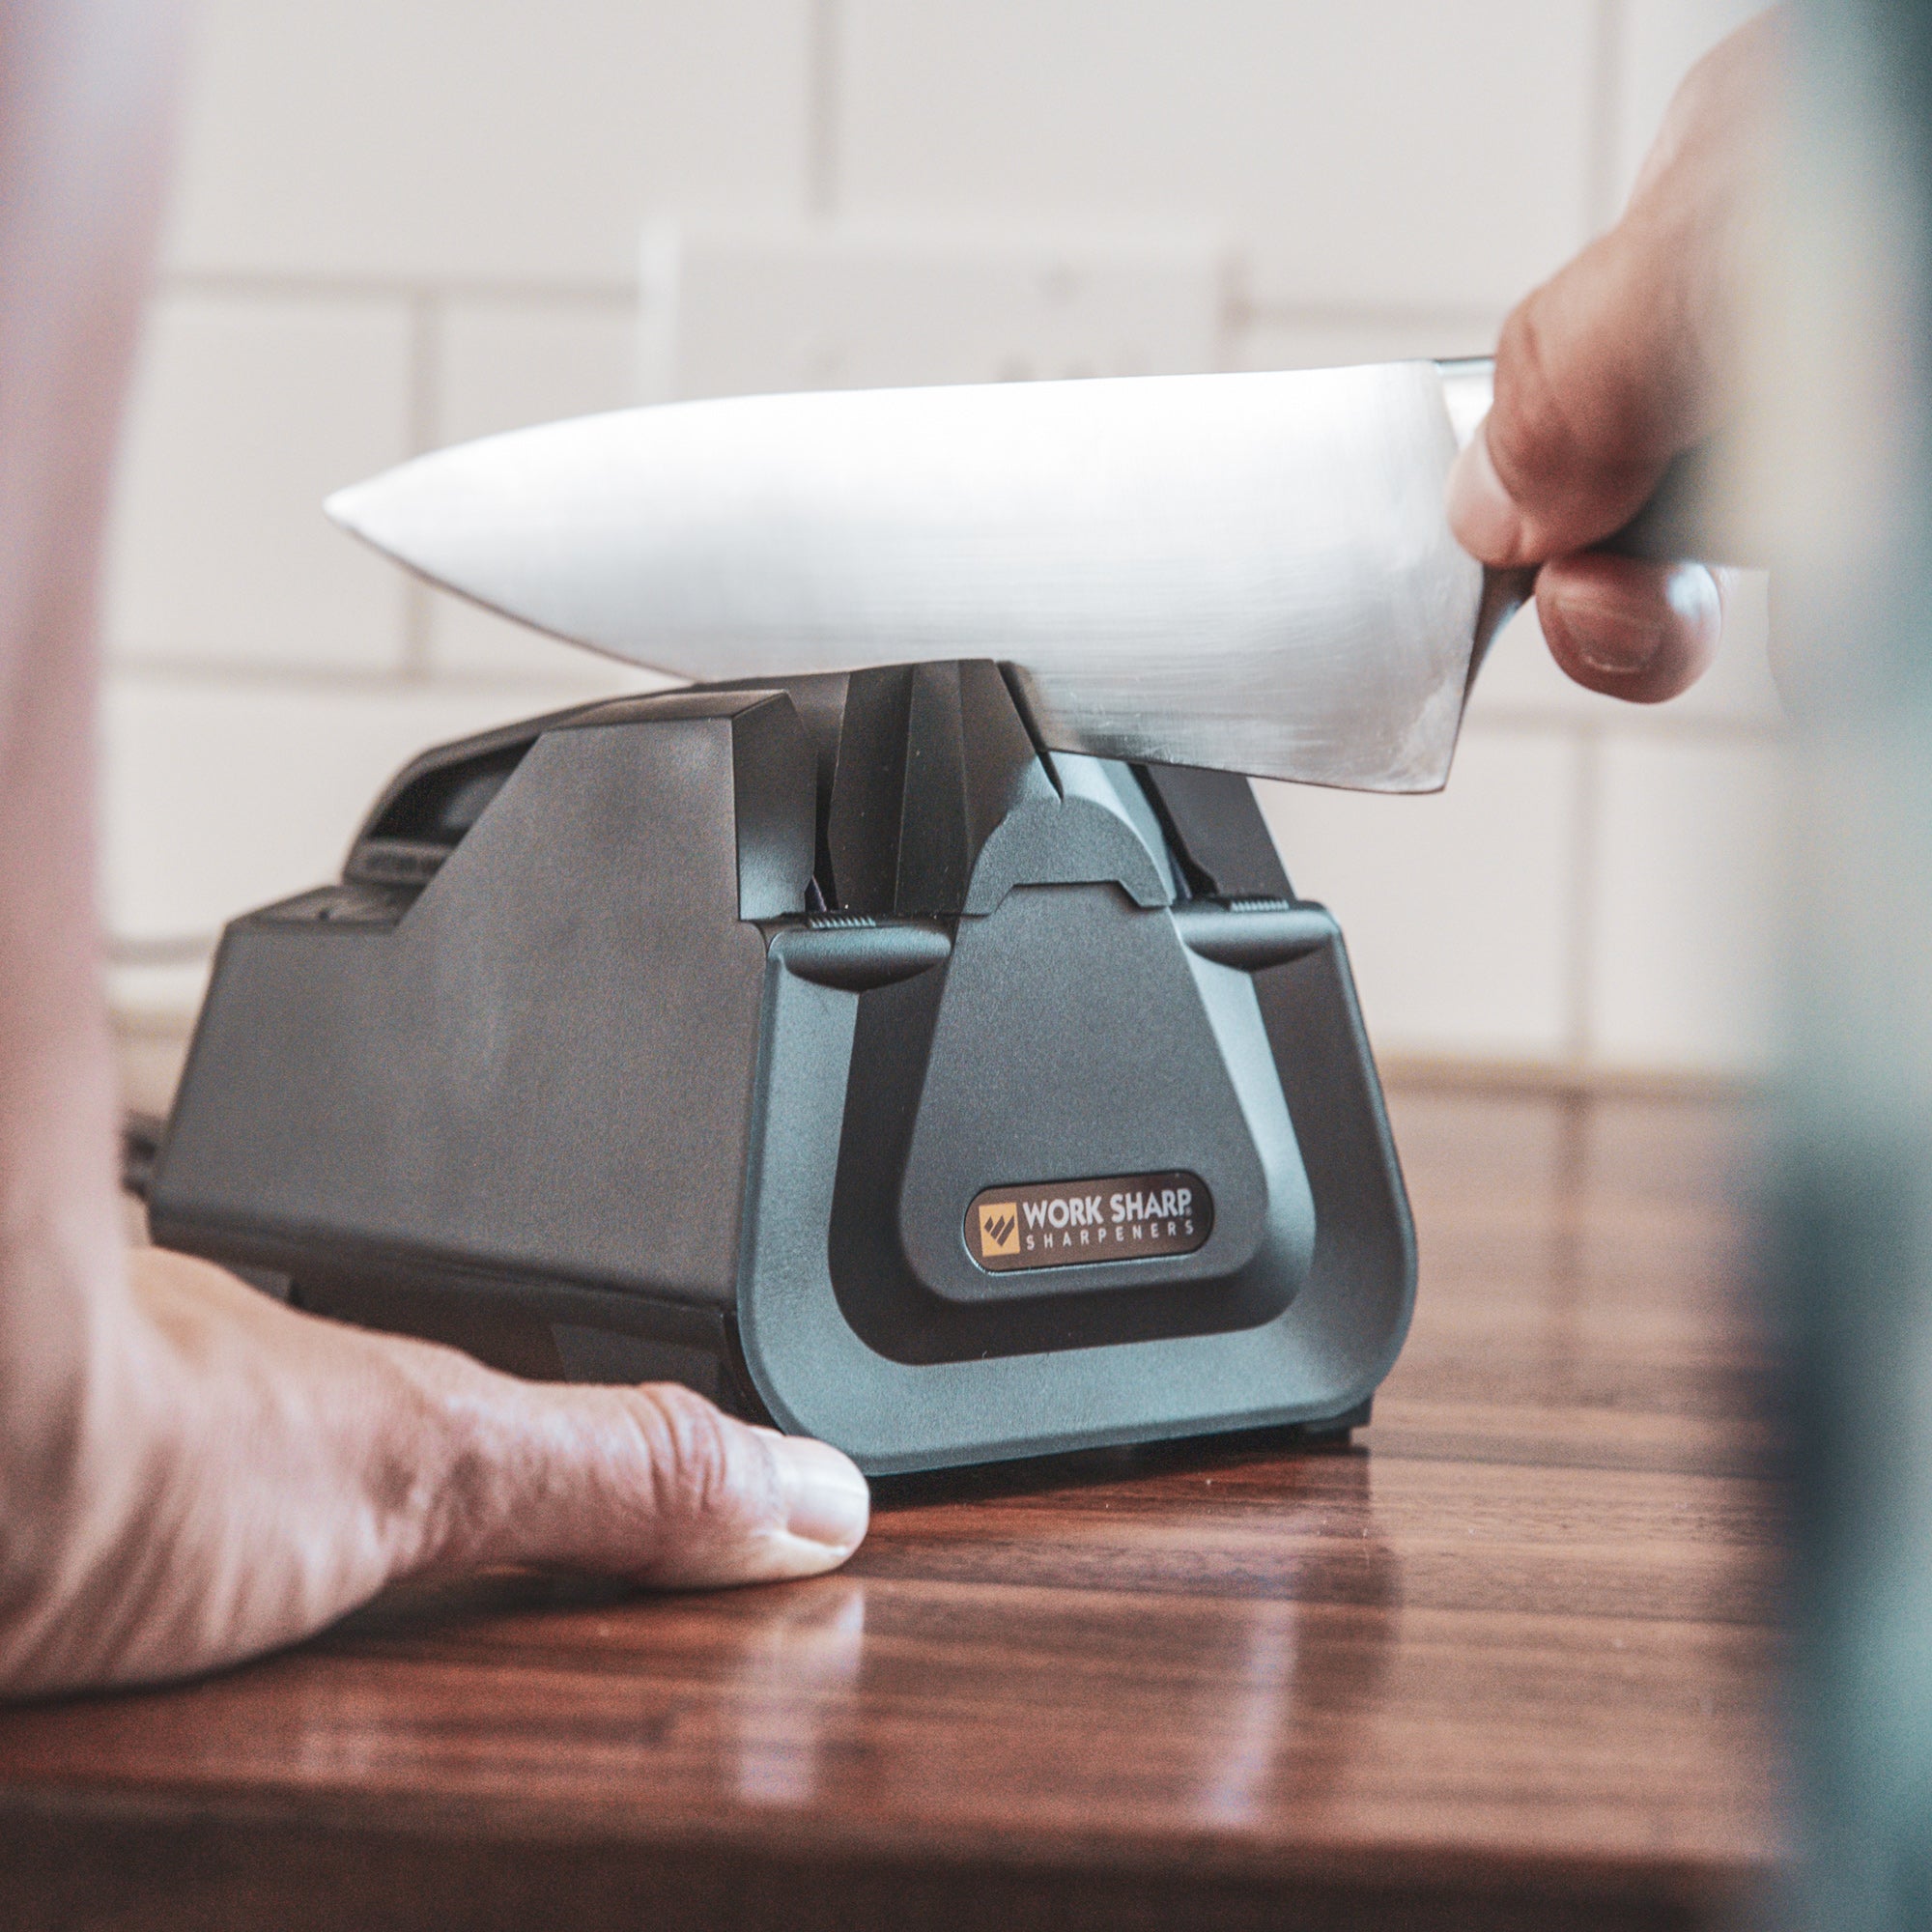
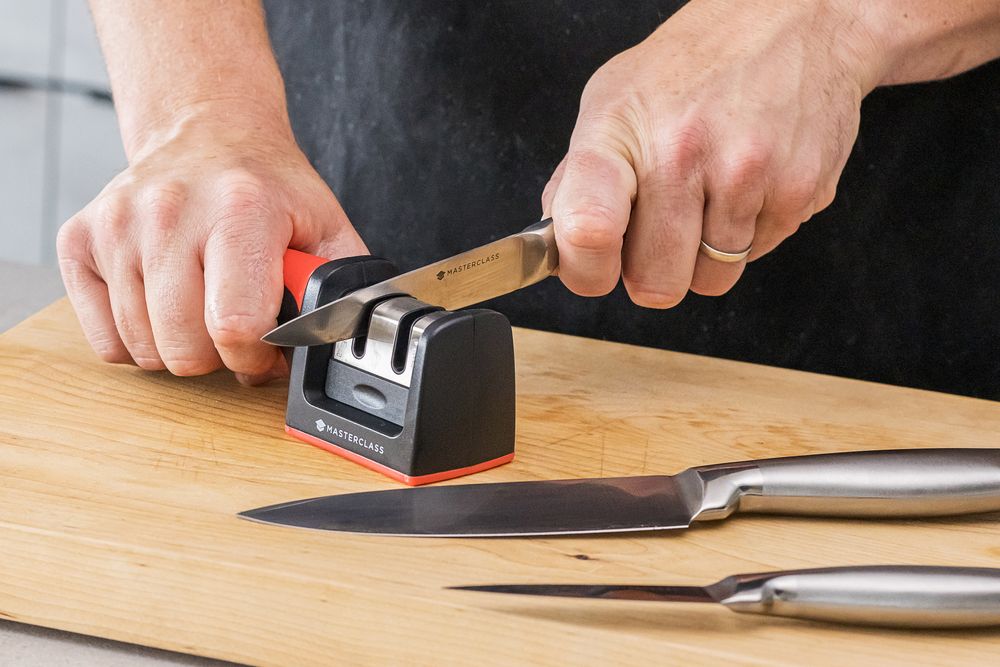
Grip the sharpener’s handle with your non-dominant hand. Place your dominant hand on the knife handle. Hold the knife vertically, with the blade facing down and tip pointing forward.
Step 3: Insert The Knife Blade
Place the heel of the knife (the part closest to the handle) into the sharpening slot. Make sure the blade is centered and straight.
Step 4: Pull The Knife Through
Draw the knife slowly through the slot, from heel to tip. Apply light, even pressure. Don’t force the blade—let the sharpener do the work.
- For the coarse slot, repeat 3–5 times.
- For the fine slot, repeat 2–4 times.
Step 5: Check The Edge
After sharpening, look at the edge. It should be shiny and smooth, with no rough spots. Test by slicing a piece of paper or a tomato. If it cuts easily, your knife is ready.
Step 6: Clean Up
Wipe the blade with a damp cloth to remove metal shavings. Clean the sharpener if needed. Always store the sharpener in a dry place.
Practical Example
Imagine you have a chef’s knife that struggles to cut onions. After cleaning, you use the coarse slot three times. You finish with two passes in the fine slot. Now the knife slices onions with minimal effort.
| Sharpening Step | Number of Passes | Purpose |
|---|---|---|
| Coarse Slot | 3-5 | Restore edge |
| Fine Slot | 2-4 | Polish edge |
| Cleaning | 1 | Remove debris |

Credit: www.oxo.com
Common Mistakes And How To Avoid Them
Even with a good sharpener, mistakes can happen. Knowing what to avoid will help you sharpen safely and effectively.
1. Using Too Much Pressure
Many beginners think pressing hard gives better results. This can damage the blade or the sharpener. Use gentle, steady pressure for best results.
2. Skipping The Fine Slot
Some people only use the coarse slot. This leaves the blade rough and can cause quick dulling. Always finish with the fine slot for a smooth edge.
3. Sharpening Dirty Or Wet Knives
Moisture and dirt can cause uneven sharpening and damage the sharpener’s blades. Always clean and dry knives before sharpening.
4. Sharpening Serrated Knives
The Good Cook sharpener is not designed for serrated blades. Using it can ruin the knife. For serrated knives, use specialized tools.
5. Not Securing The Sharpener
If the sharpener moves during use, you can slip and cut yourself. Make sure the non-slip base grips the surface firmly.
6. Over-sharpening
Sharpening too often can wear out the blade. Only sharpen when you notice dullness. Most home cooks need to sharpen every 1–2 months.
Advanced Tips For Perfect Results
If you want your knives to stay sharp for longer, try these pro-level tips. Many home cooks overlook these details.
Angle Matters
Most kitchen knives have a sharpening angle of 15–20 degrees. The Good Cook sharpener is preset, but keep the blade vertical and steady as you pull. Wobbling can create uneven edges.
Sharpen Both Sides
Some sharpeners are double-sided, but if yours is single-sided, repeat the process for the other side of the blade. This helps keep the edge balanced.
Use A Honing Steel
A sharpener restores the edge, but a honing steel keeps it straight. Use honing steel weekly to maintain sharpness. Sharpen only when honing no longer works.
Keep Your Sharpener Clean
Metal shavings build up in the slots. Clean them out regularly to keep the sharpener effective. Some models have removable parts for easy cleaning.
Store Knives Properly
After sharpening, store knives in a block or on a magnetic strip. Don’t toss them in a drawer—this dulls the edge quickly.
When To Sharpen Vs. Hone
Many people confuse sharpening and honing. Sharpening removes metal to create a new edge. Honing straightens the existing edge. You should hone regularly and sharpen when you notice dullness.
| Action | Purpose | Frequency |
|---|---|---|
| Sharpening | Restore edge | Every 1-2 months |
| Honing | Straighten edge | Weekly or after each use |
Safety Tips For Sharpening Knives
Sharpening is safe when done correctly, but accidents can happen. Here are important safety rules:
- Keep fingers away from the blade: Hold the handle, not the blade.
- Use a stable surface: Never sharpen on a slippery table.
- Don’t rush: Move slowly and steadily.
- Clean up metal shavings: These can cause cuts if left on the counter.
- Check for damage: Don’t sharpen knives with bent or cracked blades.
If you’re sharpening for the first time, ask someone to watch or assist. Most accidents happen because of distraction or rushing.
Caring For Your Good Cook Knife Sharpener
With proper care, your sharpener will last for years. Here’s how to keep it in good shape:
Cleaning
After each use, wipe the slots with a dry cloth. For deeper cleaning, use a small brush to remove metal bits. If your sharpener is dishwasher-safe, follow the manufacturer’s instructions.
Storage
Store the sharpener in a dry place. Moisture can cause rust or wear on the sharpening blades. If you live in a humid area, consider keeping it in a sealed bag.
Inspect Regularly
Check the slots for signs of wear. If the sharpening blades look dull or chipped, replace the sharpener. A worn-out sharpener can damage your knives.
Comparing Good Cook Knife Sharpener With Other Models
The market has many knife sharpeners, but not all are equal. Here’s a brief comparison with other popular brands.
| Sharpener | Slot Types | Price Range | Ease of Use | Knife Compatibility |
|---|---|---|---|---|
| Good Cook | Coarse, Fine | $10–$18 | Very easy | Most straight-edge |
| Chef’s Choice | Coarse, Medium, Fine | $35–$80 | Moderate | All kitchen knives |
| Smith’s | Coarse, Fine | $15–$25 | Easy | Most kitchen knives |
| Manual Stone | N/A | $20–$50 | Hard | All knives (requires skill) |
As you can see, Good Cook sharpeners are affordable and simple for beginners. They work well for most kitchen knives, making them a good choice for home cooks.
Credit: www.cookserveenjoy.com
Real Data: Knife Sharpening Frequency
Research shows that home cooks sharpen their knives about 6–12 times per year. Professional chefs sharpen daily or weekly. If you cook often, sharpen every 1–2 months. If you cook rarely, every 3–4 months is enough.
Example
A family cooking daily will notice their chef’s knife dulling after 6–8 weeks. Sharpening restores cutting power and reduces food waste.
Non-obvious Insights Beginners Miss
- Sharpening does not fix chips or cracks. If your knife has deep chips or cracks, sharpening only makes the problem worse. Replace the blade or seek professional repair.
- The sharpener angle is preset. Don’t try to tilt the knife—keep it vertical and steady. Tilting creates uneven edges and reduces cutting performance.
- Cleaning after sharpening is essential. Metal shavings can contaminate food or cause injury if left on the blade or counter.
Expert Guidance: Sharpening For Different Knife Uses
Different knives have different roles. Sharpen accordingly:
- Chef’s knife: Sharpen every 1–2 months. Used for most tasks.
- Paring knife: Sharpen every 3–4 months. Used for light cutting.
- Utility knife: Sharpen as needed, based on usage.
- Cleaver: Sharpen less often, as the thick blade stays sharp longer.
Troubleshooting: If Your Knife Won’t Get Sharp
Sometimes, after sharpening, the knife still feels dull. Possible reasons:
- Blade is too damaged: Chips, bends, or cracks need repair.
- Wrong slot used: Use the coarse slot first for very dull knives.
- Sharpening angle incorrect: Keep the blade vertical.
- Sharpener is worn out: Check for dull or chipped sharpening blades.
If sharpening doesn’t help, consider professional sharpening or replacing the knife.
Environmental Impact: Sharpening Vs. Replacing
Sharpening extends the life of your knives. This reduces waste and saves resources. Buying new knives often creates more waste. Using a Good Cook Knife Sharpener is an eco-friendly choice.
Getting The Most From Your Good Cook Knife Sharpener
To maximize performance, follow these steps:
- Clean knives before sharpening.
- Use the correct slot for your knife’s condition.
- Sharpen slowly and steadily.
- Finish with the fine slot.
- Clean and store the sharpener properly.
These steps help your knives stay sharp, safe, and ready for any cooking task.
Frequently Asked Questions
How Often Should I Sharpen My Kitchen Knives?
Most home cooks should sharpen their knives every 1–2 months. If you cook less often, every 3–4 months is enough. Professional chefs sharpen daily or weekly.
Can I Use The Good Cook Knife Sharpener On Serrated Knives?
No, it’s not suitable for serrated knives. Use a specialized sharpener for those blades, as standard slots can damage the serrations.
What Should I Do If My Knife Has Chips Or Cracks?
Sharpening won’t fix chips or cracks. For minor chips, use the coarse slot. For deep chips or cracks, replace the blade or seek professional repair.
Is It Safe To Use The Good Cook Knife Sharpener?
Yes, it’s safe when used correctly. Always keep fingers away from the blade, use a stable surface, and don’t rush the process.
How Do I Clean The Sharpener After Use?
Wipe the slots with a dry cloth to remove metal bits. For deeper cleaning, use a small brush or follow the manufacturer’s instructions. If dishwasher-safe, check the manual.
Keeping your knives sharp makes cooking safer, faster, and more enjoyable. The Good Cook Knife Sharpener is easy for anyone to use, even beginners. By following these steps, understanding common mistakes, and caring for your sharpener, you can keep your kitchen knives working their best for years. For more information about knife sharpening and kitchen safety, visit Wikipedia. With a little practice, you’ll notice a big difference in your cooking, and you’ll save money and time. Happy cooking!

Hello, This is Annie Walker, a 38-year-old blogger, founder, and editor of Cookware Guider from NY, USA. I am a cookware fanatic and passionate cooker. I love to cook with different types of cooking appliances (example: all types of cookware, rice cookers, slow cookers, etc) almost every day in my kitchen. I love to share my experience with my readers in my blog. Also, I enjoy helping people to solve their problems through my website. You can follow me on Twitter & Pinterest. To know details about my blog please check the about us page.