
If you cook often, you know how important a sharp knife is. Dull blades make cooking harder and less safe. That’s why a good knife sharpener is essential in every kitchen. The Temu knife sharpener is gaining popularity for its easy use and affordable price. But many people are unsure how to use it correctly or how to get the best results. If you want your knives sharp, safe, and ready, this guide will help you master your Temu knife sharpener. We’ll cover step-by-step instructions, practical safety tips, common mistakes, and give you real comparisons with other sharpeners. By the end, you’ll feel confident using your Temu sharpener—even if English isn’t your first language.
Understanding Your Temu Knife Sharpener
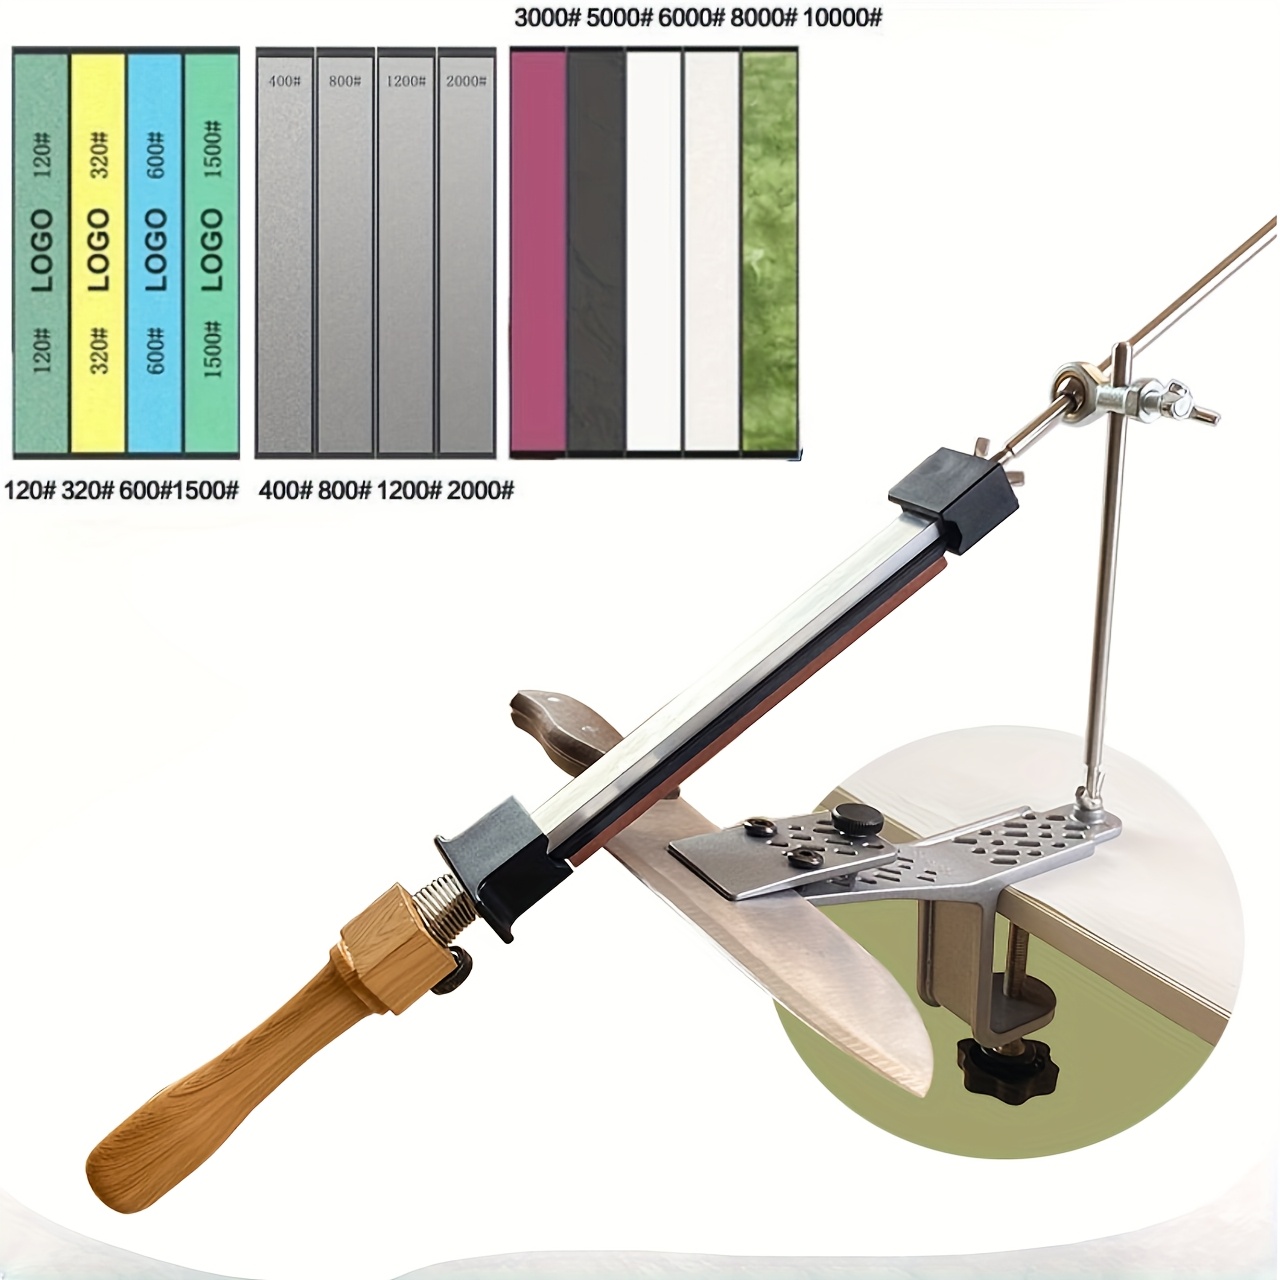
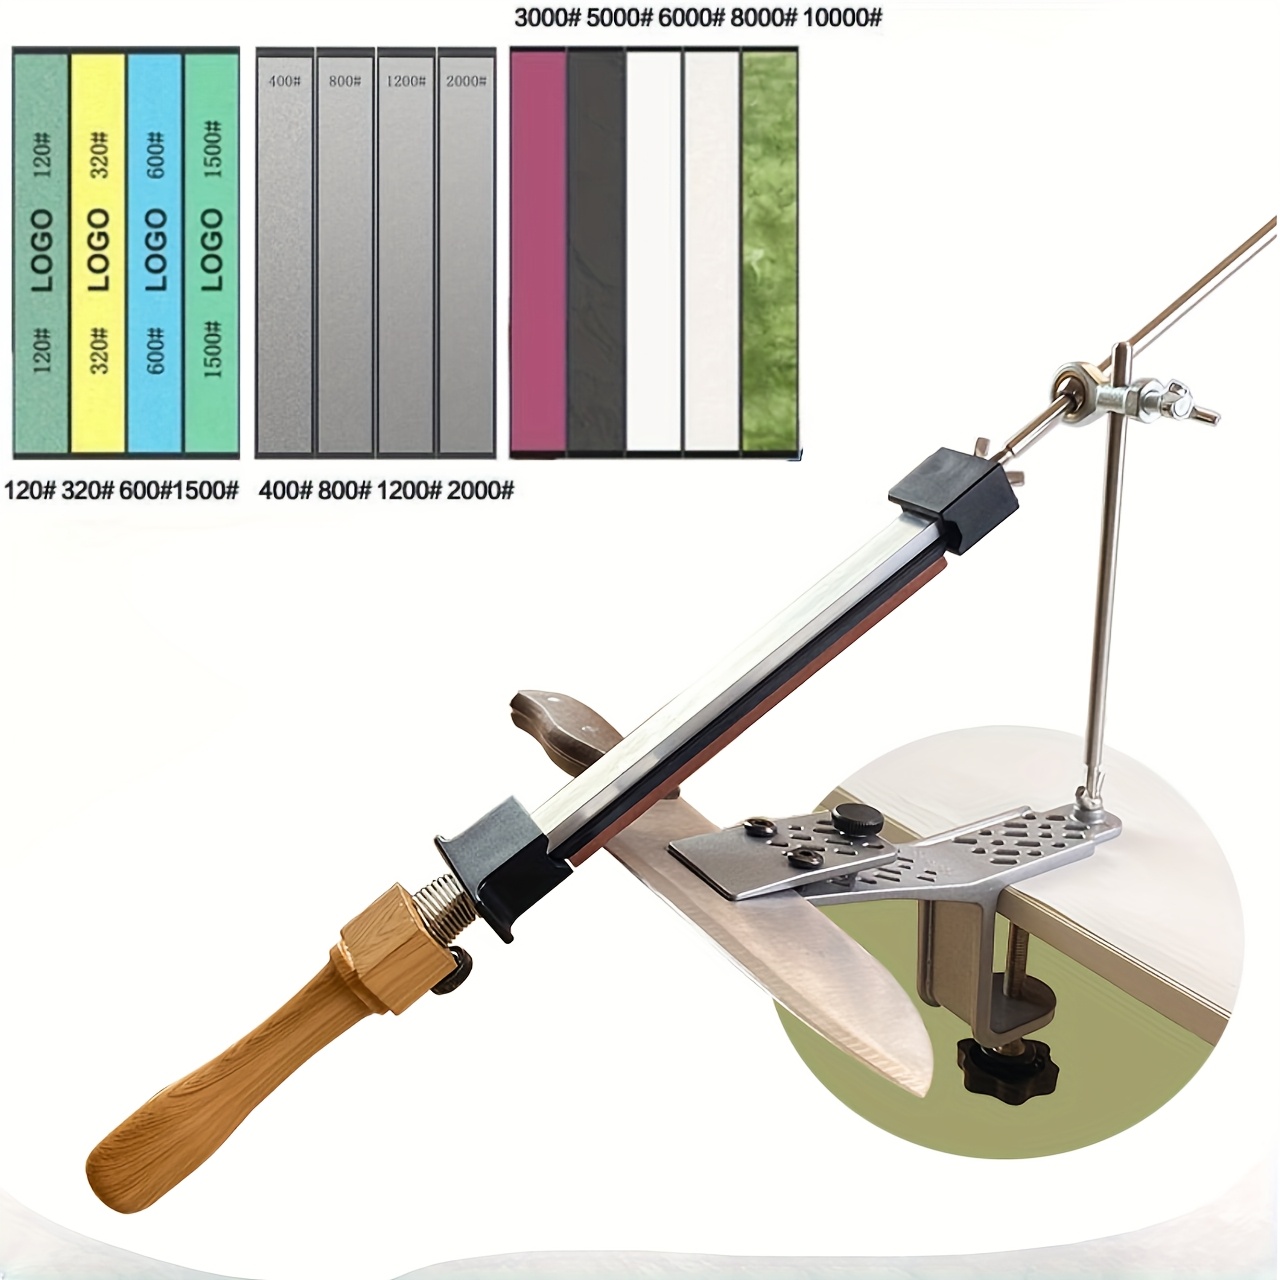
Before you start sharpening, it’s important to know the parts and how the Temu sharpener works. Most Temu sharpeners use a three-stage system with slots for different sharpening actions. Each slot is designed to handle a specific part of the sharpening process.
Main Features And Parts
- Coarse slot: For repairing and reshaping very dull blades.
- Medium slot: For regular sharpening and maintaining a sharp edge.
- Fine slot: For polishing and finishing the blade.
Some Temu models have only two slots (coarse and fine), while others offer three. The handle is typically non-slip, and the base often has rubber pads for stability.
How Does It Work?
The Temu sharpener uses angled sharpening stones or rods inside each slot. When you pull the knife through, these stones grind, sharpen, and polish the blade. The angle is fixed, so beginners can sharpen without guessing. This makes it much easier than using a traditional whetstone.
Types Of Knives Supported
Temu sharpeners work best for straight-edge kitchen knives. They are not designed for serrated knives, scissors, or ceramic blades. If your knife has a serrated edge (like a bread knife), you should not use this sharpener.
Why Choose Temu Over Others?
Many users prefer Temu because it’s affordable—most models cost under $20—and it’s simple to use. Compared to electric sharpeners or whetstones, Temu’s manual design is safer for beginners. The fixed angle helps prevent mistakes.
Quick Comparison: Temu Vs Other Sharpeners
| Sharpener Type | Price Range | Ease of Use | Best For |
|---|---|---|---|
| Temu Manual | $10–$20 | Very Easy | Home cooks, beginners |
| Electric | $50–$200 | Easy | Frequent sharpening |
| Whetstone | $20–$60 | Hard | Experienced users |
Many beginners overlook that manual sharpeners like Temu require less skill and are safer for most kitchens.
Preparing To Sharpen: Safety And Setup
You need to prepare your workspace and tools before sharpening. This step is often skipped by beginners, but it’s crucial for safety and getting good results.
Choosing The Right Location
Pick a flat, stable surface. A kitchen counter or sturdy table is best. Make sure there’s enough light so you can see the blade clearly.
Cleaning Your Knife
Always wash and dry your knife before sharpening. Dirt or grease can affect the sharpening process and damage the sharpener’s stones.
Checking The Knife Condition
Look at the blade. Is it very dull, chipped, or just needs a touch-up? This helps decide which slot to use first.
Positioning The Sharpener
Place the Temu sharpener on the surface. Make sure the base pads grip the counter and it doesn’t slide. Hold the handle firmly with your non-dominant hand.
Practical Safety Tips
- Keep fingers away from the blade path.
- Use gentle, controlled movements.
- Don’t rush—slow sharpening gives better results.
- Never try to sharpen wet or greasy knives.
Many users forget to check if the sharpener is secure, which leads to slips and injuries. Always double-check before starting.
Step-by-step Guide: Using Your Temu Knife Sharpener
Let’s walk through the sharpening process for a common kitchen knife. These steps work for most Temu models.
Step 1: Identify The Correct Slot
If your knife is very dull or damaged, start with the coarse slot. For regular sharpening, use the medium slot. For finishing and polishing, use the fine slot.
Step 2: Insert The Knife
Place the knife blade (heel) into the slot at a 90-degree angle to the sharpener. The tip should point away from you.
Step 3: Pull The Knife Through
Pull the blade smoothly through the slot, from heel to tip. Use light pressure—too much force can damage the blade.
Step 4: Repeat As Needed
- Coarse slot: 3–5 times for very dull knives.
- Medium slot: 3–4 times for sharpening.
- Fine slot: 2–3 times to polish.
Do not saw back and forth. Always pull in one direction.
Step 5: Clean The Knife
Wipe the blade with a damp cloth to remove metal dust. Dry the knife before storing or using.
Step 6: Test The Sharpness
Cut a piece of paper or a tomato. If the knife slices easily, the sharpening is successful.
Step-by-step Summary Table
| Step | Action | Purpose | Common Mistake |
|---|---|---|---|
| 1 | Choose slot | Match blade condition | Wrong slot selection |
| 2 | Insert knife | Proper angle | Wrong angle |
| 3 | Pull knife | Sharpen blade | Too much force |
| 4 | Repeat | Even sharpening | Too many passes |
| 5 | Clean knife | Remove debris | Skip cleaning |
| 6 | Test sharpness | Check results | Ignore testing |
A non-obvious insight: Many beginners do too many passes, thinking more sharpening equals sharper knives. This often leads to blade damage. Stick to recommended passes.
Practical Tips For Best Results
To get the most from your Temu sharpener, follow these practical tips. They help you avoid common mistakes and improve sharpening quality.
Use Light Pressure
Heavy pressure wears down both the blade and the sharpener. Light, steady pulls give the best edge.
Don’t Sharpen Too Often
Sharpening too frequently can reduce the knife’s lifespan. For home kitchens, sharpen once every few months, or when you notice dullness.
Keep The Sharpener Clean
After each use, tap out metal dust and wipe the slots with a dry cloth. This prevents buildup and extends the sharpener’s life.
Sharpen Only Clean, Dry Knives
Moisture can cause rust and damage the sharpening stones. Always dry knives before sharpening.
Store The Sharpener Safely
Keep the Temu sharpener out of reach of children and away from water. Proper storage prevents accidents and keeps the sharpener working well.
Avoid Using On Specialty Knives
Do not use Temu sharpeners on serrated, ceramic, or Japanese knives with special blade angles. This can ruin the blade.
Example: Proper Vs Improper Sharpening
Suppose you have a chef’s knife used daily. If you sharpen it gently every 3 months, it will last years. If you sharpen every week with heavy force, the blade will thin and break.
Comparing Temu Knife Sharpener With Other Brands
If you are considering a Temu sharpener, it helps to know how it stacks up against other popular brands. Here’s a direct comparison based on price, usability, and results.
| Brand | Price | Ease of Use | Sharpness Quality | Durability |
|---|---|---|---|---|
| Temu | $10–$20 | Simple | Good for home | Moderate |
| KitchenIQ | $15–$30 | Easy | Excellent | High |
| Chef’sChoice | $40–$200 | Easy (electric) | Professional | Very High |
| Whetstone | $20–$60 | Hard | Professional | High |
Temu sharpener stands out for its price and simplicity. It’s not as durable as premium brands, but it’s excellent for everyday kitchen use.
How To Maintain Your Temu Knife Sharpener
A well-maintained sharpener works better and lasts longer. Here’s how to care for your Temu sharpener:
Regular Cleaning
After sharpening, tap the sharpener gently to remove metal dust. Use a small brush or cloth to clean the slots. Never use water unless the manual says it’s safe.
Deep Cleaning (monthly)
Once a month, inspect the slots for buildup. If needed, use a dry toothbrush to clean inside. Avoid harsh chemicals.
Inspect For Wear
Check the sharpening stones for cracks or chips. If damaged, replace the sharpener. Using a broken sharpener can damage your knives.
Store Properly
Keep the sharpener in a dry place. Avoid storing near sinks or stoves.
Replace When Needed
Manual sharpeners last 1–3 years with regular use. If you notice poor sharpening or damaged stones, buy a new one.
A hidden insight: Many people forget to clean the slots, causing buildup that reduces sharpening quality. Regular cleaning makes a big difference.
Troubleshooting: Common Problems And Solutions
Even with the best care, you may face issues. Here’s how to solve them.
Knife Not Getting Sharp
- Check if you are using the correct slot.
- Reduce force; try lighter pulls.
- Clean the sharpener—dust may block the stones.
Blade Getting Damaged
- Too many passes can thin or chip the blade.
- Stop sharpening and inspect for damage.
Sharpener Slipping
- Place on a dry, flat surface.
- Check the rubber pads—replace if worn.
Stones Wear Out
- Replace the sharpener. Most stones are not user-replaceable.
Metal Dust Buildup
- Clean slots after every use.
Many beginners miss the importance of slot selection. Using the wrong slot is a top cause of poor results.
When To Sharpen Vs When To Hone
Sharpening and honing are often confused. Sharpening removes metal to create a new edge. Honing realigns the edge but does not remove metal.
Sharpening
- Use the Temu sharpener when the knife is dull.
- Recommended every few months.
Honing
- Use a honing steel for regular maintenance.
- Can be used weekly.
Example
If your knife cannot cut paper easily, sharpen. If it’s just a bit off but still cuts, hone.
Credit: www.temu.com
Safety Reminders And Best Practices
Knife sharpening can be dangerous if not done carefully. Here are essential safety reminders:
- Always keep hands away from the blade path.
- Never rush the process.
- Use only clean, dry knives.
- Keep children away from sharpening tools.
A non-obvious insight: Many injuries happen when trying to sharpen quickly. Take your time—safe sharpening is better than fast sharpening.
How Often Should You Sharpen?
The frequency depends on knife usage.
- Home cooks: Every 2–3 months.
- Professional chefs: Every 2–4 weeks.
- Light use: Every 6 months.
If you notice resistance while cutting, it’s time to sharpen.
Real User Experiences
Many home cooks report that the Temu sharpener gives good results for daily cooking. Users like the simple design and quick sharpening. However, some say it’s not as effective on very expensive knives.
One user shared: “I sharpened my kitchen knife with Temu, and it cut tomatoes easily. But for my Japanese chef knife, I use a whetstone.”
This shows that Temu is best for basic kitchen knives, not specialty blades.
Where To Buy Temu Knife Sharpener
Temu sharpeners are sold online and in stores. You can find them on Temu’s website, Amazon, and other retailers. If you want more details, check Temu’s official site for updated prices and models.
Credit: www.temu.com
Frequently Asked Questions
How Long Does Sharpening Take With Temu?
Sharpening a knife usually takes 2–5 minutes. If the blade is very dull, it may take longer.
Can I Use Temu Sharpener For Scissors Or Ceramic Knives?
No. Temu sharpeners are designed for straight-edge steel kitchen knives only. Using them on scissors or ceramic blades can damage both the tool and the item.
How Do I Know When My Knife Is Sharp Enough?
Test by slicing paper or a tomato. If the knife cuts smoothly without force, it’s sharp. Avoid over-sharpening.
Is It Safe For Beginners?
Yes. Temu sharpeners are designed with safety in mind. The fixed angle and stable base reduce risk. Always follow safety tips.
What Is The Lifespan Of A Temu Knife Sharpener?
With regular use and proper maintenance, it lasts 1–3 years. Replace if you notice poor performance or damaged stones.
Final Thoughts
A sharp knife makes cooking safer and easier. The Temu knife sharpener is a great choice for beginners and home cooks because it’s easy to use and affordable. If you follow the steps and tips in this guide, you’ll keep your knives sharp and your kitchen safe.
Remember to clean your sharpener, use gentle pressure, and avoid sharpening specialty blades. With practice, you’ll sharpen like a pro—even if English isn’t your first language. Investing in a good sharpener and learning proper technique pays off in better cooking and safer meals.
Credit: www.youtube.com

Hello, This is Annie Walker, a 38-year-old blogger, founder, and editor of Cookware Guider from NY, USA. I am a cookware fanatic and passionate cooker. I love to cook with different types of cooking appliances (example: all types of cookware, rice cookers, slow cookers, etc) almost every day in my kitchen. I love to share my experience with my readers in my blog. Also, I enjoy helping people to solve their problems through my website. You can follow me on Twitter & Pinterest. To know details about my blog please check the about us page.