
Using a strop for knife sharpening is an old skill, but it is still important today. Many people think sharpening a knife means using a stone or a machine. But a strop is a simple tool that can make your knife much sharper.
You don’t need fancy equipment or expert skills. With patience and careful technique, you can turn a dull blade into a razor edge.
Most beginners skip stropping because they don’t understand it. But stropping is not just for professionals or collectors. It is easy to learn and can help your knives last longer. Kitchen knives, pocket knives, and even woodworking tools all benefit from stropping.
The process polishes the blade and removes tiny burrs that stones leave behind.
In this article, you’ll discover how to use a strop for knife sharpening. You’ll learn what a strop is, how it works, and why it matters. I’ll explain how to choose the right strop, how to prepare your knife, and give step-by-step instructions for stropping.
You’ll also find tables comparing strops and sharpening methods, practical tips, and answers to common questions. With this guide, you’ll be able to sharpen your knives safely and confidently.
What Is A Strop?
A strop is a strip of material used to finish and polish the edge of a blade. Most strops are made from leather, but some use canvas or wood. The strop is not abrasive like a sharpening stone. Instead, it gently removes small bits of metal and smooths the edge.
Strops often use compounds—special pastes or powders that add mild abrasiveness. These compounds help polish the blade faster. A strop can be handheld, mounted on wood, or even hung from a wall.
Types Of Strops
There are three main types of strops:
- Leather strops: The most popular. They can be made from cowhide, horsehide, or synthetic leather.
- Canvas strops: Often used for straight razors. They are less common for kitchen knives.
- Wood strops: Used with very fine abrasive compounds. They are not as flexible as leather.
Some strops are double-sided—one side for compound, one for plain leather.
How A Strop Works
When you sharpen a knife with a stone, the edge is rough. Small burrs or teeth are left behind. Stropping removes these burrs and aligns the edge. The result is a mirror-polished edge that cuts cleanly.
The strop does not remove much metal. It is for finishing, not reshaping. Stropping can also help maintain a sharp edge between full sharpenings.
Why Use A Strop? Benefits Explained
Many people think stropping is just for barbers or craftsmen. But the benefits are clear for anyone who uses knives.
- Sharper edge: Stropping makes the blade much sharper than stones alone.
- Longer-lasting edge: Regular stropping keeps your knife sharp for longer periods.
- Smoother cuts: A stropped knife cuts food, wood, or paper more easily.
- Less damage: Stropping is gentle and does not wear down the blade quickly.
- Easy maintenance: You can strop a knife in just a few minutes.
According to experts, stropping can increase the lifespan of a knife edge by 30–50% compared to only sharpening with stones. This saves money and reduces the need for frequent sharpening.
Choosing The Right Strop For Your Knife
Picking the right strop is important. The material, size, and compound all affect your results. Let’s compare some popular strop choices.
| Strop Type | Best For | Price Range | Typical Size | Compound Use |
|---|---|---|---|---|
| Leather (Cowhide) | Kitchen, pocket knives | $15–$40 | 8″x2″, 12″x3″ | Optional |
| Leather (Horsehide) | Woodworking tools, razors | $30–$60 | 10″x2″, 14″x3″ | Common |
| Canvas | Razors, fine blades | $10–$25 | 8″x2″ | Rare |
| Wood | Micro-polishing | $20–$50 | Varies | Required |
Size And Shape
A larger strop is easier for kitchen knives. Smaller strops are better for pocket knives or tools. Flat bench strops are stable, while hanging strops are common for razors.
Compound Choices
Some compounds are colored:
- Green (chromium oxide): Fine polishing, good for most knives.
- White: Ultra-fine, for finishing.
- Red: Medium, for removing small burrs.
You can use a strop with or without compound. For beginners, green compound is a safe choice.
Common Mistakes When Choosing
- Picking a strop that is too small for your knife.
- Using a strop that is too rough (poor-quality leather).
- Skipping the compound or using the wrong one.
Always match the strop size to your knife, and start with a simple compound.
Preparing Your Knife And Strop
Before you begin stropping, you need to prepare both the knife and the strop. This step is often skipped but makes a big difference.
Cleaning Your Knife
- Wash the blade with warm water and soap.
- Dry it completely.
- Remove any oil or dirt, as this can affect stropping.
Preparing The Strop
- If using a compound, rub a thin layer onto the strop.
- Make sure the strop is clean and free from dust.
- If using plain leather, wipe it lightly with a damp cloth.
A dirty strop can scratch your blade, so keep it clean.
Setting Up Your Workspace
- Use a flat, stable surface.
- Good lighting helps you see the edge.
- Keep your hands dry and free from oil.
How To Use A Strop For Knife Sharpening: Step-by-step Guide
Stropping is simple, but technique matters. Here’s a clear process for beginners and experts.
1. Hold The Knife At The Correct Angle
The angle is usually 10–20 degrees. Hold the blade so the edge touches the strop, but do not force it flat.
- For kitchen knives: 15–20 degrees.
- For razors or fine blades: 10–15 degrees.
2. Pull, Don’t Push
Always pull the blade backward, away from the cutting edge. Never push the edge forward—it can cut the strop and damage your knife.
3. Apply Gentle Pressure
Use light pressure. Let the strop and compound do the work.
- Too much pressure can round the edge.
- Too little may not polish the blade.
4. Start At The Heel
Place the heel of the blade on one end of the strop.
5. Draw The Blade Across The Strop
Pull the blade smoothly along the strop, keeping the angle steady. Move from heel to tip in one motion.
6. Flip And Repeat
Turn the blade over and repeat on the other side. Always use the same angle and pressure.
7. Repeat 10–20 Times
Most knives need 10–20 passes per side. For very dull knives, do more. For maintenance, 5–10 passes are enough.
8. Check Your Progress
Look at the edge under a light. A polished, mirror-like finish means you are done.
9. Clean The Blade
Wipe off any compound residue with a dry cloth. Your knife is ready to use.
Practical Example
Imagine you have a chef’s knife that struggles to cut tomatoes. After sharpening on a stone, you strop it 15 times per side with green compound. The blade now slices tomatoes easily and has a shiny edge.
Tips For Safe And Effective Stropping
Stropping is safe, but mistakes can happen. Here are some tips to improve your results:
- Keep fingers clear: Always hold the knife by the handle, never near the edge.
- Work slowly: Rushing can cause accidents or damage.
- Clean the strop often: Remove old compound and dust. Dirty strops can scratch blades.
- Use compound sparingly: Too much can clog the strop and reduce effectiveness.
- Store strops flat: Hanging strops can stretch and lose shape.
- Don’t strop serrated knives: Serrated blades need special sharpening.

Credit: www.booneslickleather.com
Comparing Stropping To Other Sharpening Methods
Many people wonder if stropping is better than using stones, rods, or machines. Here’s a quick comparison.
| Method | Edge Sharpness | Ease of Use | Blade Wear | Time Required |
|---|---|---|---|---|
| Strop | Very sharp, polished | Easy | Low | 2–5 min |
| Sharpening stone | Sharp, rough | Medium | Medium | 5–15 min |
| Honing rod | Sharp, less polished | Easy | Low | 1–3 min |
| Electric sharpener | Sharp, sometimes uneven | Very easy | High | 1–2 min |
Stropping is best for finishing. Stones are for shaping and repair. Honing rods maintain the edge but don’t polish. Electric sharpeners are fast but can remove too much metal.
Troubleshooting Common Stropping Problems
Even experienced users face challenges. Here are some common issues and how to fix them.
Strop Gets Cut Or Damaged
- Cause: Pushing the blade forward or using too much pressure.
- Solution: Always pull the blade, use gentle pressure, and check your angle.
Blade Is Not Getting Sharper
- Cause: Wrong angle, too much or too little compound, dirty strop.
- Solution: Adjust angle, clean strop, use compound correctly.
Edge Gets Rounded
- Cause: Pressing too hard, inconsistent angle.
- Solution: Use lighter pressure and keep angle steady.
Compound Builds Up
- Cause: Using too much compound, not cleaning strop.
- Solution: Apply thin layer and clean regularly.
Strop Is Too Small
- Cause: Trying to strop large knives on small strop.
- Solution: Buy a larger strop or use shorter strokes.
How Often Should You Strop Your Knives?
Stropping frequency depends on how you use your knives.
- Kitchen knives: Once a week or after heavy use.
- Pocket knives: After outdoor trips or rough tasks.
- Woodworking tools: Before and after projects.
A study found that stropping after every five uses can keep a chef’s knife sharper for up to six months without needing full sharpening. Regular stropping saves time and money.
Advanced Stropping Techniques
Once you master basic stropping, you can try advanced methods.
Using Different Compounds
Try combining green and white compounds for a two-step polish. Start with green, then finish with white.
Edge Testing
Use a piece of paper or tomato to test the edge. If it cuts smoothly, your stropping is effective.
Micro-angling
Slightly increase the angle for the last few passes (by 1–2 degrees). This creates a stronger edge.
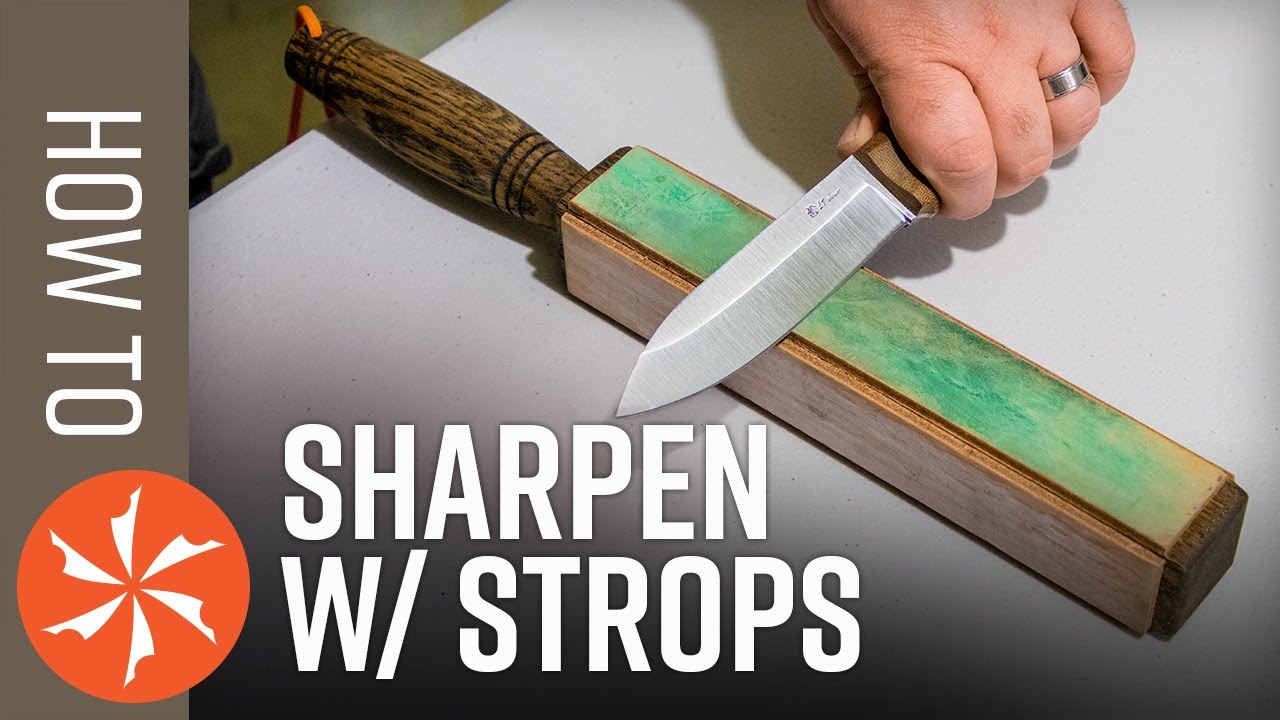
Stropping On Wood
For extremely sharp edges, use a wood strop with fine compound. This is common for woodworking tools.
Credit: www.youtube.com
Maintaining Your Strop
A well-maintained strop lasts for years.
- Clean regularly: Wipe with a damp cloth and let dry.
- Replace compound: Remove old compound before adding new.
- Store in dry place: Moisture can damage leather.
- Avoid folding: Keep strops flat to prevent creases.
With care, a quality leather strop can last 5–10 years.
Real-life Example: Professional Chef’s Routine
Chef Maria, who works in a busy restaurant, uses stropping daily. She sharpens her knives with stones once a month, but stropping every evening keeps her blades razor sharp. Her knives last longer, and she saves money on replacements.
Maria uses a cowhide strop with green compound. She does 15 passes per side for each knife. Her routine takes less than five minutes but makes a big difference in cutting performance. Her staff learned the technique, and now their knives stay sharp through the week.
Frequently Asked Questions
How Do I Know If My Knife Needs Stropping?
If your knife struggles to cut soft foods, tears paper, or feels dull, it’s time to strop. A quick paper test can show if the edge is sharp. If the blade slices smoothly, stropping is not needed yet.
Can I Use A Strop Without Compound?
Yes, you can use plain leather. However, compound speeds up the process and creates a finer edge. For most beginners, starting with compound is easier and produces better results.
How Long Does Stropping Take?
Stropping usually takes 2–5 minutes per knife. If your blade is very dull, it may take longer. For daily maintenance, 1–2 minutes is enough.
Is Stropping Safe For All Types Of Knives?
Stropping works well for straight-edged knives. Avoid stropping serrated blades, as the strop cannot reach inside the teeth. For folding knives, be careful with the handle and blade position.
Where Can I Learn More About Stropping?
You can find helpful videos and guides online. For detailed information, visit Wikipedia for stropping basics and techniques.
Final Thoughts
Learning how to use a strop for knife sharpening is a skill that pays off. It is simple, affordable, and keeps your knives sharp for longer. Stropping polishes the edge, removes burrs, and makes cutting easier. By choosing the right strop, preparing your knife and workspace, and using careful technique, you can achieve a professional-level sharpness at home.
Many beginners miss the importance of angle and pressure, or skip cleaning their strop. These small details make a big difference. With regular stropping, your knives will stay sharp, safe, and ready for any task. Whether you cook, craft, or work outdoors, stropping is a valuable habit.
Try it, and you’ll notice the improvement right away.

Credit: beavercrafttools.com

Hello, This is Annie Walker, a 38-year-old blogger, founder, and editor of Cookware Guider from NY, USA. I am a cookware fanatic and passionate cooker. I love to cook with different types of cooking appliances (example: all types of cookware, rice cookers, slow cookers, etc) almost every day in my kitchen. I love to share my experience with my readers in my blog. Also, I enjoy helping people to solve their problems through my website. You can follow me on Twitter & Pinterest. To know details about my blog please check the about us page.