
Using a sharp knife is not just about making kitchen work easier. It’s also about safety, control, and enjoying the process. Many people struggle with dull knives, leading to slips, accidents, and frustration. One of the best ways to keep knives sharp is with a wet stone knife sharpener. This tool, also called a whetstone, is trusted by chefs, woodworkers, and home cooks everywhere. But using a wet stone properly takes patience and the right technique. If you’ve never used one before, it might seem confusing. In this guide, you’ll learn exactly how to use a wet stone knife sharpener, step by step. You’ll also discover tips, avoid common mistakes, and see why wet stones give a sharper, longer-lasting edge than other methods.
What Is A Wet Stone Knife Sharpener?
A wet stone is a flat stone used with water to sharpen knives and other blades. The water helps remove metal shavings and keeps the stone cool during sharpening. Wet stones come in different sizes and levels of roughness, known as grit. Coarse grits fix very dull or damaged edges, while fine grits polish and finish the blade.
Unlike electric or pull-through sharpeners, wet stones allow you to control the angle and pressure. This means you can achieve a very sharp, precise edge that lasts longer. Wet stones are popular in professional kitchens and among people who care deeply about their tools.
Types Of Wet Stones
There are a few main types of wet stones you should know:
- Natural stones: Mined from quarries, often expensive, but give a unique finish.
- Synthetic stones: Made from bonded abrasives, more affordable, consistent grit.
- Diamond stones: Not true wet stones, but sometimes used with water. They cut fast but can be harsh on softer knives.
Most home users choose synthetic wet stones for their balance of cost, quality, and ease of use.
Why Use A Wet Stone Instead Of Other Sharpeners?
Sharpening tools are everywhere, from electric gadgets to simple pull-through devices. So why bother with a wet stone?
- Precision: Wet stones let you set and hold the sharpening angle. This is key for a sharp, safe edge.
- Edge quality: A properly sharpened blade with a wet stone is sharper and stays sharp longer.
- Blade life: Wet stones remove less metal than other sharpeners, so your knives last longer.
- Versatility: You can sharpen almost any blade—kitchen knives, pocket knives, chisels, and more.
For people who care about their tools, the wet stone is the gold standard.
Understanding Grit: Choosing The Right Wet Stone
Wet stones are labeled by grit number. This tells you how rough or smooth the surface is.
| Grit Range | Best For | Example Use |
|---|---|---|
| 200–400 | Repairing damaged edges | Fixing chips or very dull knives |
| 800–1000 | General sharpening | Restoring a working edge |
| 3000–6000 | Finishing and polishing | Getting a razor-sharp edge |
| 8000+ | Ultra-fine polishing | Professional-level sharpness |
Most people start with a 1000/6000 combination stone for home use. The 1000 side sharpens, and the 6000 side polishes.
How To Select The Right Grit
- Very dull or damaged knife: Start with 400 grit, then move up.
- Regular sharpening: Use 1000 grit, then finish with 3000–6000 for a polished edge.
- Touch-ups: 3000–8000 grit is enough for keeping an already sharp knife in top shape.
Many beginners skip the lowest and highest grits, but knowing when to use them helps avoid frustration.
What You Need Before Starting
Before sharpening, gather these items:
- Wet stone (single or double-sided)
- Water container (large enough to soak the stone)
- Towel or non-slip mat (to keep the stone steady)
- Guide rail (optional, for holding the sharpening angle)
- Marker (optional, helps track your progress)
- Clean, dry cloth
Having everything ready makes the process smoother and safer.
Preparing The Wet Stone
A wet stone must be soaked in water before use. This step is often rushed, but it’s important for both the stone and your knife.
- Soak the stone: Submerge it in water for 10–15 minutes. You’ll know it’s ready when air bubbles stop rising.
- Keep it wet: Sprinkle or dip the stone in water during sharpening to keep the surface slippery.
- Set up a stable work area: Place the stone on a towel or rubber base to stop it from sliding.
Some synthetic stones need less soaking. Always check the manufacturer’s advice.
Setting The Correct Sharpening Angle
Getting the right angle is the key to a sharp edge. Most kitchen knives are sharpened at 15–20 degrees. Western knives often use 20 degrees, while Japanese knives use 15 degrees.
Here’s a simple way to estimate the angle without tools:
- Hold the knife so the edge touches the stone.
- Raise the spine until the side forms a thin wedge shape—about the height of two stacked coins for 15 degrees, or three coins for 20 degrees.
You can also use a sharpening guide rail that clips onto the knife for consistent angles.
:max_bytes(150000):strip_icc()/__opt__aboutcom__coeus__resources__content_migration__serious_eats__seriouseats.com__2010__04__20200220-knife-sharpening-whetstone-vicky-wasik-5c825782502c4a429c08d0039d1df051.jpg)
Credit: www.seriouseats.com
Step-by-step: How To Use A Wet Stone Knife Sharpener
Sharpening with a wet stone takes practice, but these steps help you avoid mistakes and get a razor-sharp edge.
1. Check Your Knife
Look for chips, dull spots, or damage. If the edge is badly worn, start with a coarse stone.
2. Soak The Stone
Place the stone in water for 10–15 minutes. If it dries during use, add more water.
3. Position The Stone
Put the stone on a non-slip surface. The coarse side faces up if you’re using a double-sided stone.
4. Set The Angle
Hold the knife at the correct angle (15–20 degrees). Use a guide rail if needed.
5. Start Sharpening
- Place the knife edge against the stone, near the handle.
- Using light pressure, push the blade across the stone, moving from heel to tip in a sweeping motion.
- Keep the angle steady throughout the stroke.
- Repeat this motion 8–12 times on one side, then switch to the other side.
6. Check Your Progress
After a few strokes, feel for a burr—a tiny raised edge—on the opposite side of the blade. It means you’re sharpening correctly.
7. Switch To Finer Grit
When you feel a burr along the whole edge, flip the stone to a finer grit (like 3000 or 6000). Repeat the sharpening motion, using less pressure. This polishes the edge.
8. Alternate Sides
Finish by alternating sides every stroke. This evens out the edge and makes it sharper.
9. Clean The Knife And Stone
Rinse both under water. Dry the knife well to prevent rust.
10. Test The Edge
Try slicing a piece of paper or a tomato. A properly sharpened knife should cut smoothly with little effort.
Visual Guide: Knife Sharpening Angles
It’s easy to get confused about angles. Here’s a simple reference:
| Angle | Blade Type | Result |
|---|---|---|
| 10–15° | Japanese kitchen knives | Very sharp, delicate edge |
| 15–20° | Western kitchen knives | Sharp, durable edge |
| 20–25° | Outdoor/pocket knives | More robust, less sharp |
| 25–30° | Axes, heavy tools | Very durable, less fine |
Choosing the right angle helps balance sharpness and durability.

Credit: www.dalstrong.co.uk
Mistakes Beginners Make (and How To Avoid Them)
Many people struggle with wet stone sharpening at first. Here are common errors and how to fix them:
- Wrong angle: If you change the angle during sharpening, the edge will be uneven. Use a guide or practice holding steady.
- Skipping grits: Going from very coarse to very fine skips important steps. Move through the grits in order for best results.
- Too much pressure: Pressing hard removes more metal and can damage the blade. Use light, even strokes.
- Not enough water: If the stone gets dry, it clogs and doesn’t sharpen well. Keep it wet at all times.
- Ignoring the burr: Not checking for a burr means you might not be sharpening the whole edge.
- Sharpening only one side: Always sharpen both sides evenly to keep the edge centered.
A non-obvious insight: Most people don’t realize that over-sharpening can actually make a knife dull faster. Once you feel a burr and the edge is sharp, stop sharpening and move to the next grit.
Tips For Best Results
- Use the whole stone: Don’t just sharpen in one spot. Move the knife along the full length of the stone to wear it evenly.
- Clean the stone after each use to remove metal particles.
- Store knives properly to keep the edge sharp longer.
- Practice makes perfect: Your first results may not be perfect, but skill improves quickly with practice.
A second insight: The pressure you use should decrease as the grit gets finer. Heavy pressure at the start, lighter as you polish, helps get a sharper, cleaner edge.
How Often Should You Sharpen Your Knives?
How often you sharpen depends on use, but here are rough guidelines:
- Home cooks: Every 1–2 months
- Professional chefs: Weekly
- Outdoor knives: After heavy use
Honing with a steel rod can help keep the edge between sharpening sessions.
Comparing Wet Stones To Other Sharpeners
It’s helpful to see how wet stones compare to other common sharpening tools.
| Sharpener Type | Edge Quality | Blade Life | Skill Needed | Cost |
|---|---|---|---|---|
| Wet Stone | Excellent | Longest | Medium | Medium |
| Pull-through Sharpener | Fair | Shorter | Low | Low |
| Electric Sharpener | Good | Medium | Low | High |
| Honing Steel | Maintains, not sharpens | Longest | Low | Low |
Wet stones give the best sharpness and blade life but require some learning.
Caring For Your Wet Stone
A good stone can last for years if you care for it:
- Clean after use: Rinse away metal shavings and let it air dry.
- Flatten regularly: Stones wear unevenly over time. Use a flattening stone or coarse sandpaper to keep the surface even.
- Store dry: Wet stones can crack if stored damp or in freezing conditions.
A flat, clean stone gives the best results every time.
Sharpening Special Blades
Some knives need special attention:
- Serrated knives: Only sharpen the flat side on a stone, or use a special tool.
- Single-bevel knives (common in Japanese cuisine): Sharpen only the beveled side, with a few light strokes on the flat side to remove the burr.
- Pocket knives: Use the same technique, but keep the angle a bit steeper (20–25 degrees).
If you’re not sure, check the knife’s manual or ask an expert.
Safety Tips
- Work slowly: Rushing increases the risk of slipping.
- Keep fingers away: Hold the knife handle, not the blade edge.
- Dry the knife completely after sharpening to prevent rust.
Wet stones are safer than electric sharpeners, but always pay attention to your hands and blade position.
Real-world Example: Sharpening A Chef’s Knife
Imagine you have a dull chef’s knife with no chips, just a worn edge. Here’s how you’d sharpen it:
- Soak your 1000/6000 grit stone for 15 minutes.
- Place the stone on a towel, coarse side up.
- Hold the knife at a 20-degree angle.
- With light pressure, make 10 strokes on one side, from heel to tip.
- Repeat on the other side. Check for a burr.
- Flip the stone to the 6000 side. Use lighter strokes, 8 on each side.
- Alternate sides with each stroke at the end.
- Rinse the knife and stone. Dry both well.
- Test the edge on a tomato. The knife should glide through.
This process takes about 10–15 minutes.
Resources For Further Learning
If you want to dive deeper, there are many online guides and videos from professional chefs and knife makers. For a history of sharpening stones and more technical detail, you can visit Wikipedia.
Frequently Asked Questions
How Long Does It Take To Sharpen A Knife With A Wet Stone?
For most kitchen knives, sharpening takes about 10–20 minutes. Very dull or damaged blades may take longer. As you gain experience, the process gets faster.
Can I Use Oil Instead Of Water On A Wet Stone?
No. Wet stones are designed for water only. Oil stones are a different type. Using oil on a wet stone can clog the surface and reduce performance.
How Do I Know If My Knife Is Sharp Enough?
A sharp knife should slice paper easily and cut through food without crushing. If it struggles or slips, keep sharpening. Feeling a consistent burr along the edge is a good sign you’re ready to move to a finer grit.
Do I Need To Sharpen Both Sides Of The Knife Equally?
Yes. Sharpening both sides evenly keeps the edge centered and straight. Uneven sharpening can create a lopsided blade that’s harder to control.
What If My Wet Stone Is No Longer Flat?
An uneven stone gives poor results. Use a flattening stone or coarse sandpaper on a flat surface to restore it. Flattening once every 5–10 uses is usually enough.
Keeping your knives sharp with a wet stone isn’t just for professionals. With the right tools and a little patience, anyone can learn this essential skill. Sharpening brings your knives back to life and makes cooking safer and more enjoyable.
Whether you cook every day or just want to care for your favorite tools, mastering the wet stone is one of the best things you can do for your kitchen.
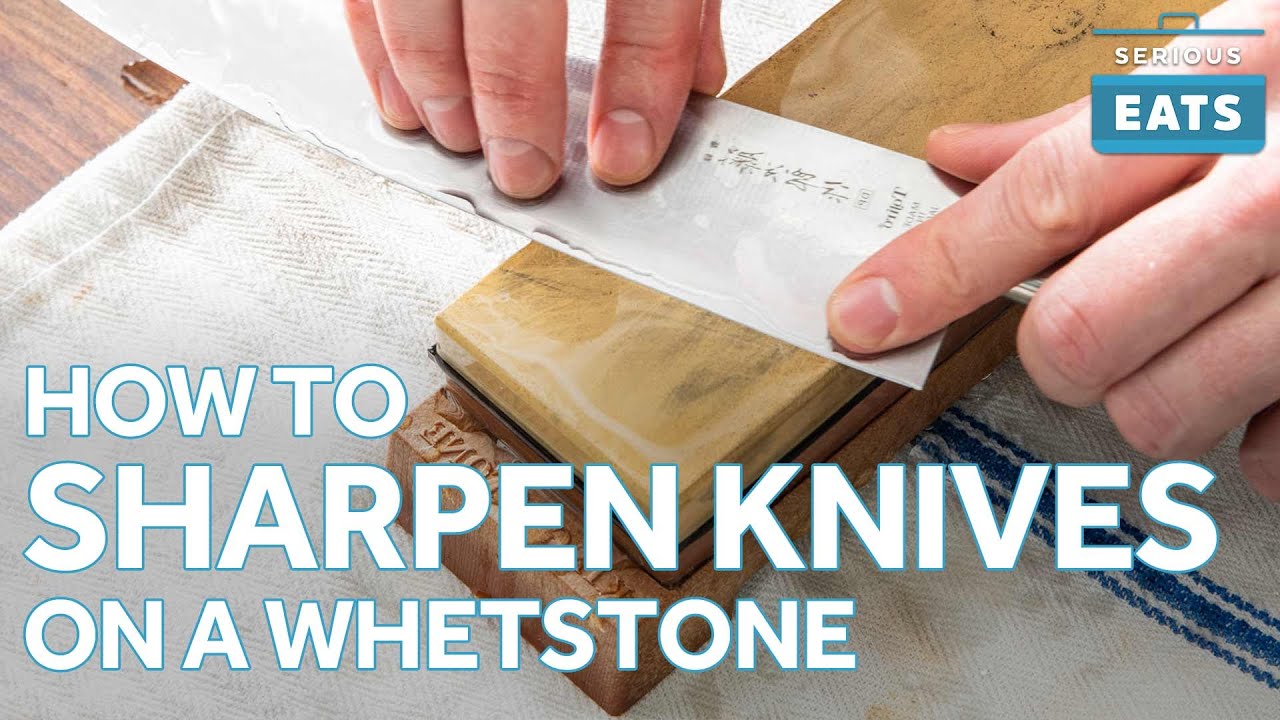
Credit: www.youtube.com

Hello, This is Annie Walker, a 38-year-old blogger, founder, and editor of Cookware Guider from NY, USA. I am a cookware fanatic and passionate cooker. I love to cook with different types of cooking appliances (example: all types of cookware, rice cookers, slow cookers, etc) almost every day in my kitchen. I love to share my experience with my readers in my blog. Also, I enjoy helping people to solve their problems through my website. You can follow me on Twitter & Pinterest. To know details about my blog please check the about us page.