
Cooking brown rice can feel tricky for many people. It often turns out undercooked, mushy, or sticky. The Instant Pot changes everything. With just a few steps, you can get perfect, fluffy brown rice every time—no babysitting the pot or worrying about boiling over. Whether you’re new to pressure cooking or looking to improve your kitchen skills, this guide will walk you through everything you need to know to master brown rice in your Instant Pot.
You’ll learn about water ratios, timing, and why the Instant Pot is a game changer for brown rice. We’ll also look at common mistakes, helpful tips, and ways to use your cooked rice. If you want rice that’s healthy, tasty, and ready with minimal effort, keep reading.
Why Cook Brown Rice In An Instant Pot?
Brown rice is known for its nutty flavor, chewy texture, and higher nutritional value compared to white rice. However, its tough outer bran makes it harder to cook perfectly on the stovetop. Enter the Instant Pot—a modern electric pressure cooker. It takes the guesswork out of cooking, giving you consistent results every time.
Benefits Of Using An Instant Pot
- Consistency: The Instant Pot controls pressure and temperature precisely, so you get even cooking.
- Speed: While brown rice usually takes 45–50 minutes on the stove, the Instant Pot does it in about 25–30 minutes (including pressure build-up and release).
- Hands-Off Cooking: No need to watch the pot. Set it and forget it.
- Energy Efficiency: Uses less energy compared to stovetop methods.
- Versatility: You can make large or small batches with the same simple process.
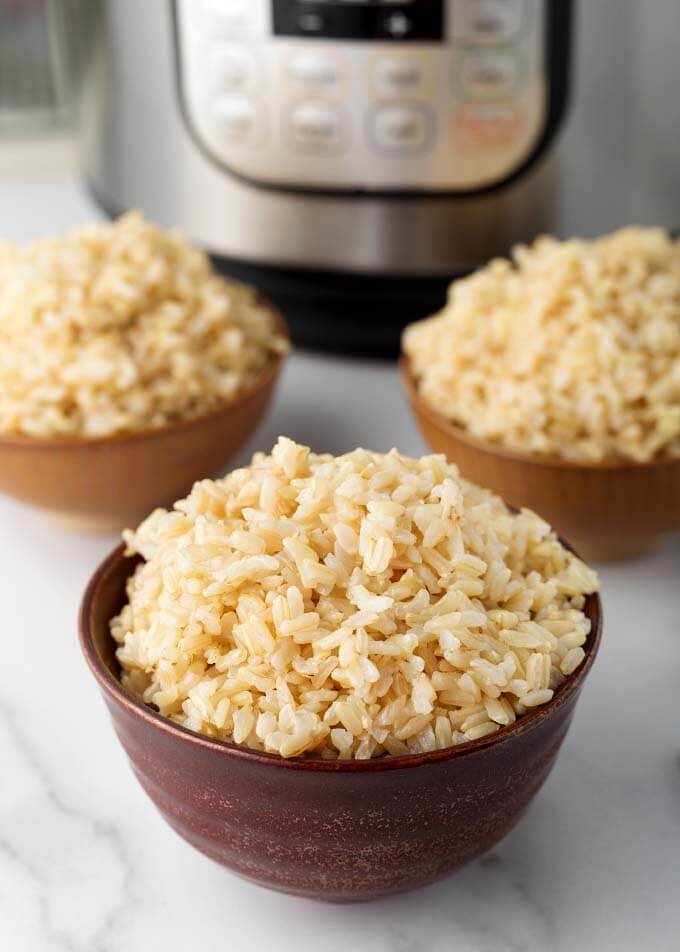
Many people are surprised how much better brown rice tastes when cooked under pressure. It becomes fluffy, tender, and never sticky.
Understanding Brown Rice Types
Not all brown rice is the same. Your cooking method will change slightly depending on the variety. Here are the most common types:
| Type | Grain Length | Texture | Cooking Time (Instant Pot) |
|---|---|---|---|
| Long Grain | Long and slender | Light, separate grains | 22–24 minutes |
| Short Grain | Short and plump | Sticky, chewy | 24–26 minutes |
| Basmati Brown | Extra-long | Fluffy, aromatic | 22–23 minutes |
| Jasmine Brown | Medium-long | Soft, slightly sticky | 22–24 minutes |
Non-obvious insight: Not all brown rice brands behave exactly the same. Factors like age of the rice, dryness, and polish level can affect cooking time. If your rice is consistently too firm or too soft, adjust the water or time by small amounts.
Credit: www.medonemedicalgroup.com
Ingredients And Equipment Needed
Essential Ingredients
- Brown rice: 1 cup (use any variety, but long grain is most common)
- Water: 1 ¼ cups (for most types; see tips below)
- Salt: ¼–½ teaspoon (optional, for flavor)
- Oil or butter: 1 teaspoon (optional, helps prevent sticking and adds richness)
Equipment
- Instant Pot (any size works, but 6-quart is standard)
- Measuring cups and spoons
- Fine mesh strainer (for rinsing rice)
- Fork (for fluffing rice)
Practical tip: If you want to make more than 2 cups of dry rice, add a little less water per cup for larger batches (e.g., 1 ⅛ cups water per cup of rice for 3+ cups dry rice).
Step-by-step: How To Cook Brown Rice In An Instant Pot
Let’s break down the cooking process into simple steps. Follow these, and you’ll avoid most common mistakes.
1. Rinse The Rice
Place your rice in a fine mesh strainer. Rinse under cold running water for at least 30 seconds, swirling with your hand. This removes extra starch and helps prevent sticky rice.
Non-obvious insight: Rinsing also removes tiny bits of bran dust that can make rice taste bitter.
2. Add Rice, Water, And Salt
Transfer the rinsed rice to the Instant Pot’s inner pot. Add the correct amount of water (see chart below), and stir in salt and oil if using.
Standard ratio for brown rice:
- 1 cup rice : 1 ¼ cups water
3. Secure The Lid And Set Pressure
Make sure the sealing ring is in place. Lock the lid and set the valve to “Sealing. ”
Press the “Manual” or “Pressure Cook” button, set to High Pressure:
- 22 minutes for long grain or basmati
- 24–26 minutes for short grain
4. Natural Pressure Release
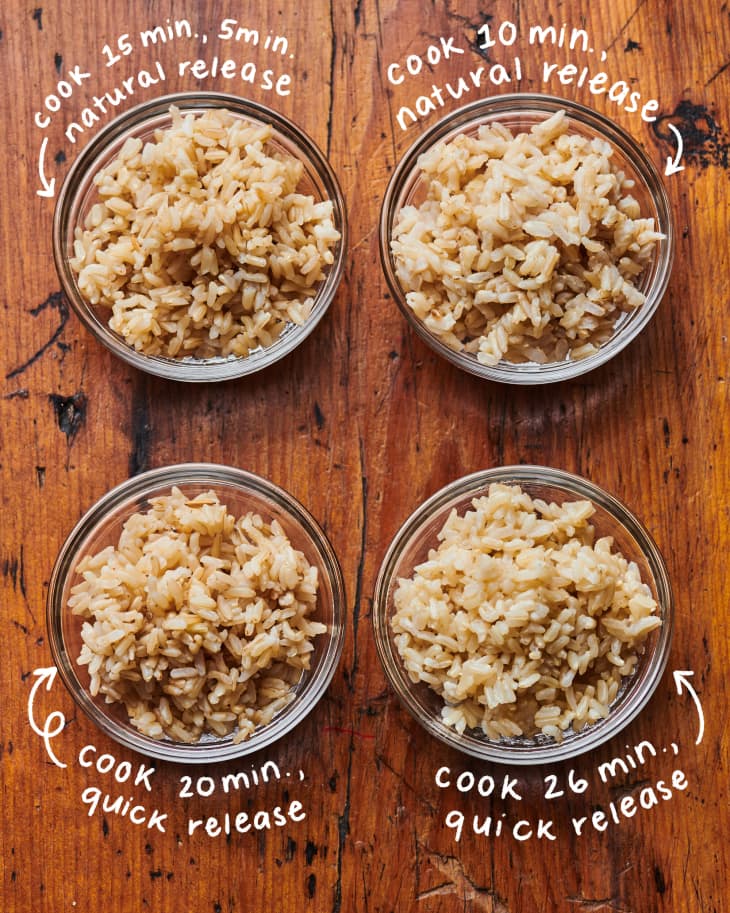
When the cooking time is done, let the pressure release naturally for at least 15 minutes. This is key. Quick release can result in undercooked rice or a foamy mess. After 15 minutes, you can open the valve to release any remaining pressure.
5. Fluff And Serve
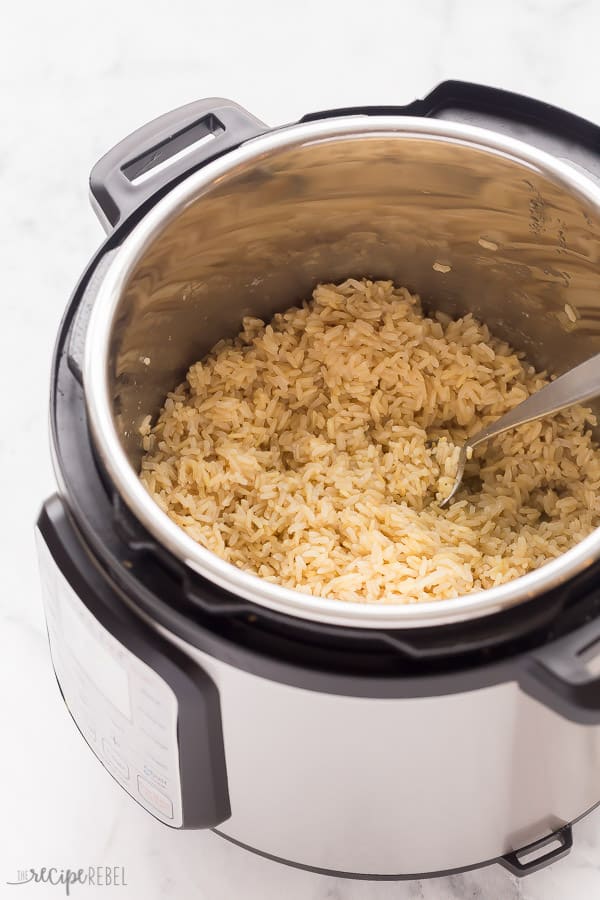
Open the lid. Use a fork to gently fluff the rice. Let it sit for a few minutes with the lid off to steam out extra moisture.
Water-to-rice Ratio: What Really Works?
Most Instant Pot recipes recommend 1 cup rice to 1 ¼ cups water. But this can depend on your rice type, batch size, and even your local water hardness.
Here’s a quick guide:
| Rice Variety | Water per Cup of Rice | Comments |
|---|---|---|
| Long Grain | 1 ¼ cups | Standard ratio |
| Short Grain | 1 ⅓ cups | Needs a bit more water |
| Basmati Brown | 1 ¼ cups | Rinses away starch |
| Jasmine Brown | 1 ¼–1 ⅓ cups | Adjust for chewiness |
Pro tip: If your rice is dry or crunchy, increase the water by 2–3 tablespoons per cup. If it’s mushy, decrease water by the same amount next time.
Cooking Larger Or Smaller Batches
The good news: The cooking time for brown rice does not change no matter how much you make. The Instant Pot’s pressure system evens out the temperature throughout the pot.
- For smaller batches (½ cup rice), use the same ratio and time.
- For larger batches (up to 4 cups dry rice), you can reduce the water slightly (1 ⅛ cups per cup rice).
Practical insight: Overfilling the Instant Pot (above the halfway mark for grains) can cause foam and spillover. Stick to 4 cups dry rice max in a 6-quart pot.
Common Mistakes And How To Avoid Them
Even with the Instant Pot, a few small errors can ruin your rice. Here’s how to avoid them:
- Not rinsing rice: Skipping this step leads to sticky, clumpy rice.
- Wrong water ratio: Too much water makes mushy rice. Too little gives you hard, undercooked grains.
- Quick releasing pressure: This disrupts the cooking and can splatter starchy water everywhere.
- Opening lid too soon: Rice needs to finish cooking in the residual steam.
- Not fluffing rice: This helps release extra moisture and separates grains.
- Using old rice: Very old brown rice may need a little more water or a minute longer cooking.
Adjusting For Altitude And Special Situations
If you live above 3,000 feet, water boils at a lower temperature. This means pressure cooking can take longer.
- High Altitude: Add 1–2 minutes to the cook time for every 1,000 feet above 3,000 feet.
- Very fresh rice: New crop rice is moister; use a bit less water.
Credit: www.thereciperebel.com
Flavor Variations And Add-ins
Plain brown rice is healthy, but you can easily add flavor or nutrition:
- Use broth instead of water for extra taste.
- Add a bay leaf, garlic clove, or cinnamon stick for subtle flavor.
- Mix in frozen veggies before cooking for a one-pot meal.
- Stir in herbs, lemon zest, or sautéed onion after cooking.
Experience-based tip: For a nutty taste, toast the dry rice in the Instant Pot on “Sauté” mode with a teaspoon of oil before adding water.
Storing And Reheating Cooked Brown Rice
Brown rice is perfect for meal prep. It stores well and reheats easily, making it a great staple for healthy eating.
How To Store
- Refrigerate: Let rice cool to room temperature. Store in an airtight container for up to 5 days.
- Freeze: Portion into freezer bags or containers. Freeze for up to 3 months.
Quick tip: Spread rice in a thin layer to cool faster and prevent bacteria growth.
How To Reheat
- Microwave: Sprinkle rice with a tablespoon of water, cover, and heat until hot.
- Stovetop: Add a splash of water and heat in a covered pan on low, stirring occasionally.
Frozen rice can go straight into a hot pan or microwave—no need to thaw first.
Brown Rice Instant Pot Recipes And Uses
Once you have cooked brown rice, you can use it in many dishes:
- Fried rice: Use day-old rice for best texture.
- Rice salads: Toss with veggies, beans, and dressing.
- Rice bowls: Top with grilled chicken, tofu, or roasted veggies.
- Soups and stews: Add cooked rice at the end for a hearty meal.
- Casseroles: Mix with cheese, beans, and sauce for an easy bake.
Friendly mentor tip: Make a big batch and freeze in single portions. It saves time during busy weeks.
Comparing Instant Pot Vs. Stovetop And Rice Cooker
How does Instant Pot brown rice compare with other methods? Here’s a look at the main differences:
| Method | Active Time | Total Time | Texture | Effort |
|---|---|---|---|---|
| Instant Pot | 2 minutes | 30 minutes | Fluffy, separate | Very low |
| Stovetop | 5–7 minutes | 45–50 minutes | Variable | Medium (watching needed) |
| Rice Cooker | 2 minutes | 45–60 minutes | Usually sticky | Low |
The Instant Pot offers a balance of speed, texture, and convenience that’s hard to beat.
Credit: www.simplyhappyfoodie.com
Nutrition: Why Brown Rice?
Brown rice is a whole grain, meaning it contains the bran, germ, and endosperm. This gives it more fiber, vitamins, and minerals than white rice.
- Calories (per cooked cup): ~215
- Protein: 5g
- Fiber: 3.5g
- Magnesium, B vitamins, and antioxidants
Brown rice helps with digestion, keeps you full, and can support heart health. For more on brown rice nutrition, see this Harvard Health source.
Troubleshooting: Fixing Common Brown Rice Problems
Even with the right steps, things can go wrong. Here’s how to fix the most common issues:
Rice Is Too Wet Or Mushy
- Use less water next time (2–3 tablespoons less per cup).
- Let rice steam with the lid off for 5–10 minutes after cooking.
Rice Is Too Dry Or Crunchy
- Add 2–3 tablespoons of water, stir, and “Steam” for 2 minutes.
- Increase water or cook time slightly next time.
Rice Burned Or Stuck To The Pot
- Always add oil or butter.
- Scrape stuck bits into soups—don’t waste them.
Rice Foamed Out Of Valve
- Rinse rice more thoroughly.
- Never fill above the halfway mark for grains.
- Use natural pressure release (not quick release).
Expert Tips For Best Results
- Measure accurately: Use the same cup for rice and water.
- Let it rest: After fluffing, let rice steam a few minutes for perfect texture.
- Don’t skip the salt: Even a small amount enhances flavor.
- Batch cooking: Double or triple the recipe for easy meal prep.
- Add-ins: Try adding a teaspoon of turmeric or curry powder for color and taste.
Frequently Asked Questions
How Long Does It Take To Cook Brown Rice In The Instant Pot?
It takes about 22–26 minutes of pressure cooking time, depending on the rice variety. Add 10–15 minutes for the Instant Pot to come to pressure and release it naturally. So, total time is about 35–40 minutes.
Can I Cook Brown Rice And Other Foods Together In The Instant Pot?
Yes, you can use the “pot-in-pot” method. Place rice and water in a smaller bowl on a trivet above other food (like curry or beans). Both cook at the same time.
What’s The Best Water-to-rice Ratio For Brown Rice In The Instant Pot?
The best ratio is 1 cup rice to 1 ¼ cups water for most varieties. Adjust slightly based on your rice type and local conditions.
Should I Soak Brown Rice Before Cooking It In The Instant Pot?
Soaking is not necessary for the Instant Pot. If you do soak, reduce the cooking time by 3–4 minutes and the water by 2–3 tablespoons.
Can I Freeze Cooked Brown Rice?
Absolutely. Cool rice first, then portion into airtight bags or containers. Freeze for up to 3 months. To reheat, microwave with a splash of water or steam on the stovetop.
Cooking brown rice in the Instant Pot is easy, reliable, and delivers great taste every time. With a little practice, you’ll never want to go back to stovetop or rice cooker methods. Try different varieties, experiment with flavors, and enjoy the benefits of whole grains in your diet.
Whether for meal prep or quick weeknight dinners, brown rice in the Instant Pot is a healthy staple you’ll use again and again.

Hello, This is Annie Walker, a 38-year-old blogger, founder, and editor of Cookware Guider from NY, USA. I am a cookware fanatic and passionate cooker. I love to cook with different types of cooking appliances (example: all types of cookware, rice cookers, slow cookers, etc) almost every day in my kitchen. I love to share my experience with my readers in my blog. Also, I enjoy helping people to solve their problems through my website. You can follow me on Twitter & Pinterest. To know details about my blog please check the about us page.