
Sharpening a knife with a sharpening stone is a skill that can make your kitchen experience smoother, safer, and more enjoyable. Many people struggle with dull knives, which not only make cutting harder but also increase the risk of accidents.
Learning how to use a sharpening stone can transform a frustrating kitchen tool into a precise, reliable instrument. Whether you are a beginner or someone looking to improve your technique, understanding the right way to sharpen knives is essential.
This guide will walk you through each step, from choosing the right stone to perfecting your angle and maintaining your tools. Along the way, you’ll discover practical tips, common mistakes to avoid, and some insights that even experienced home cooks sometimes overlook.
Soon, you’ll have the confidence to sharpen any knife in your kitchen—and keep it sharp for years.
Understanding Sharpening Stones
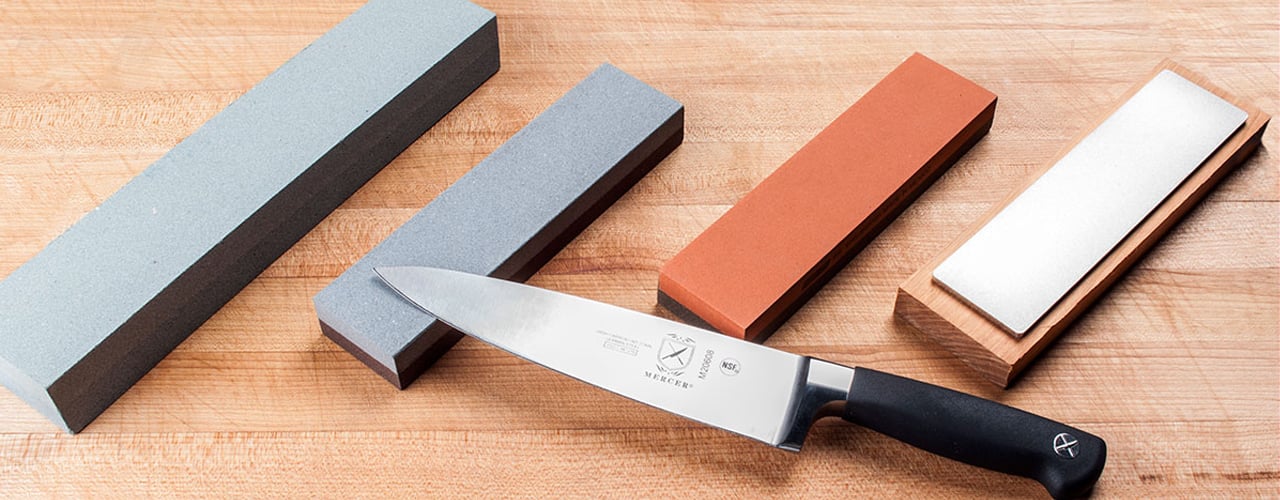
Sharpening stones, often called whetstones, are blocks made from natural or synthetic materials used to grind and hone the edges of steel tools and implements. They come in various types, each with unique advantages.
Types Of Sharpening Stones
- Oil Stones: Made from materials like aluminum oxide or silicon carbide, these require oil as a lubricant. They are durable and often used for heavy sharpening but can be slower than other options.
- Water Stones: These use water as a lubricant and are made from softer materials. They cut quickly, making them popular for both beginners and professionals.
- Diamond Stones: Coated with industrial diamonds, these are extremely hard and fast-cutting. They don’t require flattening as often as other stones.
- Ceramic Stones: Hard and long-lasting, ceramic stones can be used with or without water. They are great for fine polishing and maintenance.
Comparison Of Sharpening Stones
| Type | Lubricant | Speed | Maintenance | Cost |
|---|---|---|---|---|
| Oil Stone | Oil | Moderate | Low | Low |
| Water Stone | Water | Fast | High (needs flattening) | Moderate |
| Diamond Stone | None/Water | Very Fast | Very Low | High |
| Ceramic Stone | Optional Water | Moderate | Low | High |
Water stones are the most common choice for home cooks due to their speed and ease of use. However, diamond stones are a great option if you need a stone that lasts a long time and requires less maintenance.
Grit Ratings
Sharpening stones are labeled with grit numbers, which indicate how coarse or fine the stone is.
- Coarse (200–600 grit): Removes chips and reshapes very dull blades.
- Medium (800–2000 grit): For regular sharpening.
- Fine (3000–8000 grit): For polishing and finishing the edge.
Choosing the right grit depends on your knife’s condition. If your knife is only slightly dull, start with a medium or fine stone. For very dull or damaged knives, begin with a coarse stone.
Preparing To Sharpen
Before you start sharpening, good preparation is essential. This step is often skipped by beginners, but it makes a big difference in your results and safety.
Choosing The Right Stone And Grit
- Match the stone type to your needs (speed, maintenance, cost).
- Choose the correct grit for your knife’s condition.
- If you’re unsure, a 1000/6000 grit combination water stone is a good all-purpose choice.
Gathering Tools And Materials
You will need:
- Sharpening stone (and a coarse and fine stone if possible)
- Lubricant (water for water stones, oil for oil stones)
- Towel or non-slip base to stabilize the stone
- A dull knife to practice
- Clean cloth for wiping the blade
Soaking Or Oiling The Stone
- For water stones, soak in water for 10–15 minutes before use.
- For oil stones, apply a few drops of honing oil.
- Diamond and ceramic stones usually need little or no lubricant, but check the manufacturer’s advice.
Safety Preparations
- Place the stone on a non-slip mat or damp towel.
- Work in a well-lit, uncluttered space.
- Keep fingers away from the blade’s edge during sharpening.
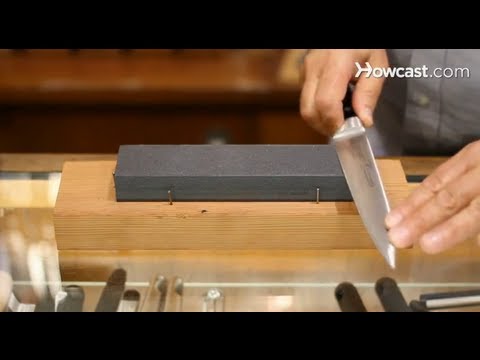
Non-obvious insight: Many people forget to soak their water stones long enough. If the stone still releases bubbles after a few minutes, it’s not fully saturated—let it soak longer for best results.
Credit: www.youtube.com
Setting The Correct Angle
The sharpening angle is one of the most important factors for a sharp edge. Most kitchen knives are sharpened at a 15–20 degree angle, but some specialty knives require different angles.
How To Find The Angle
- For a 20-degree angle, hold the knife so the edge is about the height of a nickel above the stone.
- For a 15-degree angle, use the height of a penny.
You can also buy inexpensive angle guides that clip onto the blade and help maintain a consistent angle.
Common Angle Mistakes
- Too steep (over 25 degrees): The edge will be durable but not sharp.
- Too shallow (under 10 degrees): The edge will be razor-sharp but fragile and chips easily.
- Inconsistent angle: Leads to a dull or uneven edge.
Practical tip: Consistency matters more than perfect accuracy. If you keep the angle steady throughout, your knife will get sharper—even if it’s not exactly 15 or 20 degrees.
Step-by-step Guide: How To Sharpen A Knife With A Sharpening Stone
Now, let’s walk through the sharpening process in detail. This section is the heart of the technique.
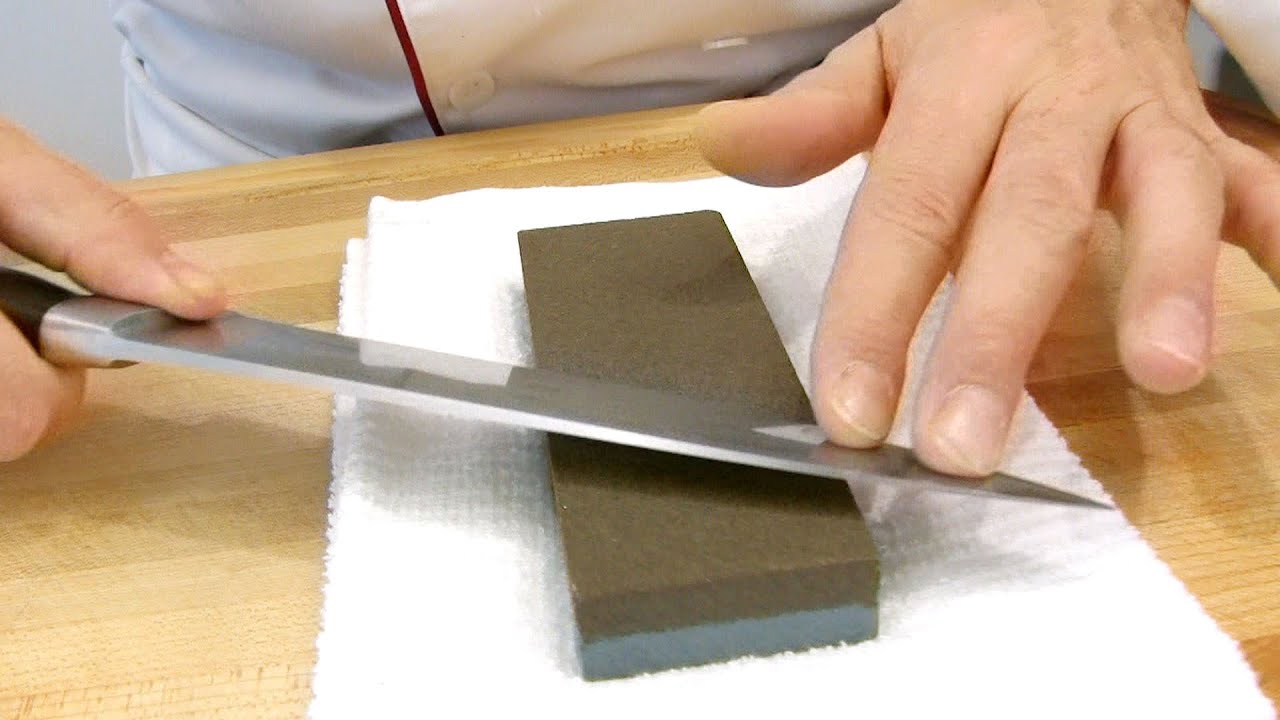
1. Position The Stone
Place your sharpening stone on a damp towel or a non-slip holder. This keeps the stone from moving, which is critical for safety.
2. Lubricate The Stone
- For water stones, splash some water on the surface.
- For oil stones, add a few drops of honing oil.
- Diamond stones need only a tiny bit of water, or none.
3. Hold The Knife Correctly
- Hold the knife’s handle with your dominant hand.
- Place your other hand gently on the blade (above the edge, never near the cutting side).
- Set the blade at the correct sharpening angle (see above).
4. Sharpen The First Side
- Starting at the heel (the thick end) of the knife, move the blade across the stone in a sweeping motion toward the tip.
- Apply gentle, even pressure—don’t press too hard.
- Cover the entire edge with each stroke.
- Repeat this motion 10–15 times, or until you feel a slight burr (a tiny raised edge) on the opposite side.
5. Sharpen The Second Side
- Flip the knife and repeat the same motion on the other side.
- Maintain the same angle and pressure.
- Make the same number of strokes as the first side.
6. Check For A Burr
A burr is a thin, rough edge of metal that forms on one side as you sharpen. It means you have ground the edge thin enough.
- Run your fingertip gently along the opposite side of the edge (not along the sharp side).
- If you feel a small wire-like edge, you are ready to move to a finer stone or finishing.
7. Repeat With Finer Grits
If you started with a coarse stone:
- Move to a medium and then a fine stone.
- Repeat the sharpening motions, but use less pressure with each finer grit.
- This polishes and refines the edge for a razor-sharp finish.
8. Alternate Strokes
On your final stone, alternate strokes from side to side (one stroke per side). This removes the burr and aligns the edge.
9. Clean And Test The Knife
- Rinse the blade and stone with clean water.
- Dry the knife completely.
- Test sharpness by gently slicing through a piece of paper or a tomato. A sharp knife should cut cleanly with little effort.
10. Clean Up
- Rinse and dry your sharpening stone.
- Flatten the stone if needed (see next section).
- Store your knife and stone in a dry place.
Experience-based tip: Beginners often press too hard, thinking it will speed up sharpening. Light, controlled strokes are safer and give a sharper edge.
Credit: www.youtube.com
Flattening And Maintaining Your Sharpening Stone
Even the best sharpening stones can become uneven with use, which affects sharpening quality.
Why Flattening Matters
A stone with a dip or hump in the middle will not sharpen evenly. This can ruin the blade’s edge over time.
How To Flatten A Stone
- Use a lapping plate or a special flattening stone (available at knife shops or online).
- Draw a grid pattern on the stone with a pencil.
- Rub the sharpening stone against the lapping plate in a figure-eight motion.
- When the pencil marks are gone, your stone is flat.
| Maintenance Tool | Cost | Ease of Use | Frequency Needed |
|---|---|---|---|
| Lapping Plate | High | Easy | Monthly (heavy use) |
| Flattening Stone | Moderate | Moderate | Monthly |
| Sandpaper on Flat Surface | Low | Moderate | Monthly |
Non-obvious insight: Flatten your stone after every 4–5 sharpening sessions. This simple habit keeps your results consistent and extends the life of your stone.
Honing Vs. Sharpening
Many people confuse honing and sharpening, but they are different processes.
Sharpening
- Removes metal to create a new, sharp edge.
- Done with a sharpening stone.
- Needed when the knife is dull or damaged.
Honing
- Realigns the existing edge without removing much metal.
- Done with a honing rod (steel or ceramic).
- Keeps a sharp knife sharp between sharpening sessions.
A good practice is to hone your knife every few uses and sharpen it with a stone only when it starts to feel dull. Over-sharpening can wear out knives faster than necessary.
How Often Should You Sharpen Your Knife?
The right frequency depends on:
- How often you use your knives
- Type of food you cut (hard foods dull knives faster)
- Knife steel quality
On average:
- Home cooks: Every 1–3 months
- Professional chefs: Every 2–4 weeks
You might be surprised—most home cooks wait too long between sharpenings. Regular maintenance keeps your knives safer and more enjoyable to use.
Common Mistakes And How To Avoid Them
Even with the right tools, mistakes can lead to poor results or even damage your knife.
1. Using The Wrong Angle
Many beginners change the angle during sharpening, creating a rounded, dull edge. Focus on consistency, not perfection.
2. Not Using Enough Lubricant
A dry stone can scratch your blade or clog with metal filings. Always keep the surface wet or oiled, depending on your stone.
3. Skipping Grits
Jumping from a very coarse to a very fine stone can leave a rough, uneven edge. Move through the grits gradually.
4. Not Checking For A Burr
If you don’t feel a burr, you may not have sharpened enough. The burr tells you it’s time to switch sides or stones.
5. Ignoring Stone Maintenance
A warped or clogged stone will never give a sharp edge. Flatten your stone regularly and clean it after each session.
6. Pressing Too Hard
Heavy pressure causes uneven sharpening and can even chip the edge. Gentle pressure gives better control and results.
Advanced Tips For Better Results
Once you have mastered the basics, these advanced tips can help you achieve professional-level sharpness.
Use A Marker To Check Your Angle
Color the edge with a permanent marker before sharpening. After a few strokes, check where the color is removed. If you’re hitting the edge evenly, your angle is correct.
Try Different Strokes
- Straight strokes for Western-style knives.
- Circular or figure-eight motions for Japanese knives or curved blades.
Sharpening Specialty Knives
Some knives, like serrated blades or single-bevel Japanese knives, need special techniques or stones. Consult the manufacturer’s instructions or seek professional help if you’re unsure.
Strop For A Polished Edge
After sharpening, use a leather strop to polish the edge. This removes any remaining burr and gives a razor finish.
Knife Sharpening Myths
There is a lot of misinformation about knife sharpening. Let’s clear up a few common myths.
- Myth: You should never sharpen expensive knives yourself.
*Reality:* With practice and care, you can maintain even high-end knives at home.
- Myth: Sharpening removes too much steel.
*Reality:* If done correctly, sharpening only takes off a tiny amount. Over-sharpening is a result of poor technique, not the process itself.
- Myth: All sharpening stones work the same.
*Reality:* Different stones have unique properties and suit different needs. Choose the right one for your knives and skill level.
For more on knife sharpening techniques, the Wikipedia page on sharpening stones is a helpful resource.
Credit: www.webstaurantstore.com
Frequently Asked Questions
How Do I Know If My Knife Is Sharp Enough?
A sharp knife should easily slice through a sheet of paper or a ripe tomato with minimal force. If you feel resistance or tearing, it’s time to sharpen.
Can I Use The Same Stone For All My Knives?
Most kitchen knives can be sharpened on a 1000/6000 grit water stone. However, very hard or specialty steel knives may need a diamond stone or higher grit for best results.
How Long Does It Take To Sharpen A Knife?
For a dull knife, it may take 10–20 minutes the first time. Regular touch-ups with a fine stone take only a few minutes.
Is It Safe To Sharpen Knives At Home?
Yes, with proper technique and safety measures. Always keep your fingers away from the blade, use a stable surface, and work slowly.
What Should I Do If My Knife Still Won’t Get Sharp?
Check for common mistakes: wrong angle, not enough strokes, or a warped stone. If problems persist, consult a professional or try a different sharpening stone.
—
Sharpening a knife with a sharpening stone is a valuable skill that pays off in safer, more enjoyable cooking. With practice, attention to angle, and regular maintenance, you can keep your kitchen knives performing like new. Remember, the key is consistency, not speed or pressure.
Take your time, enjoy the process, and soon you’ll be slicing with precision and confidence.

Hello, This is Annie Walker, a 38-year-old blogger, founder, and editor of Cookware Guider from NY, USA. I am a cookware fanatic and passionate cooker. I love to cook with different types of cooking appliances (example: all types of cookware, rice cookers, slow cookers, etc) almost every day in my kitchen. I love to share my experience with my readers in my blog. Also, I enjoy helping people to solve their problems through my website. You can follow me on Twitter & Pinterest. To know details about my blog please check the about us page.