
A sharp knife is a chef’s best friend. Whether you cook at home or work in a professional kitchen, a well-sharpened blade makes all the difference. Cutting becomes faster, safer, and more precise. One of the oldest and most reliable ways to sharpen knives is using a stone knife sharpener. But many people feel confused about how to use sharpening stones correctly. This guide will walk you through each step, explain important details, and help you avoid common mistakes. With practice, you can keep your knives sharp for years.
What Is A Stone Knife Sharpener?
A stone knife sharpener is a flat piece of stone made from natural or synthetic materials. You may also hear it called a whetstone. The stone has a rough surface that helps grind and polish the blade’s edge. Sharpening stones come in different shapes, sizes, and grit levels. Some stones need water or oil to work, while others can be used dry.
Most whetstones are rectangular, but you might find oval or round stones. The grit number is the most important factor. Lower numbers (like 220 or 400) mean a rougher stone for repairing dull or damaged blades. Higher numbers (like 1000, 3000, or 8000) mean a smoother stone for fine sharpening and polishing.
Types Of Stone Knife Sharpeners
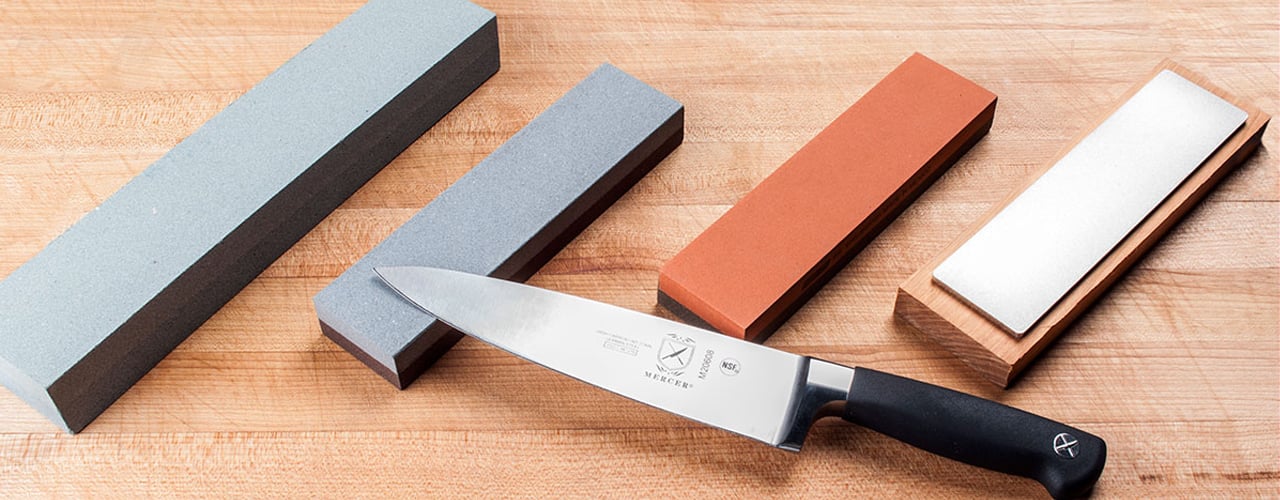
Choosing the right stone is the first step. There are three main types, each with its own benefits.
| Stone Type | Material | Main Use | Water/Oil? |
|---|---|---|---|
| Water Stone | Synthetic/Natural | Sharpening & Polishing | Water |
| Oil Stone | Synthetic/Natural | Sharpening | Oil |
| Diamond Stone | Industrial Diamond | Sharpening | Dry/Water |
Water stones are popular because they work quickly and are easy to clean. They need soaking in water for 10-15 minutes before use. Oil stones are harder and last longer, but require special sharpening oil. Diamond stones use tiny diamond particles, offering fast sharpening and little maintenance. Each type has its fans, but water stones are usually easier for beginners.
Understanding Grit Levels
The grit level tells you how fine or coarse the stone is. It’s like sandpaper—the higher the number, the smoother the finish. Here’s a quick comparison:
| Grit Number | Purpose | Typical Use |
|---|---|---|
| 220-400 | Coarse | Repairing chips, reshaping edge |
| 1000 | Medium | Regular sharpening |
| 3000-8000 | Fine | Polishing, finishing |
For most home cooks, a 1000/6000 combo stone is perfect. The 1000 side sharpens, and the 6000 side polishes. If your knives are very dull or damaged, start with a coarse stone (220-400). Finish with a fine grit for a razor-sharp edge.
Preparing Your Stone
Before sharpening, you must prepare your stone. This step is often missed by beginners but is very important.
- Clean the Stone: Wipe off any dust or old residue.
- Soak Water Stones: Submerge in water for 10-15 minutes until bubbles stop rising.
- Apply Oil to Oil Stones: Use a few drops of sharpening oil—don’t use cooking oils.
- Check Flatness: Stones can wear unevenly. Lay a ruler across the stone; if you see gaps, flatten it with a lapping stone or sandpaper.
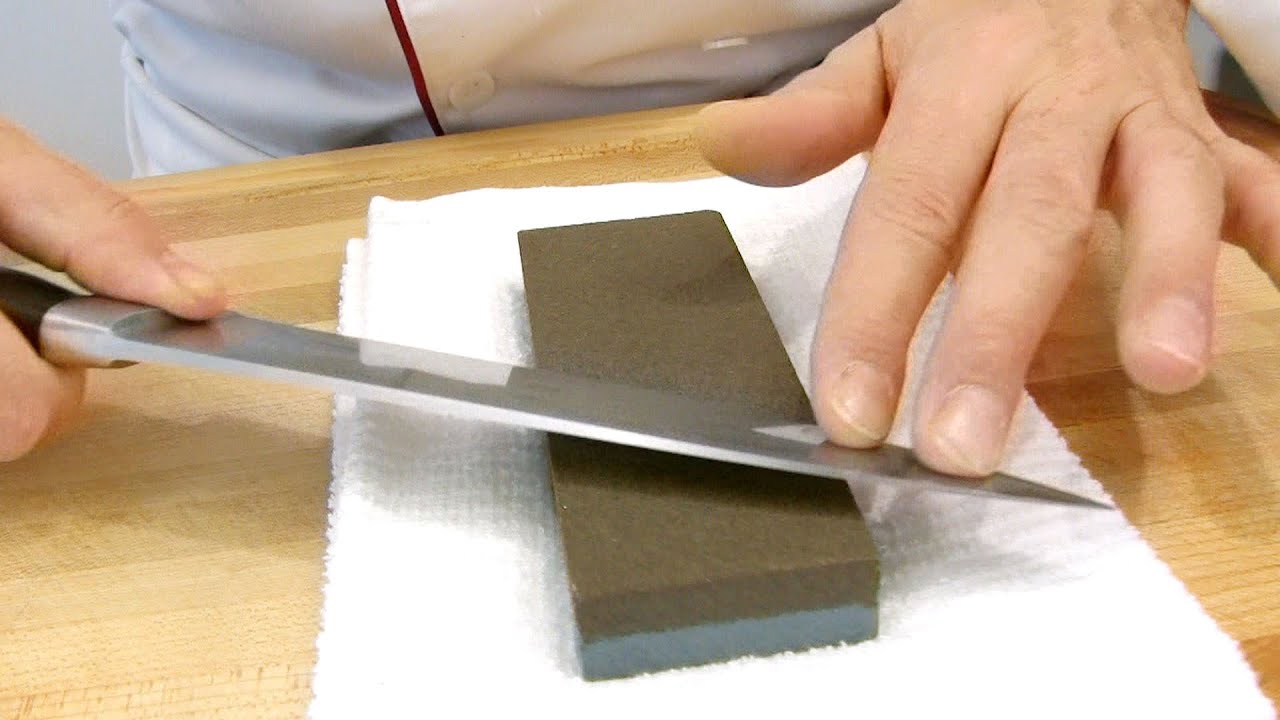
- Set Up Your Workspace: Place the stone on a non-slip base, towel, or rubber mat. Keep your area clean and well-lit.
Some people skip soaking or oiling, but this can damage both the stone and your knife. Always follow the instructions for your stone.
Credit: www.youtube.com
Choosing The Right Knife
Not all knives are the same. Sharpening angles and techniques can vary. Here’s what you need to know:
- Western Knives: Most kitchen knives (like chef’s knives, paring knives) use a sharpening angle between 20-22 degrees.
- Japanese Knives: These often have a thinner edge and use a 15-17 degree angle.
- Specialty Knives: Serrated knives, cleavers, or scissors may need special stones or tools.
Check your knife’s manufacturer for recommended angles. If unsure, 20 degrees works for most kitchen knives.
How To Hold Your Knife
Proper knife grip is key for safety and control. Hold the knife with your dominant hand, fingers wrapped around the handle, thumb resting on the spine. Use your other hand to guide and steady the blade on the stone. Keep your fingers away from the sharp edge.
Credit: www.webstaurantstore.com
Step-by-step Sharpening Process
Sharpening seems simple, but technique matters. Here’s a complete guide:
1. Place The Stone
Put your stone on a stable surface with a non-slip base. If using a double-sided stone, start with the coarser side.
2. Find The Right Angle
Hold the knife at the correct angle—usually 20 degrees for Western knives. To estimate, stack two coins under the spine for a rough guide.
3. Sharpen One Side
Place the heel of the blade (the part closest to the handle) on the stone. Pull the knife across the stone, moving from heel to tip. Apply gentle, even pressure. Repeat this motion 8-10 times.
4. Sharpen The Other Side
Flip the knife and repeat the process on the other edge. Try to match the number of strokes for both sides.
5. Check Your Progress
After a few passes, check for a burr—a tiny raised edge you can feel with your finger. This means you have sharpened enough.
6. Switch To Finer Grit
If using a combination stone, flip to the fine side. Repeat the process, using lighter pressure. This polishes the edge and removes any burr.
7. Clean And Test
Rinse the knife and stone. Dry thoroughly. Test the blade by slicing a sheet of paper or a tomato. A sharp knife should cut smoothly.
Common Mistakes And How To Avoid Them
Many beginners make errors that can damage knives or stones. Here are some to watch out for:
- Wrong Angle: Using too wide or too narrow an angle weakens the edge.
- Uneven Pressure: Pressing too hard can chip the blade; too light leaves it dull.
- Neglecting Both Sides: Sharpening only one side creates an uneven edge.
- Skipping Grits: Jumping from coarse to fine without intermediate steps leads to poor results.
- Dirty Stone: Not cleaning your stone causes metal particles to build up and reduces effectiveness.
- Over-Sharpening: Too many strokes can wear out the blade faster than needed.
A useful tip: Mark the knife edge with a black marker before sharpening. This lets you see where you’re removing metal and helps keep your angle consistent.
Maintenance And Care Of Sharpening Stones
Sharpening stones need regular care to work well and last longer.
- Clean After Use: Wash with water and scrub gently with a brush.
- Dry Thoroughly: Never store stones wet; moisture can cause mold or cracks.
- Flatten Regularly: Sharpening wears stones unevenly. Use a flattening stone every few months.
- Store Safely: Keep stones away from extreme heat, cold, or sunlight.
Neglecting stone care is a hidden reason why many people struggle with knife sharpening.
Comparing Stone Sharpeners To Other Methods
Sharpening stones are not the only way to sharpen knives. How do they compare to others?
| Sharpening Method | Ease of Use | Cost | Results |
|---|---|---|---|
| Stone Sharpeners | Moderate | $25-$100 | Excellent, customizable |
| Pull-Through Sharpeners | Easy | $15-$40 | Quick, less precise |
| Electric Sharpeners | Very Easy | $50-$200 | Fast, can damage blades |
| Professional Service | Very Easy | $10-$30 per knife | High quality, costly |
Sharpening stones require more skill but offer the best control and results. Pull-through and electric sharpeners are faster but often remove too much metal or sharpen unevenly. Professional sharpening is great for expensive knives but costs more over time.
Safety Tips For Sharpening
Sharpening knives can be dangerous if you’re not careful. Here are some important safety tips:
- Keep Fingers Away: Always keep your fingers behind the blade’s edge.
- Use a Stable Surface: Never sharpen on a slippery or unstable table.
- Don’t Rush: Sharpen slowly and carefully, especially when learning.
- Wear Protective Gear: If you’re nervous, wear cut-resistant gloves.
- Clean Up Spills: Water or oil on the floor can cause slips.
Most accidents happen when people hurry or lose focus. Take your time and stay alert.
Practical Tips For Beginners
Sharpening takes practice. These tips will help you get better results:
- Watch Videos: Seeing someone sharpen helps understand the motion. Find trusted tutorials from chefs or knife makers.
- Start with Cheap Knives: Practice on inexpensive knives before sharpening expensive ones.
- Use a Guide: Magnetic angle guides help beginners keep a steady angle.
- Don’t Overthink: Focus on smooth, consistent strokes rather than speed.
- Track Your Progress: Keep a notebook or photos of your knives before and after sharpening.
Many beginners are surprised by how much smoother and easier cutting becomes with a sharp blade.
Sharpening Specialty Knives
Some knives need special attention.
Serrated Knives
Serrated knives (like bread knives) are harder to sharpen. Use a special rod or tapered stone, focusing on each serration. Usually, these knives need sharpening less often.
Single-bevel Knives
Japanese knives like Yanagiba or Deba are sharpened only on one side. Use a lower angle (10-15 degrees) and a fine stone.
Pocket And Outdoor Knives
These knives often get more abuse. Use a coarse stone for quick repairs, then finish with a fine grit.
How Often Should You Sharpen?
There’s no exact rule, but most home cooks should sharpen kitchen knives every 2-3 months. If you cook daily, sharpen monthly. Professional chefs sharpen weekly. Use a honing rod between sharpening sessions to keep the edge aligned.
A dull knife is dangerous—it slips and causes accidents. If your knife struggles to cut tomatoes or slips on onions, it’s time to sharpen.
Real-world Examples And Data
Research shows that a sharp knife can reduce cutting effort by up to 50%. In a test by Cook’s Illustrated, knives sharpened with a whetstone stayed sharp twice as long as those sharpened with a pull-through sharpener.
A chef’s knife sharpened to a 20-degree angle will slice paper easily and handle tough vegetables with less force. Proper sharpening also reduces food waste; a dull blade squashes and tears instead of making clean cuts.
Advanced Sharpening: Polishing And Honing
Once your knife is sharp, polishing and honing can improve the edge further.
- Polishing: Use a stone with 3000-8000 grit. This creates a mirror-like finish and a razor-sharp edge.
- Honing: Use a honing rod to realign the edge. This doesn’t remove metal but keeps the knife sharp between sharpening.
Professional chefs often polish their knives for presentation and performance. Home cooks can do this for special occasions or when preparing delicate foods.

Credit: dreamofjapan.com
Non-obvious Insights
Many beginners don’t realize that:
- Stone Size Matters: Larger stones are easier to use and help keep the motion smooth. Small stones can cause uneven sharpening.
- Let the Stone Do the Work: Pressing harder does not make the knife sharper. Gentle, steady pressure is best.
Another overlooked detail: Always dry your knives after sharpening. Moisture left on the blade can lead to rust, especially with high-carbon steel knives.
Recommended Brands And Where To Buy
Quality sharpening stones are available online and in specialty stores. Some trusted brands include Shapton, King, DMT, and Naniwa. Prices range from $25 for basic stones to over $150 for premium models.
For more information about stone types and sharpening techniques, you can visit Wikipedia’s whetstone page.
Frequently Asked Questions
How Long Does It Take To Sharpen A Knife With A Stone?
Sharpening usually takes 10-20 minutes per knife, depending on how dull it is. If you are new, it may take longer. With practice, you’ll become faster and more efficient.
Can I Use A Stone Sharpener For Scissors Or Other Tools?
Yes, but you must adjust your technique. Scissors and some tools need a different angle and often require a dedicated stone or guide. Always check the tool’s instructions.
What Is The Difference Between Sharpening And Honing?
Sharpening removes metal to make a new edge. Honing realigns the existing edge without removing metal. Both are important, but sharpening is needed less often.
How Do I Know If My Stone Needs Flattening?
If your stone feels uneven or if your knife skips during sharpening, it’s time to flatten. You can check with a ruler or by marking the stone with pencil lines and rubbing it—if lines don’t disappear evenly, flatten the stone.
Are Expensive Stones Worth The Price?
Premium stones offer better consistency, last longer, and can give a finer edge. For beginners, mid-range stones work well. If you sharpen often or have expensive knives, investing in a quality stone is smart.
Sharpening knives with a stone is a skill anyone can learn. It takes patience and practice, but the rewards are big—safer, faster, and better cooking. With the steps and tips above, you can keep your knives sharp and ready for any kitchen task.

Hello, This is Annie Walker, a 38-year-old blogger, founder, and editor of Cookware Guider from NY, USA. I am a cookware fanatic and passionate cooker. I love to cook with different types of cooking appliances (example: all types of cookware, rice cookers, slow cookers, etc) almost every day in my kitchen. I love to share my experience with my readers in my blog. Also, I enjoy helping people to solve their problems through my website. You can follow me on Twitter & Pinterest. To know details about my blog please check the about us page.