
Using a sharp knife makes cooking safer and easier. Many people struggle with dull blades, leading to unsafe cuts and poor results in the kitchen. If you have an Ikea knife sharpener, you already have a simple tool that can restore your knives.
This guide shows you how to use the Ikea knife sharpener with confidence, including tips for best results, common mistakes, and how to keep your knives sharp for longer. Whether you are new to knife sharpening or want to improve your skills, you will find practical advice here.
Understanding The Ikea Knife Sharpener
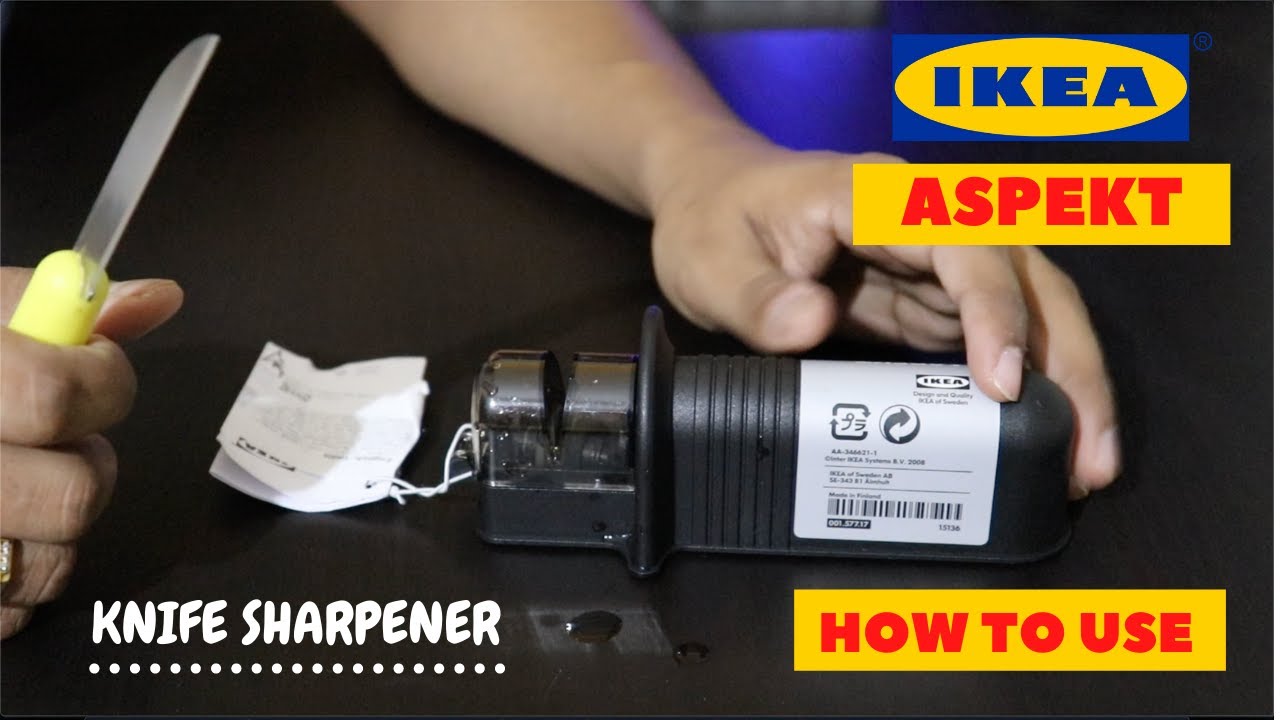
Before sharpening, it’s helpful to know what makes the Ikea knife sharpener unique. Ikea offers several models, but most share a simple, user-friendly design. Most Ikea sharpeners use ceramic or carbide wheels, positioned in a plastic base. The sharpener usually has two slots: one for coarse sharpening and one for fine honing.
The biggest advantage is that Ikea knife sharpeners are designed for home cooks. You do not need special skills or expensive tools. The device fits easily in your hand, and the slots guide your knife, so you do not have to worry about holding the correct angle. This reduces mistakes and helps you sharpen your blade evenly.
Key Features
- Dual-stage sharpening: Coarse and fine slots for different sharpening needs
- Safety design: Non-slip base and finger guards
- Compact size: Easy to store in a kitchen drawer
- Affordable price: Usually below $15
A common misconception is that only professionals can sharpen knives well. In reality, the Ikea sharpener is designed for beginners, so you can quickly improve your kitchen knives without risk.
Preparing Your Knife And Sharpener
Proper preparation is a step many people skip. It is important to ensure both your knife and sharpener are clean and ready before you start.
- Clean your knife: Wash the blade with warm, soapy water to remove oil, food, and debris. Dry it fully so no moisture gets trapped during sharpening.
- Inspect the blade: Look for chips, bends, or deep rust. The Ikea sharpener works best for regular maintenance, not for repairing heavily damaged blades.
- Set up your sharpener: Place the sharpener on a stable, flat surface. Make sure the non-slip base is secure. This prevents accidents and gives you better control.
Taking a few minutes to prepare will make sharpening easier and safer. You will also avoid spreading bacteria or damaging your sharpener.
Step-by-step: How To Use Ikea Knife Sharpener
Now, let’s walk through the full sharpening process. These steps apply to most Ikea models, including the VÄRDE, SKÄRANDE, and similar types.
1. Identify The Slots
Most Ikea sharpeners have two slots:
- Coarse slot: For dull knives, removes material and shapes the edge
- Fine slot: For slightly dull knives, polishes and finishes the edge
Check the labels or icons on your sharpener. Some models use different colors or textures to mark the slots.
2. Hold The Sharpener Correctly
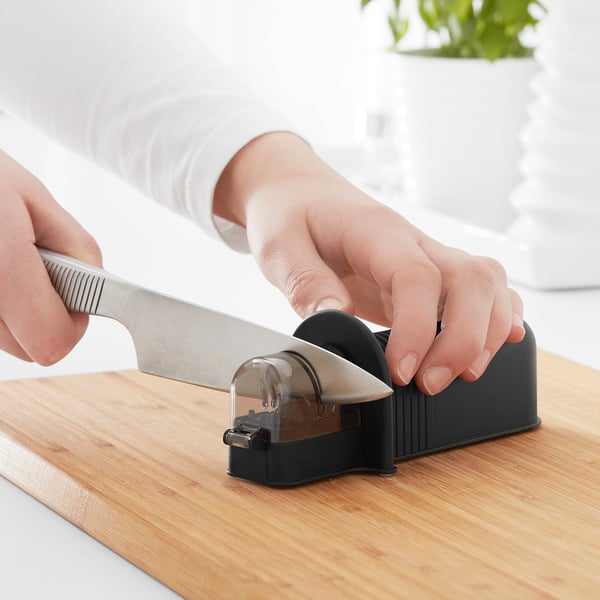
Grip the sharpener with your non-dominant hand. Place your fingers behind the finger guard, not near the slots. With your dominant hand, hold the knife by the handle.
Make sure the sharpener is steady. If your model has a suction base, press it down to activate it.
3. Insert The Knife
Place the knife blade in the slot, starting near the handle. The blade should be vertical. Do not force the knife sideways.
4. Pull The Knife Through
Pull the knife through the slot, from heel to tip, in one smooth motion. Do not push the knife back and forth. Always pull in one direction.
Repeat this motion 3–5 times in the coarse slot if your knife is very dull. For regular maintenance, use the fine slot only.
5. Switch To The Fine Slot
After coarse sharpening, move to the fine slot. Repeat the same motion 3–5 times. This polishes the edge and removes burrs.
6. Check Sharpness
Carefully check the blade. Try slicing a piece of paper or a tomato. If the knife cuts easily, you are done. If not, repeat the process.
7. Clean Up
Wipe the blade with a damp cloth to remove metal shavings. Clean the sharpener according to the instructions. Store both safely.
Example: Sharpening A Chef’s Knife
Let’s say you have a 20 cm Ikea chef’s knife. It feels dull after a month of use. You follow the steps above, using 4 pulls through the coarse slot and 4 pulls through the fine slot. After sharpening, you test the knife on a tomato and it slices cleanly.
This process takes less than 5 minutes and does not require any special skills.
Comparing Ikea Knife Sharpener With Other Sharpeners
Many people wonder how the Ikea sharpener compares to other types, like whetstones, electric sharpeners, or professional services. Here’s a simple comparison:
| Sharpener Type | Ease of Use | Price Range | Sharpening Quality | Maintenance |
|---|---|---|---|---|
| Ikea (Manual) | Very easy | $10–$20 | Good for home use | Minimal |
| Whetstone | Requires skill | $20–$60 | Excellent, precise | Needs care |
| Electric Sharpener | Easy | $40–$150 | Good, fast | Clean regularly |
| Professional Service | Very easy | $5–$15 per knife | Excellent | N/A |
The Ikea sharpener is best for people who want quick results and do not want to learn complex skills.

Credit: www.ikea.com
Key Tips For Best Results
Getting a sharp edge is not just about following steps. Here are some tips that many beginners miss:
- Do not press too hard: Using too much force can damage the blade or the sharpener. Use gentle, steady pressure.
- Sharpen only clean knives: Dirt or oil can clog the sharpener and reduce its effectiveness.
- Use the correct slot: Always start with the coarse slot for very dull knives. For regular maintenance, use only the fine slot.
- Sharpen regularly: Do not wait until the knife is very dull. Sharpen every few weeks for best performance.
- Check the edge often: It’s better to sharpen lightly and often than to do heavy sharpening rarely.
- Avoid serrated knives: Most Ikea sharpeners are not suitable for serrated blades.
A non-obvious tip: If your knife is new, start with the fine slot only. Coarse sharpening removes more metal and shortens the life of your knife.
Common Mistakes And How To Avoid Them
Even with a simple tool, mistakes happen. Here are some of the most frequent errors and how to fix them:
- Using a dirty sharpener: Metal dust builds up and reduces effectiveness. Clean after each use.
- Sharpening too fast: Fast pulls can skip important parts of the blade. Slow down for a consistent edge.
- Over-sharpening: Too many passes can make the blade brittle. 3–5 pulls per slot are usually enough.
- Wrong angle: While the sharpener guides the angle, tilting the knife can ruin the edge.
- Ignoring the tip: Many people sharpen only the middle. Always pull from heel to tip.
One insight: It’s common to forget the tip of the blade. This can lead to uneven sharpness, making the knife hard to use for detailed work.
Credit: www.ikea.com
Maintenance And Care For Your Ikea Knife Sharpener
To keep your sharpener working well, you need to care for it. Most Ikea models require very little maintenance, but regular cleaning makes a big difference.
Cleaning Steps
- Remove any visible debris or metal shavings after each use.
- Wipe the slots with a damp cloth. Avoid soaking the sharpener in water.
- For stubborn dirt, use a soft brush.
- Dry the sharpener completely before storing.
Storage Tips
- Keep the sharpener in a dry place.
- Avoid storing near heat or moisture.
- If your sharpener has removable wheels, check for wear every few months.
If you sharpen often, check the wheels for damage. Replace the sharpener if the wheels become rough or lose effectiveness.
Safety Advice: Protecting Yourself And Your Knife
Sharpening knives is safe if you follow basic rules. Here are important safety tips:
- Keep fingers away from slots: Always use the finger guard.
- Stable surface: Sharpen on a flat, sturdy surface.
- Do not rush: Slow, steady movements prevent accidents.
- Supervise children: Keep sharp tools out of reach.
- Check for damage: If the sharpener is cracked or broken, do not use it.
A surprising fact: Most injuries during sharpening happen because people rush or use a damaged sharpener.
Sharpening Different Types Of Knives
The Ikea sharpener works best on straight-edged kitchen knives. Here’s how it performs with common types:
| Knife Type | Compatible? | Special Instructions |
|---|---|---|
| Chef’s Knife | Yes | Standard process |
| Paring Knife | Yes | May need slower pulls |
| Bread Knife | No | Serrated edge not supported |
| Utility Knife | Yes | Use fine slot for thin blades |
| Cleaver | No | Too thick for slots |
If you have specialty knives, such as Japanese or Damascus steel, check the manufacturer’s advice. Ikea sharpeners are best for regular stainless steel kitchen knives.
When Should You Sharpen Your Knife?
Knowing when to sharpen is as important as knowing how. Here are signs your knife needs sharpening:
- Cuts poorly: Struggles to slice tomatoes or onions.
- Slips easily: Blade slides off food instead of biting.
- Visible dull edge: The blade looks rounded instead of sharp.
- Increased force needed: You have to push harder to cut.
- Paper test fails: Knife cannot slice cleanly through paper.
For most home cooks, sharpening every 2–4 weeks keeps knives in good condition. If you cook daily, check your knives weekly.
Credit: www.youtube.com
How Often Should You Replace Your Ikea Knife Sharpener?
A sharpener does not last forever. Over time, the wheels wear down and lose effectiveness. Here’s what to look for:
- Reduced sharpening power: More pulls needed to get a sharp edge.
- Visible damage: Cracks or chips in the wheels.
- Difficulty guiding the knife: Slots become loose or uneven.
Most Ikea sharpeners last 1–2 years with regular use. If you sharpen many knives or use it daily, you may need to replace sooner.
Quick Troubleshooting Guide
If you have problems, try these solutions:
- Knife still dull: Try more passes in the coarse slot, then fine slot. If no improvement, the blade may be damaged beyond sharpening.
- Sharpener not working: Check for dirt or damage. Clean or replace if needed.
- Blade scratches: Do not press too hard. Use gentle, even pressure.
- Metal shavings: Wipe the blade after sharpening to remove debris.
If issues continue, consider professional sharpening or replacing your knife.
Real-world Example: Ikea Knife Sharpener In Action
Let’s look at a practical example. Anna, a home cook, uses her Ikea sharpener once a month. She sharpens her chef’s knife with 4 passes in the fine slot. It takes less than 5 minutes. Her knife cuts vegetables easily, and she avoids injuries from dull blades.
After 18 months, Anna notices it takes more passes to sharpen. She checks her sharpener and sees the wheels are worn. She replaces the sharpener and continues her routine. This simple habit improves her cooking and keeps her tools in good shape.
Expert Advice And Recommendations
Experts agree that regular sharpening is better than waiting for knives to become very dull. According to knife specialists, using a manual sharpener like Ikea’s is safe and effective for most kitchen knives.
If you want to learn more about sharpening, you can visit Wikipedia for detailed guides and history.
A key insight: Even expensive knives need regular sharpening. The quality of your sharpener matters less than the consistency of your routine.
Frequently Asked Questions
How Long Does It Take To Sharpen A Knife With The Ikea Sharpener?
Usually, it takes 3–5 minutes to sharpen a standard kitchen knife. If the knife is very dull, it may take a few extra passes.
Can I Use The Ikea Sharpener For Serrated Knives?
No, the Ikea sharpener is not suitable for serrated knives. Serrated blades require a special tool or professional sharpening.
How Often Should I Clean The Ikea Knife Sharpener?
Clean your sharpener after every use. Wipe away metal shavings and debris. Deep cleaning every month keeps it working well.
Is The Ikea Sharpener Safe For Children To Use?
While the sharpener is designed for safety, children should be supervised. Knives are dangerous, and adults should handle sharpening.
What Should I Do If My Knife Is Still Dull After Sharpening?
If your knife is still dull, try more passes in the coarse slot, then finish with the fine slot. If it stays dull, the blade may be damaged, or the sharpener may need replacing.
Final Thoughts
Learning how to use the Ikea knife sharpener is a valuable skill for any home cook. With proper technique, regular maintenance, and safety habits, you can keep your knives sharp and extend their life. Remember to clean your sharpener, avoid rushing, and check your blades often.
Investing a few minutes each month can make cooking safer, easier, and more enjoyable. By understanding the process and avoiding common mistakes, you get the best results from your Ikea sharpener—no matter your experience level.

Hello, This is Annie Walker, a 38-year-old blogger, founder, and editor of Cookware Guider from NY, USA. I am a cookware fanatic and passionate cooker. I love to cook with different types of cooking appliances (example: all types of cookware, rice cookers, slow cookers, etc) almost every day in my kitchen. I love to share my experience with my readers in my blog. Also, I enjoy helping people to solve their problems through my website. You can follow me on Twitter & Pinterest. To know details about my blog please check the about us page.